Tag Archives: completed

Completed: The Renfrew Top (and why I love knits!)

7 Feb

Omg you guysssss have you been lurking the Renfrew top as hard as I have? I was seriously excited when Tasia released this pattern – I love working with knits and I want everyone else to love them, too! Honestly, I already have a tshirt pattern block and I’ve got a pretty good handle on knits – not to toot my own horn or anything, but I’ve been pumping out knit tshirts/dresses for a few years now (mostly LLADYBIRD stuff. But I bought this pattern anyway – for SCIENCE. Despite making hundreds of tshirts, I’ve never actually sewn with a pattern for knits. So I was curious to see what it was like, and I wanted to report back to y’all. Also, SCIENCE.

Chevron Renfrew

I do love how versatile this pattern is – and not even with just what is offered on the envelope! You can seriously butcher this pattern up to make all kinds of other designs! I do like it better than my personal block, although it took some tweaking to get the fit correct. My biggest issue with Sewaholic patterns is the bust size – the measurements are so much smaller than mine, and since I already have to do a FBA with normal patterns, it’s not usually worth it to go the extra step with something that will take even more flat pattern adjusting. Knits, however, are very very forgiving. You don’t have to do a FBA so much as you just cut a bigger size 🙂

I was a little confused with the finished measurements – they include a few inches of ease, which is guess is necessary for a stable knit. Me, I use super stretchy knits – I have a whole cabinet full of them! I cut my pattern to accommodate for this – a 4 at the bust, reducing to a 0 at the waist/hip. I left the sleeves at a 4 (I have big upper arms for my size, I guess) and the shoulders/neckline are a 0. I also reduced the shoulder width just a hair past 0 as my first prototype was in danger of falling off my shoulder.

Speaking of my first shirt, I’m not going to show it to you. There’s nothing wrong with it – the fit is great – but it’s a boring red long sleeve shirt with a scoop neck. BORING. Who wants to look at that?

The whole pattern is great. I love the fit and the instructions are very clear and concise. I love the bands – this is not a new concept to me, personally, as I’ve been using this method for a few years, but it was reassuring to know my method was the right method 🙂

I do have one small change I made to the pattern that I think makes a huge difference with the finished neckline, though – if you are sewing this up with a stretchy/slinky knit (i.e, not something stable), cut the neckline band an inch or so shorter than the pattern piece indicates, and then stretch it to fit as you sew it on. The ending result is that the band shrinks down to fit the neckline and you get a perfect curve without needing to top stitch it down. As far as how much to cut off – well, I wish there was a formula to tell you, but it’s really dependent on how stretchy your knit is. Usually an inch is enough, but you might need to experiment! It is definitely worth it for the end result, though.

Chevron Renfrew

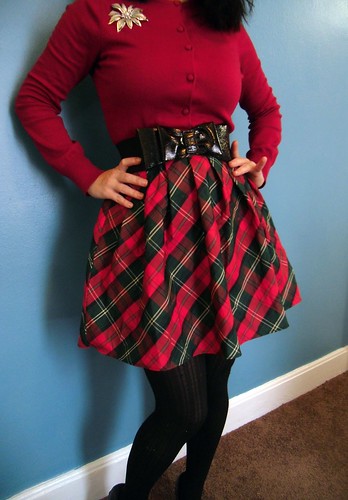
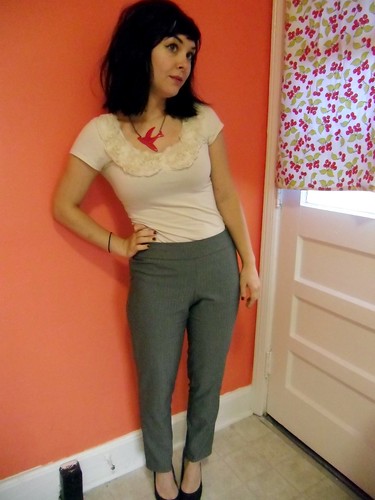
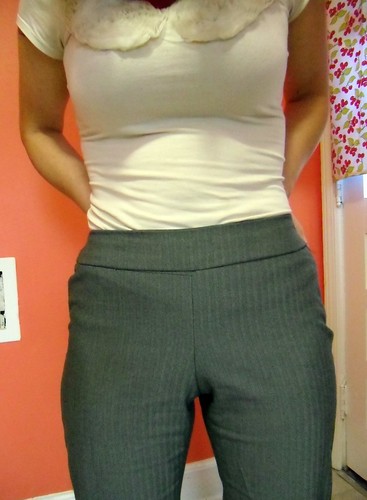
The fabric requirements on this pattern, btw, can easily be fudged. If you play around with the cutting layout, you can definitely save on fabric. Fabric can also be pieced at certain points if you don’t have enough length – this particular shirt is pieced right down the front. Partially to form the chevrons, but mostly because I barely had any of this stripey fabric.

Chevron Renfrew - back
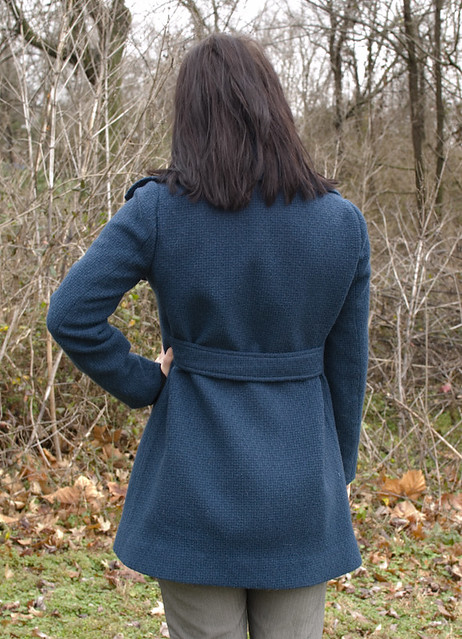
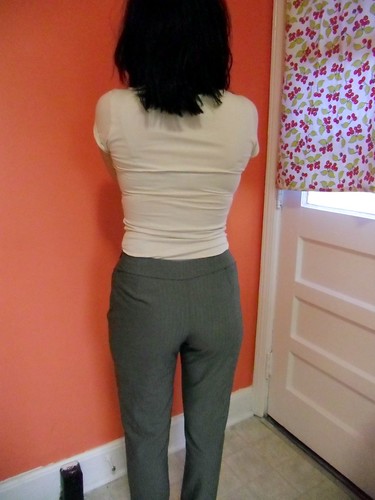
And look – the back is solid black 🙂

Chevron Renfrew - side
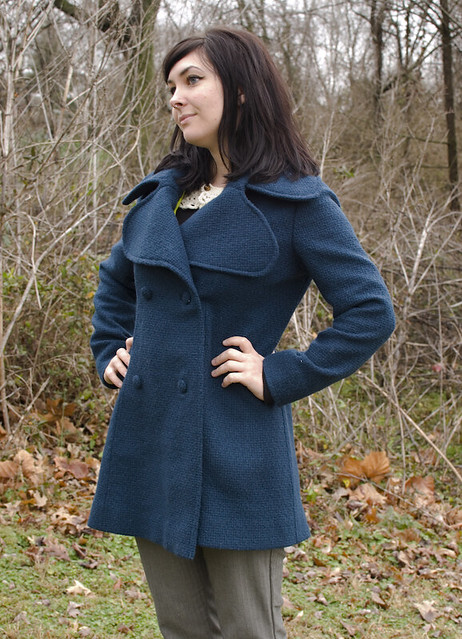
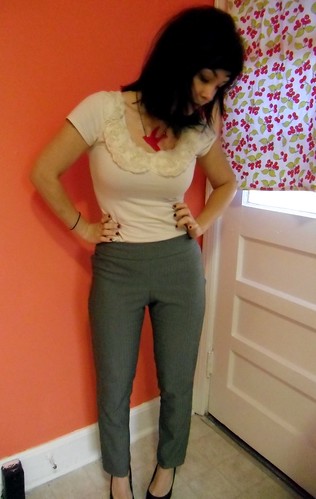
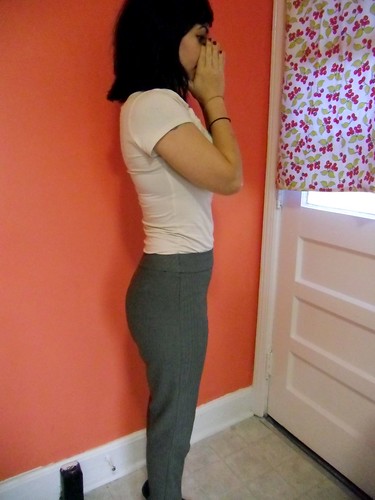
I love the way it looks from the side (and no, I have no idea what is going on there with my hand)

Chevron Renfrew

Chevron Renfrew - top stitching
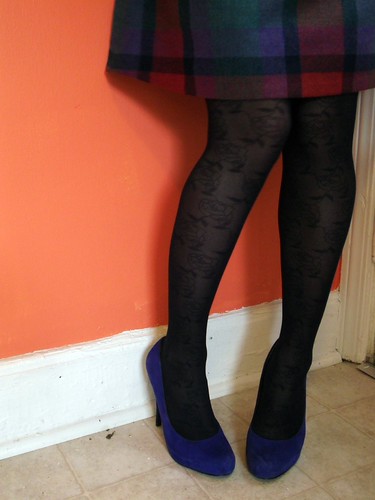
I tried to get a picture of my top stitching but you can’t really see it, even with my super obvious ‘shopping 😦 Instead of using the zig zag (which I think looks kind of amateur on knits), I used a double needle and stitched with the seam in the middle of the needles. This is something I see on lots of RTW and I think it looks pretty professional! The bobbin stitch in a double needle is kind of a zig zag, so you still get a little stretch even though the top stitching is straight 🙂 I also did this with my shoulder seams when I stitched down the twill tape.

So… as a lover of knits, my final verdict on this pattern is a definite WIN. I can’t wait to play around with this pattern some more; I’ve already pulled out a giant stack of knits from my cabinet to see what else I can cook up 😀

Chevron Renfrew

The Big Reveal – The Fabiani Coat!

6 Feb

Finally! I get to show off my new coat! 🙂

Coat front
Notice anything different (aka: good) about the pictures? Yeah, it’s because I didn’t take them! Ha! These were all shot by Sarah McDonald – aren’t they gorgeous!?

Quick details recap-
Pattern: Vogue 2925 (Thank you, Molly!)
Fabric: Coating – Sea Green Solid Coating (Thank you, Tracy!!); Lining – Bemberg Rayon Ambiance Lining in Kiwi
Notions Used: Horsehair interfacing, fusible interfacing, silk thread, self-covered buttons (made to order, yeehaw!), and the tiniest piece of silk organza.
I didn’t initially intend on this, but I guess this actually ties in quite nicely with Sew Grateful Week – showing my thanks for this pattern, fabric, and the pictures! Yay!

What else is there to say about this coat? It was definitely a task, although it went together much faster than my first coat – I guess I had enough practice to better understand what I was doing 🙂

Buttons

Coat - side
I am REALLY pleased with how it turned out! The coat is so warm & snuggly – too bad it’s been 60* (that’s 15* for all you non-Americans :P), and thus too warm to wear a coat! Ah, well, maybe I’ll go on a short vacation somewhere cold. Ha!

Coat back
Pretty much the whole thing is interfaced – in addition to the interfacing already fused to the fabric (which definitely gave it a nice hand and made it really easy to handle), I used horsehair interfacing on the front pieces & on the collar/lapels. The hem & sleeves are interfaced with a lightweight fusible that was cut on the bias. This coat is nice and heavy!

lining peek
There are snaps under the fake buttons to keep everything in it’s proper place.

Lining
Oh, yeah, and the lining is pretty freakin’ bright!

Top stitching
I love how the top-stitching turned out and I’m really pleased with my buttons. I tacked the spare on the inside by the hem, but forgot to take a picture of it. Sorry 😦

Tag :3
Here’s my tag!

And some flat shots – sorry these pictures are awwwwful, lol you can definitely tell I took them.

Coat - button backs
The functioning buttons are backed with small buttons – partially to keep them on the coat, and partially to cover the ugly threads on the lining :B

Coat - feather stitched lining pleat
I tacked the lining pleat down with feather stitches, as originally suggested by Gertie.

Coat - buttonholes & top stitching
Bound button holes

Coat - label
Here’s another label shot. It’s hand-embroidered on bleached muslin & then catch-stitched down to the lining. I sewed everything in after the coat was finished, which was a bad idea… very difficult to get everything in there! Next time, I will sew the label in while the coat is still being assembled.

Coat front
So yep, that’s my coat! I hope these pictures were worth the wait 🙂 Hehe!
Thanks again for all your patience/input/contributions – and thank you Sarah for taking these amazing pictures!

Soooo, now that that’s over… have I inspired anyone else to make a coat yet? 🙂

Completed: Dotted Swiss Colette Violet Blouse

31 Jan

Swiss dot or dotted swiss? I’ve heard it both ways. Which one do YOU use?

I’m going to apologize in advance for 2 things – 1. These pictures are terrible (when am I going to figure out that white photographs like doo-doo?) and, 2. This isn’t even how the shirt looks now, and no I won’t be taking more pictures (see fig. 1).

Ok, now that that’s off my chest…

Violet - front

Here be the Colette Violet blouse in pretty dotted swiss! Let’s talk about the good stuff first.

I barely – barely squeezed this out of 7/8 yard. The under collar is actually cut on the bias and pieced in the middle. The bias part actually makes it roll quite nicely at the seam, so bonus mistake turned into a ~design element, yeah? My dotted swiss was extremely sheer, so I hand-underlined the whole thing with equally sheer cotton batiste – you can still kind of see the seams through the fabric, no biggie. I was originally going to leave the sleeves underlined, by a practically unanimous vote, but when it came down to it… leaving the sleeves sheer just looked like I had run out of underlining fabric. They didn’t go with the rest of the blouse at all, sadly. Instead of interfacing, I used a slightly heavier bleached muslin to stabilize the collar & facings. I wanted the entire shirt to be cotton/white/breezy – perfect for a summer bike ride 🙂

The fit was… interesting. I wanted this version to be more fitted, like Joanne’s fitted Violets, so I put some giant (like 1″) vertical darts down the front. If you’re curious how I did it – ehh, I sewed the entire shirt up, minus the hem, put it on inside-out and properly buttoned, and then just pinched away until it fit the way I like. Then I basted my darts, checked the fit right-side out, and sewed them down forreal. Easy! I think fitted looks much better on me and now I don’t have to tuck it in if I don’t feel like it 🙂

Violet - front

I sewed this up in a size 4, but cut the back down to a 0 at the side seams to make it a little less blousey. In the future, I will probably cut this to a 2 and add a FBA because my darts were all kinds of in the wrong place! You can’t really tell in the pictures – partially because I’m standing still so it stays in place, and partially because the pictures are total shit, but trust me. I wore this thing all day yesterday and every now and then I’d look down and notice the side darts were hanging out on the tops of my lady lumps. It would appear the shoulders were too big, which would cause the shirt to ride up every time I moved. I had originally moved the darts up when making my first Violet blouse, and they look fine where they are, so I’m not sure why these were such a pain. Maybe because this version is more fitted? Ehh.

Violet - back

Of course, the entire shirt is serged within an inch of it’s life, so any normal person would probably either deal or wad, but I REALLY NEED A DOTTED SWISS PETER PAN COLLAR BLOUSE TO WEAR WHILE RIDING MY BICYCLE THIS SUMMER. So I ripped up all the seams last night & spent an hour pinning, fiddling, basting, tucking, and pressing until I moved the darts into a more respectable position and shortened as much of the shoulder seams as I dared.

Violet - side

Violet flat
Flat – the buttons are from the flea market! Love it when stuff like that just appears for me 😀

Violet flat
Inside – underlining, serged seams, oh and yes, my tag 🙂

Violet waist dart
Nevermind the dart creeping upward, here is a vertical dart for waist fitting.

Anyway, I am quite happy with my shirt now 🙂 It fits nicely & the darts are in the correct places. And isn’t it perfect for a summer bike ride? Hm I need to sew me up some plaid shorts asap 🙂

Violet - front

More Knitted Goodies

18 Jan

Look – I finished not one, but TWO knitting projects! Both of these have been slow works-in-progress, and over the weekend I was able to get everything blocked, then last night I finished weaving in ends & sewing seams & all that fun stuff. And now you get to share my joy with me! Yay!

Sorry that the pictures are so bad – I took these last night because I was so excited to show them off. It’s been grey & rainy all week. Ugh, winter is so bad for pictures.

First up – bunny slippers!
bunny slippers
This is the hopsalots pattern – it is very easy! You knit everything flat with decreases and increases and then seam everything up, felt the shit outta it, and sew on the ears/eyes/nose/tail. I learned a lot with this pattern – decreases, increases, seaming, felting, knitting with 2 strands of yarn. I also made my first pom-pom lol.

bunny slippers - in progress
Here is a progress photo – I had to pin the edges down because they really wanted to curl up.

bunny slippers
I added 2 rows of stitches before decreasing, since I knitted a 5/6 and I wear a 6.5. In the end, I pinched a little excess off the back because the slippers were too long – probably from those extra rows. Also, I don’t think I felted them as much as I needed to. Felting took about an hour – I got bored! I brought my Kindle in the kitchen and watched some TV shows, so it wasn’t tooooo bad, but man my poor fingers were pruney after the fact.

Anyway, I love my slippers! They are kind of dangerous on the bathroom floor but I’m sure I’ll manage 😉

Next pattern – my cowl!
my cowl!
This is the Casu Cowl (psst – it’s a FREE Ravelry download!). I knitted mine using an Alpaca blend in a delicious shade of wooly teal. It is my very first written pattern and that shit took foooorever (mostly because I kept stopping to make other fun things, like bunny slippers. Ahem.). Things I learned with this pattern: how to read a pattern, how to read a pattern chart, provisional cast on, yarn overs, knitting 2 together, grafting, and adding a new ball of yarn (I used almost 3 balls). Grafting was interesting – my seam isn’t totally invisible, but I think it’s pretty good for a first try 🙂

knitted cowl
I just love the lace pattern at the top.
The only thing that sucks about this cowl is that the teal is basically the same color as my new coat – which is too matchy-matchy for me. Ah, guess I’ll have to just knit another cowl. Bummer 🙂

I have a couple more knitting projects – one nearing completion (just a few more rows to knit and then a quick blocking) and I just started swatching my sweater last night. Actually, the lace pattern on this thing nearly killed me but Sarah the Knitting Magician saved the day/my life and corrected my error. Hopefully I’ll have some swatches to show off in a few days! I am REALLY excited about this project 😀

Are any of y’all on Ravelry? Friend me – I’m laurenc0re!

completed: colette’s clover, v2.0

19 Dec

or i guess you could call these version 5.0, considering this is the fifth time i’ve made these trousers (the first three being oh-god-you-can’t-wear-that-in-public muslins).

ahem.

not much to say about these – i’m still picking away at my pants-fitting, still can’t decide if i’m making shit better or worse as i slash & tape. i received a lot of good feedback on my last clover post (i definitely recommend taking a peek if you are still questioning your pants-fitting), and made some more changes to the front of the pattern – added a tiny bit back to the front rise, and scooped out a little more of the front crotch. next time, i will need to add to the sides what i took off the front (i left it off because, well, i don’t know why.), as the whole top was super tight until i reduced the seam allowance to something laughably thin.

these pants have LOTS of wrinkles, but i’m fairly certain that a good chunk of them are due to my fabric choice – that shitty stretch poplin i bought from fabric mart, which btw is on my list of online fabric stores i will not buy from again. it’s a *very* flimsy fabric, so i underlined the pants with more stretch poplin… just serged all the pieces together. there is a little sheen to the fabric so i think that is also making the wrinkles look more pronounced. i have also convinced myself that those smooth pants on the colette website must be photoshopped, and whether or not this is actually true, i still feel quite a bit better about myself.

oh, and these pants would have been ready last week, except that after i finished *everything* and put them on to check the length for hemming… the red zipper broke and i had to cut myself out of my pants. EW. i did not have another red zipper (that one was actually pulled from a pair of wool pants i harvested for the material a couple of years ago), and i didn’t want to go back to the fabric store so i just used an orange zipper in my stash. it doesn’t match, but no care!

red clovers

red clovers
the leg wrinkles are from wearing them all day! they are VERY comfortable! haha!

red clovers
see the orange zipper? yep, me neither.

red clovers
view from the back

red clovers
with my leopard jacket! 😀

red clovers - inside
here’s an inside shot – i bound the facing with white bias tape. and there’s my orange zipper lol.

i actually bought another piece of fabric that i think will make up a great little pair of clovers – more on that tomorrow!

red clovers
RED PANTSSSSSSSSSSSSSS

completed: mccall’s 5936; the leopard jacket

12 Dec

this was one of those “i am going to make this but i don’t actually want to start it” projects – i dragged it out into FOREVER. i bought this fabric in… july? took my sweet time making a muslin, cutting the pieces out, making bound button holes. part of the reason why i dragged my feet so hardcore with this pattern is that i couldn’t decide how i was going to attempt construction. i wanted to fully tailor the whole thing – even bought matching silk thread & drafted a back stay – until i realized that linen doesn’t exactly lend itself well to tailoring. and my muslin was giving me the side eye so i wasn’t feel too confident about the overall fit.

those high-waisted jeans i made last week are basically what pushed me into completing this. and you know what? i ended up not doing a damn bit of tailoring on this jacket (minus the bound button holes). i basically had the whole thing pieced together & ready for slip-stitching in an afternoon. fastest jacket ever. and it feels good. it feels real good.

leopard & teal jacket
this is what i used – mccall’s 5936, which is sadly out of print (sorry!). my leopard fabric is a nice sturdy linen. and check out that lining! the woman at the fabric store talked me into it – i started to pick up the red, and she told me i wasn’t boring enough for that. that woman is totally onto me. anyway, i am in LOVE LOVE LOVE with this teal bemberg lining & when said fabric store has it’s biannual 50% everything sale next month (u jealous?), i may end up just buying the entire bolt & wrapping myself in it for the rest of my life. it is that fabulous.

in retrospect, this jacket could have benefited from some light tailoring – the lapels don’t quite lay right, i may need to steam them more. my button holes are not in the right place, sadly, and i can’t do anything about it sooo i decided that i don’t care. also, i need to redo the lining slip-stitching at the waistline, because i definitely pulled it too tight so there are some odd wrinkles on the outside fabric. but i finished it! and it is a jacket and it is leopard and it has a peplum and i am about to eat the lining, seriously.

leopard jacket

leopard jacket
recognize my jeans? 🙂
as a sidenote – they have stretched quite nicely (thanks to that pure denim – i forgot what jeans were like before the introduction of stretch!) and fit beautifully. i want to wear them forever!

and closer:
leopard jacket

leopard jacket

leopard jacket
this is an unflattering picture, but i love the way the peplum looks from the side

leopard jacket

leopard jacket - lining :)
lining! 😀

leopard jacket

leopard jacket

leopard jacket - flat

leopard jacket - inside

leopard jacket - L tag
other than the lining, my favorite part is the tag 🙂 i embroidered this last year for my lady grey but decided to use something else. it is satin stitch with a back stitch outline. lovely!

leopard jacket - buttons
buttons – vintage!

leopard jacket - bound button holes
bound button holes

and just for fun – here’s how i wore it today:
leopard jacket
excuse the extra christmas tree in the background lol

so fun! i think everyone needs a leopard print jacket 🙂

also, i think i’m gonna need some red clovers next 😉

recon: taffeta christmas skirt

5 Dec

my favorite kind of recon – easy easy!

holiday skirt

i’ve been pining for a plaid taffeta party something for a couple of weeks now – didn’t care if it was a skirt or a dress. i actually wanted to make a taffeta peony, so i started lurking plaid taffetas online. well, i scrapped that idea to the back burner when i realized how expensive that stuff is – and i wanted silk!

so imagine my delight when i found a little girl’s plaid taffeta party dress during my saturday shopping trip with lauren. it’s polyester, but whatever – PLAID. and $2.50!

holiday skirt - the before
here’s what i started with. it’s pretty small, but that empire waist is exactly my waist measurement. and before anyone gets sad about the death of a little girl’s plaid taffeta party dress, i will point out that it’s a walmart brand. pretty cheap stuff to begin with.

anyway, i removed the skirt from the bodice (and discarded the bodice – not enough fabric to do anything with!) and cut the hem off the bottom to form a waistband. since the hem is on the bias, i stabilized it with horsehair interfacing to give it some structure. i shortened the zipper & stuck it back in there with the skirt lining. the hem is just a simple rolled hem. easy!

holiday skirt

this whole project probably took about 2 hours, and now i have a new skirt to wear for christmas parties 🙂 i already wore it this morning to put up the office christmas tree.

holiday skirt - waistband

holiday skirt - inside

i even had enough taffeta left over to make a matching headband.

matching headband

i look like a damn christmas present.

holiday skirt
i’m okay with that 🙂

completed: the colette meringue

23 Nov

my first pattern from the colette sewing book! i’ve been itching to try this one, especially after sarai posted a tutorial on how to draft a waistband (which, in case you were wondering – easy easy!). also, SCALLOPS. i think i just jumped on the scallop bandwagon with this. they are a pain to mark, sew & press, but oooh they are so happy!

i used a piece of wool houndstooth that i got from lauren winter, during that awesome yardsale where i bought half of her fabric stash. this piece of fabric cost me a whopping 75 cents. everything else was already in the stash – the lining (a remnant left over from a dress i made 4 years ago – yeesh, do i throw anything away? well, it’s gone now. gone inside my skirt, i mean.), the bias tape, even the zipper & thread. 75 cent skirt, yo!

cutting this pattern out was… interesting. it calls for a lot of yardage, but i only had 3/4 yard of the houndstooth. it was 60″ wide, though, so with some careful folding, i was able to get my skirt cut out with practically nothing to spare. cutting off the top to make a seperate wasistband really helped, as it shortened the length of the skirt so that the skirt & the facing fit exactly at the 3/4 yard length. i suppose one could use a different fabric for the facings (on both the scallops & the waistband) if you were really running short. i had exactly enough, though!

i cut a size 2 in this, no flat pattern alterations. yay! i made a lot of “style” alterations, though – added the waistband, piped the waistband seam, finished the top of the waistband over the zipper with a tab (that was accidental… for some reason, my waistband was too long? bwuh?), added a short lining for comfort. i also finished the inside of the waistband & the top of the scallop facing with black bias tape, so it looks real pretty inside :3

if you want my honest opinion on this skirt, it alone is worth the $18 that the book currently costs on amazon. go get it!

meringue

meringue - back

meringue - side
you can see my waistband tab over the zipper here

meringue waistband
piping!
i really only added piping because i wanted to test out my new piping foot 🙂 verdict: omg how did i live without a piping foot???

meringue - inside + lining
the lining makes me so happy!

meringue - hem

my only problem now is that i don’t know what to wear to thanksgiving dinner tomorrow! the floral peony was supposed to be my ~thanksgiving dress~, but now i’ve got plaid & pants & scallops and man, i just can’t decide. i love having these kinds of problems, lol

meringue

one more thing…
my first bit of knitting!!
i learned how to knit (and purl!) last night! my new friend & fellow nashville bike rider, sarah, taught me over coffee. so pumped about my future cowl 😀

clover: let’s get real

21 Nov

i mean, let’s get real-real here.

this is my 4th pair of clovers i have completed thus far. in case you aren’t up to speed with this saga, every prior pair of clovers has been demoted to “muslin” and wadded up & stuffed in the Muslin Basket of Shame (i’ll throw that stuff away… eventually). making anything over & over again – especially if you can’t actually wear it out in public – sucks. it feels wasteful – wasteful of fabric, of precious sewing time, of misplaced giddiness (idk, i get real giddy when i am making a new piece of clothing lol).

this pattern almost broke me. it might still break me because it’s not quite perfect. i’ve made a lot of fitting changes and i actually feel kind of pants-intelligent right now. so that’s nice. i don’t want to dissuade anyone from buying or making this pattern because i don’t think it’s a flawed pattern… i’ve seen many of these made up, and they look GREAT. unfortunately, the body they were drafted for is quite obviously not my body. so i’ve had to do a lot of fitting, and muslins, and more fitting.

anyway, pants #4. i took another 3/8″ off the front crotch length and slightly narrowed the inside of the legs (like, maybe 1/4″. not much). i decided to make these a wearable muslin, so i used a stretch poly-blend suiting fabric i found in my stash ($2 yard sale score!) and a zipper i pulled out of a dress someone gave me for fabric salvage. i did serge everything on the inside in case the wearable muslin turned out awesome.

after wearing them around this afternoon, i shaved about 3/8ish” off the front crotch seam & tapered the curved side seam (on the non-zipper side, sry, don’t feel like re-inserting the zipper) to a straight line. in the future, i may let out the waistband a little because it digs in when i sit down. also, i thought the waistline didn’t look terribly flattering on me – too low – but looking at the pictures it doesn’t seem so bad. what do you think? for anyone who is curious, they hit exactly at my belly button.

i guess my question is, how fitted is too fitted? of course we want a smooth line, but i don’t want to get it so smooth that i can’t move comfortably! this is where i want y’all to be honest – critique! please! 🙂

clovers
when i stand normally, they look close to perfect.

clovers
when i stand with my legs together, though, i get a little bagginess around the crotch (ughh i’m gonna get some weird google search terms for this one). how to fix this? what is stumping me is that it is all the lower crotch/thigh area, and i can’t find fitting info for that – only the top half. it kind of makes me look like i have a FUPA right now. i don’t want to look like i have a FUPA. help!

clovers
another view, another baggy crotch.

clovers back
back looks good! there are a few drag lines on the sides and the darts look like that because i couldn’t get a good press (stupid poly), but i think it’s satisfactory.

clovers side
side looks good!

clover close-up
last crotch-shot, promise
see that bagginess? what is causing it and how can i fix it?

ALL THAT BEING SAID, i like these pants. i think the fitting issues are pretty minor & most normal non-sewing people won’t notice them. so i will continue to wear these, and continue to improve this pattern block. i think they look really cute on me, and i want several pairs!

completed: peony, this time in PLAID

17 Nov

pretty sure the peony is my new favorite TNT dress, y’all. it is SO easy to make up – even with matching plaids! – and extremely versatile in all the ways you can change it up. i am already thinking about making a summertime-approps peony with a chiffon overlay & no sleeves. oooh i just inspired myself again.

anyway, before i get ahead of myself, let’s focus on the peony at hand. this is my second make up, floral being the first. in addition to the previous alterations i made to the pattern, i shaved about 1/2″ off the front neckline, as i felt it was a tiny bit too high. i omitted the facings & instead lined the bodice & sleeves. i wanted to line the entire dress, but i only had 1 yard so it was either sleeves or skirt… i went with sleeves, because i can always wear a slip with the skirt.

the plaid fabric is my new favorite! i bought it from miss lauren winter right before she moved house (and, sadly, out of my neighborhood ::sob!::), although considering she charged me $2 for the whole 2 yards it’s more like she basically gave it to me. it is a very fine/soft wool, super drapey & comfortable. the lining is a pale periwinkle blue bemberg rayon that i found in the remnant rack for super duper cheap & i’ve been hoarding for like a year.

i was concerned that this dress wasn’t totally appropriate for plaid, but i think i did an ok job at matching. this pattern really doesn’t use a lot of fabric – even with matching up the plaids, i used less than 2 yards. the side seams match perfectly (if i do say so myself) and surprisingly the darts match up. well, kind of. the bottoms don’t, but that’s just the way they are positioned. furthermore, the waistline doesn’t exactly match up & again, that’s because of how the pattern was drafted. i can’t decide if it bothers me or not. in the meantime, i’ll just wear a belt and pretend otherwise.

i actually cut out the pieces for the cummerbund (in navy taffeta), but decided to go thrifting last night instead of sewing it up. it’s all good, though – look at the belt i got for $3!

plaid peony

plaid peony - side/back

plaid peony - back
the dark vertical line is actually part of the plaid, and not my invisible zipper, fyi.

plaid peony

plaid peony - no belt
here it is without the belt
ooh the mismatched plaid at the darts actually is really bothering me

plaid peony - front, flat

plaid peony - waistline

plaid peony - back
sorry ’bout the rogue white thread lurking back there

plaid peony - lining
really pleased with myself here – i figured out how to attach the lining without having to slipstitch it to the zipper tape. so clean!

plaid peony - hem
tiniest hem ever – this dress is SHORT!

and some bonus shots…
plaid peony & lady grey
with my lady grey

plaid peony & lady grey - back
a result of gertie’s sew-along last year, my first venture into tailoring. this baby is lined, interlined, padstitched… and it is nice & heavy, just like a coat should be 😉

plaid peony & lady grey - open
LOVEEEE THIS COAT

and, in case you were curious:
SHOES
my shoes 🙂

plaid peony

i have the whole week off next week, and i think i’ve already overwhelmed myself with all the sewing projects i want to tackle. we’ll see how many actually get accomplished, though 😉 hehe