Look! A Mini-LT! (and a tutorial to make your own)

10 Jan

Look! I made a creepy line-drawing of myself!
mini LT!
Isn’t it just the cutest thing you ever did see? Ok, maybe not… it’s kind of creepy lol.

I was inspired to make one of these after reading chapter 2 of the Colette Sewing Handbook, A Thoughtful Plan. It is suggested that you make your own croquis to aid with planning out future sewing projects.

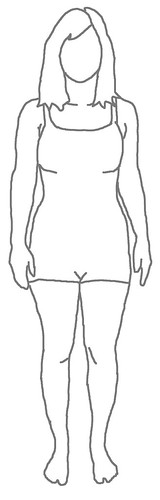
This is not normally something I would use – garments look sooo different on a bunch of stylized croquis than they do on normal ol’ bodies, plus, I’m pretty ~aware~ of how my body looks – so I didn’t see much of a point. But now little mini-me’s are popping up all over the internet, and I’m a sheep at heart so I took some pictures and drew out my own. Mine has a little outfit (bathing suit?) because I feel a little creeped out at the idea of a nakey me floating around the internet.

The book suggests printing your picture & tracing around the lines to create the croquis – which is fabulous, but I don’t have a printer at home and I was a little skeeved at the idea of printing out a picture of my undie-clad body on the office printer (or at Kinko’s! Oh God!). Hence, the all-digital LT.

And guess what? The process was pretty easy, so I made a bunch of screen shots so I could share the tutorial with you 🙂 And the best part is, you don’t have to have Photoshop 🙂 I used GIMPshop, which is a FREE software that is very similar to Photoshop (except free). Yay!

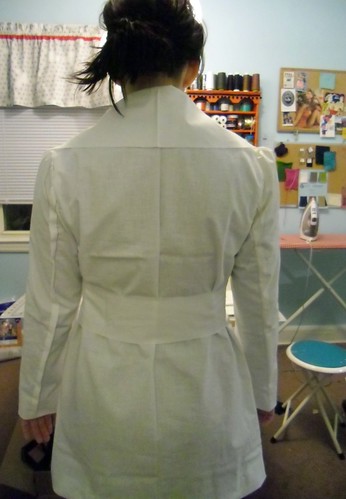
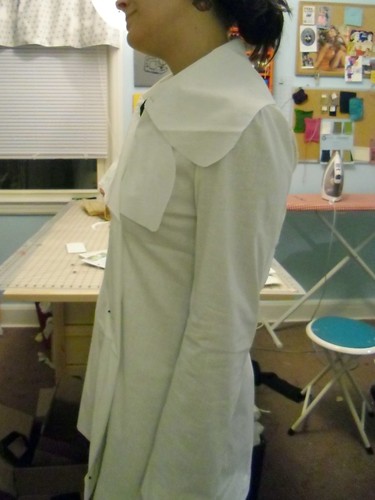
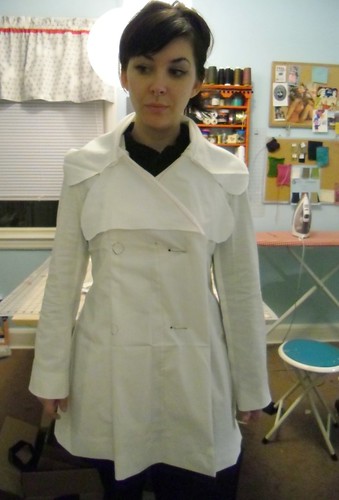
First, you are going to want to take a picture of yourself – in something very form-fitting (like leggings or a tank) or just undies. My actual picture was taken in a tank top and undies, hence why I picked a different picture for the tutorial 🙂 But you – you are going to want to wear something that shows your shape!

Some photo tips that I wish someone had pointed out to me:
– Stand in front of a plain (preferably light) backdrop. The less noise you need to edit out of the background, the better! This also makes it easier to see where you figure ends & where the wall (or whatever is behind you) begins.
– Make sure the camera is pointed straight at you, and not at an angle. My first croquis did not heed this warning, and as a result, she hashad very short legs (Had. I deleted her lol). Apparently I take my pictures at slightly MySpace-esque angle, which is great for outfit photos but not so great for croquis.
– Ensure that there is plenty of light & use a flash if necessary! It doesn’t matter if the picture is “blown out” or you are making a derp face – we are just dealing with the lines here, anyway.

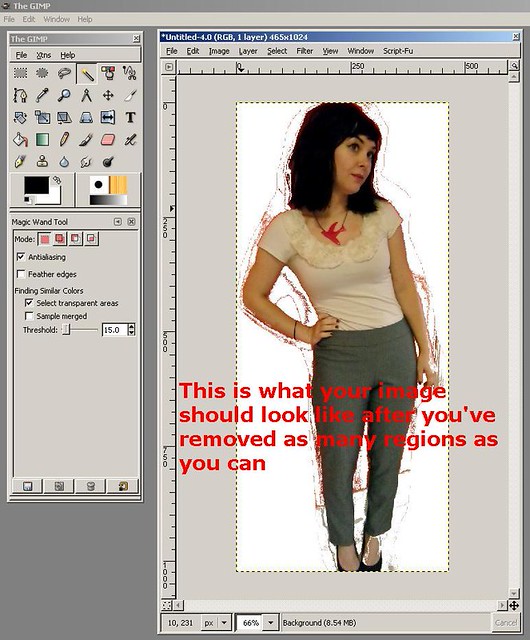
Ok, so you’ve got your picture – tutorial time! These pictures are also located on my Flickr in their own set if you feel so inclined. Click through any picture to make it bigger if you need to!

I decided to use this clover picture as an example, saving y’all the pain of viewing an undies shot. You are all welcome. And again, I’m using GIMPshop. It’s free! And please note that I am by no means a professional when it comes to digital image manipulation – I just kind of hacked my way through until I came up with something suitable 🙂

Step 1
Step 2
Step 3
Step 4
Step 5
Step 6
Step 7
Step 8
Step 9
Step 10
Step 11
Step 12
Step 13
Step 14
Step 15
Step 16
Step 17
Step 18
(I know, it should be “Croqui” not “Croquis,” my bad. I did not realize until it was TOO LATE!

I made myself wear the Pastille dress:
mini LT pastille
In the future, I will be drawing the actual clothes with a pencil & a piece of paper. It is hard to adjust the lines of the garment in GIMP to correspond with the lines of my body.

At any rate, I’m excited about my new little friend 🙂

Now – go print out a million little images of yourself & draw up a new wardrobe! Yay!

This Is Why I Can’t Buy Fabric Anymore

9 Jan

You guys.
Remember this?
ughhh my fabric stash
That is my fabric stash as of last week. And before anyone goes, “Oh! That’s not too bad!” may I point out that the fabric is double-stacked – i.e., there are piles of fabric behind the stuff you can see. Also, I have smaller piles lurking in my sewing room closet & attic. Eep!

So, I knew I was going to put myself on a fabric-buying ban. It seems silly to keep spending money (especially when you consider my expensive taste when it comes to fabric) when I have soo much perfectly usable fabric hanging out at my house as it is. I mentioned this at the beginning of the year (aka last week) and a few of y’all commented that you should also follow suit, but felt like you couldn’t stick to it. To be honest, I kind of felt the same way, but after pulling out my stash & really combing through it, I am actually pretty excited about this upcoming sewing year. I have so much good fabric! So many gems I had forgotten about!

Over the weekend, I pulled every single piece of fabric off my shelf, measured it (both yardage & width) and took a picture. I was going to upload everything to Pinterest – well, I started, anyway – but their site is all buggy and half the pictures don’t show up and idk, I just got pissy & moved everything to Flickr. Whatever! I also took the opportunity to pull any fabric that hadn’t been prewashed (I try to prewash everything as soon as I get it home but in some of these cases, this fabric has been hanging around for years… long before I because the Queen of Prewash) and get that taken care of as well.

I’m not going to bore you with dozens of pictures of my fabric stash, but if you are feeling lurky, I have allotted it it’s very own set on flickr. I am kind of embarrassed that there are nearly 50 photos, especially when you consider that this is ONLY my woven garment fabric with significant yardage. I have more stacks of muslins/interlinings, linings, remnants/scraps, and an entire cabinet full of stretch fabrics. Plus I never got around to that stuff in the attic lol. Baby steps, y’all!

I cut little swatches & hung them on my bulletin board as well:
fabric board!
The swatches to the left are the ones I want to try to sew up over the spring/summer. The swatches in the middle are fabrics I want to use before them (aka now). The giant stacks at the bottom are the rest of my swatches. Oh, and the little white papers stuck on everything show the yardage & width – so I can figure out if I have enough of something without actually unfolding it and getting measure on. Did that once, not doin’ it again!

Then I got really inspired and decided to document my entire pattern stash as well. And, well, guys… I have a lot more than I thought I did. And I’m kind of embarrassed. But we’re not judging each other, right? This is a safe space, yes?

Ok, well, here’s the flickr link to all 158 of them.
Don’t judge me!

For your troubles, here is my favorite weird pattern that I had forgotten I own:
McCall's 6988
lol wtf is even going on here?

So there you go! I do feel more organized about my various stashes – I’m already planning my spring wardrobe in my head 🙂 Hopefully this is inspire some of you to take control of your stash, too! And then share pictures, because *I* like to lurk 🙂 Heehee.

How Do You Notch?

5 Jan

I took the first step last night and cut out my coat pattern pieces – all 21 of them! Coating, lining & interfacing – I basically cut the coat out three times. The coating & interfacing were fine the way they are, but cutting the Bemberg rayon took a little bit of finesse – I used Sunni’s brilliant tutorial for cutting slippery fabrics and used silk pins for the first time. My tip if you want to try this – pin the slippery fabric to the muslin first (especially if you have the slippery fabric doubled) and when you pin your pattern pieces down, give the pins some extra breathing room and put them at least 1/2″ from the edge of the tissue. It may pull you out of the seam allowance (hence why I used such fine pins), but it does make it easier to wedge those scissors in there! And no jagged edges! Yay!

I noticed this while I was cutting out my pieces:
wait, people really do this?
I actually see this a LOT when using vintage patterns (and wearing vintage handmade stuff) – people who go the extra mile and give those notches a proper space to call their own. I remember my mom doing this on the clothes she made for me, and I always thought it was such a fiddly extra step. Cutting out fabric is obnoxious enough without having to maneuver around the table to cut some tiny extra pieces with the tips of your shears.

Here’s how I handle the situation:
snipping off notches
I cut the triangles off entirely & notch directly into the seam allowance. It’s quick, painless, and efficient.

And it gives me a good excuse to use my tailor snips, a Christmas present from Landon:
tailor snips!
(Seriously, he is the best! I AM NOT WORTHY)

Now seems like an appropriate time to introduce you to my Gingher Family:
my gingher family :3
8″ knife-blade shears, pinking shears, applique scissors, and the new tailor snips.

Anyway, back to the subject at hand – how do you handle your notches? Do you cut out the entire triangle, or just snip a little snip? Or do you do something else? Is there any benefit to leaving such a giant piece flapping around the notch? Should I stop cutting (hahahahaaaa see what I did there?) corners?

In other blog-land news, I was nominated for the Versitale Blogger Award by miss Joanne and given this cute button to share!

Now I’m supposed to tell you seven things you don’t know about me. Let’s see…
– My last name is Taylor! Every so often, I’ll have a friend make the connection and get really excited about their epiphany.
– I got the bird tattoo before I got the name. I am not really sure what to tell you about the second L. I wanted it to be like Lloyd, the silent L that makes for confusing pronunciation.
– I love obsolete electronics & I collect bits & pieces when I can. My favorites are computers/game systems and cell phones.
– I was homeschooled from third grade until graduation. This REALLY confuses people when I tell them, because apparently I don’t “act homeschooled.” Well all right, then!
– In addition to Nashville (my hometown & forever Lover), I have also lived in New Orleans & Pittsburgh. I left New Orleans because a bitch named Katrina kicked me out 😦 I left Pittsburgh because it was a terrible idea. The cold & I do not get along.
Johnny Paycheck serenaded me on Lower Broadway in front of a bunch of tourists shortly before he died. I told him to bugger off & he thought it was the most hysterical thing ever. I didn’t find out who he was until years later – I thought he was some rando tourist just being an ass.
– I have pretty bad TMJ, so my jaw pops every time I open it all the way. My dentist finds this hilarious.

Now I am supposed to nominate some people for being my new favorites of awesome, so I pick Molly and Oona. I would nominate more but it looks like Joanne already jumped on the others I was going to pick. Boo!

Okay, back to cutting! I have a shirt muslin that requires my complete & undivided attention.

Of Muslins & (Fabric) Musings

3 Jan

Welcome to 2012, everyone! Did you make any resolutions for the new year? I only made one, forreal-legit resolution, and I actually made it just now (as opposed to pre-2012): I have decided to enter the world of adulthood & start using proper capitalization on this blog. No real reason in particular except that it makes it easier to read. So there you go – my Christmas gift to y’all!

Another goal for 2012 started running through my mind last night while I was working on my coat muslin:
ughhh my fabric stash
Dear Lauren,
You are not allowed to buy anymore fabric this year until you cull that stash under control.
Love,
Lauren.

EXCEPTIONS (ah, but isn’t there always an exception?): January & July, my amazing local fabric store has a 40%-50% off sale on all fabrics. I generally use this opportunity to stock up for the upcoming season, and to pick up fabrics that I know I will use but are normally a bit cost-prohibitive (such as silk organza, and extra yardages of rayon lining to, er, hoard). So I’ll allow myself to buy stock-up fabric during these sales, and also a piece or two for funsies. Another exception is anything that involves my mega-cheap fabric scores – flea markets, yard sales, thrift stores, donations, etc. I mean, they’re practically paying me to take this stuff! I’d be a fool to not grab it and go, amirite?

Speak of the fabric sale, I already hit that shit up yesterday (first day!) and picked up a rather modest pile (considering my usual history of how much I tend to spend…):
the only fabric I bought in 2012 :)
The top two don’t count; they are shirting fabrics for Landon’s Negroni. More on that when I make a muslin!
That black under the plaid flannel is dark-wash denim with a slight stretch (for another pair of wide-legged trousers), the stripey is jersey knit with navy & white stripes, the white is boring old cotton batiste (for lining summer dresses), the shiny blue is silk shantung (actually from Mood fabrics), the green is Bemberg rayon lining for my coat (yes! I went with green!), and the big blob at the bottom is my coating fabric from Mood.

Speaking of my coat – have some muslin pictures!

coat muslin
This is actually my second muslin – the first muslin was almost workable, but needed a little bit of tweaking. This is what I ended up with:
– Remove 1/4″ from top & bottom sleeve side seams
– Reduce sleeve head ease (appx 7/8″ at peak)
– Taper lapel 1/2″
– Shift button position
– Shorten back belt 3/4″ on each end
– Remove 5/8″ from center back seam
– Remove 3/4″ from side back seam
– Raise underarm seam 1″
– Reduce shoulder width 5/8″
I think I’m pretty happy with the fit! Tell me what you think, fitting princesses & princes.

coat muslin
The underarm seam was the most confusing adjustment I made. Clearly there was something wrong with the first muslin, as I couldn’t move my arms at all without the entire coat joining the parade. I checked several fitting books, but none of them mentioned the actual armhole unless they were referring to a sleeveless top. I finally determined that the armhole was too low (which makes sense, as the pattern is a slight bit too large for me), and raising it 1″ pretty much eliminated the problem.

coat muslin
the lapels were also a little too wide around the neckline which resulted in some gaping. I pinched out the excess and re-smoothed the lines. There is still a small amount of gape but I want to be able to wad a scarf in there so I’m ok with it.

coat muslin
The back in cinched in via the belt, which is a design feature i loooove. Check out my mismatched sleeve caps – I put one in before I realized it needed to be reduced.

coat muslin
Side looks okay.

coat muslin
What do we think about the overall length? I folded back the sleeves the suggested 2″, but I think they are a smidge too long (like, no more than 1/2″). I like the coat length, although I realize now that I hemmed it 2″ and the pattern calls for 3″. So – current length or 1″ shorter? Eh?

Transferring the fitting adjustments was a PAIN IN THE REAR. This coat has separate pieces for everything – coat, lining, and interfacing! So every adjustment was transferred three times. And I will just (wo)man up and say right now that I did it all to the pattern tissue – no tracing. Whoever owned the pattern before me wrote all over it and made their own fitting adjustments, so I didn’t see much of a point in preservation. I will include my fitting notes should someone obtain this pattern after me, and they can re-add the stuff I cut off. Or something. Don’t be mad!

Anyway, I’m pretty happy with the overall fit of the coat! I think everything looks good & I’m ready to cut straight into the coating fabric. I have my (green!)lining & I picked up some giant covered buttons. Oh, and 3 yards of 72″ horsehair interfacing. Hopefully I won’t need to buy interfacing again until 2013 😉

my bad

27 Dec

just dropping in to report…

featherweight!
i may or may not have put a deposit down on a singer featherweight yesterday :X

MY BAD.

2011: a year in retrospect

22 Dec

yeesh, has it already been a year?! soooo much has happened in the past 12 months, i hardly know where to begin!

the very first sewing-related thing i did this year? immortalize my love for sewing by branding it onto my body – forever (an evil cackle seems appropriate right now):
tattoo
ISN’T SHE DARLING? this was taken immediately after it was finished.
done by jonny lashley at kustom thrills in nashville.

here’s a collage recap of every garment i made for myself this year:
2011 sewing recap
2011 sewing recap
2011 sewing recap
2011 sewing recap
2011 sewing recap
2011 sewing recap
2011 sewing recap
(click on the photo to see the pattern i used!)
did you count them? that’s 27, plus a scarf! damn gina – that’s like sewing a garment every other week! and here i was thinking i barely made anything this year :B

i also made two small collections to sell locally – spring 2011 and summer 2011. the rest of the seasons don’t exist because i’m burnt out on making a bunch of clothes for other people. also i’m selfish and i want to keep everything i make. so there you go.

some non-sewing related points of mention:
– do you see all the changes i made to my hair over the course of the year? lol! i went from red, to orange, to bright red, to faded red, to dark brown, to black brown. bangs, no bangs, long, short, curly, straight. clearly i love playing with my hair, like, a lot.
– my very best friend (like, reaching life-partner status best friend) joined the peace corps & moved to macedonia! i miss her SO much 😦
– best friend was also my roommate, so i had to pack up & move! double bummer! but i like my new house & it gave me a new sewing room to paint & decorate, so all was not lost.
– i met the most amazing guy and he turned my world upside-down. seriously, even my cat likes him – and she hates everyone (except me, obviously. bitch, i buy your food!). we actually just celebrated 6 months last week! blog world, this is my boyfriend, landon:
MY BOYFRIEND IS A BABE
GAWD he’s such a babe.
– my beloved s10 pickup bit the dust, and forced me to learn how to navigate the public transportation options here in nashville. it wasn’t too bad! i also rode my bike a LOT. i eventually bought a new-to-me red ford ranger (what can i say? i’m a truck girl :)), which is awesome but the process of paying it off has definitely put a screeching hold on buying a plane ticket to macedonia 😦 at least for now.

and now for the sewing-related mentions:
– i made my first pair of pants! and then another and then another! i am still having some fitting issues, but i think i’m heading in the right direction as far as fitting the lower half of my body. i have discovered i have a short crotch & a protruding butt. well, okay then!
– speaking of pattern fitting, i have made leaps & bounds as far as my fit is concerned. i now almost always make a muslin before cutting (or at the very least, a quick tissue-fit) and i have learned little tweaks to make the pattern work best for my body.
– this year, i forced myself to slow down & enjoy the actual experience of sewing. to me, sewing is like riding a bicycle – what is the point of rushing through it to finish as fast as you can? if you’re in a hurry, buy something ready-to-wear (or drive!). slow the eff down & enjoy the experience! as a result, i have garments that are as lovely on the outside as they are on the inside. and they wash & wear soo much better!
– i participated in my first pattern testing experience & ended up with a sweet biking jacket. this was my first experience with sewaholic patterns, and i was definitely impressed with the ending result.
– a couple (small)blog changes – i added a new page of my handmade clothes if you just want to lurk the finished projects. i signed up for a pro flickr account so now you can see ALL my photos – including old ones like the apartment i lived in for 4 years (it’s really cute!). i finally changed my banner, since the original was, er, part of a picture from the threads website :X ahem. and i have a lot of new followers! yay! hi everyone! 🙂
– not sewing, but i learned how to knit! and then i finished my first scarf! YAY! knitting is something i’ve wanted to learn for yeeears, so i’m thrilled to actually be learning this new skill 🙂

now for 2012… i have a few goals!
– i want to make another coat! i already have my pattern & fabric chosen (still debating on a lining). this baby will be fully tailored, wooly, beautiful, etc. can’t wait to start it!
– i want to perfect my pants fitting! pants are sooo easy to sew up, it’s really the fit that causes so much hair-pulling. once i get that down, i can churn those babies out one after the other.
– this is a pretty lofty ambition (and likely not something that can be completed by the end of 2012 – it might take a couple years. well, that is, if the world doesn’t end on 12/21/12, y’know), but i want to start phasing out my shitty rtw clothes & replacing them with handmade or vintage clothes. i have a LOT of clothes, and a giant chunk of them are stuff i have just to “have” – like the suit pants that don’t look very good on me, but i keep because it’s nice to have suit pants. or the tshirts that get increasingly ratty, but they are allowed to stick around because it’s good to have tshirts on hand. i don’t even buy new clothes anymore – everything i accumulated this year was handmade, thrifted, or vintage. i no longer fill gaps in my wardrobe with junky stuff from the mall, so now it’s time to start replacing the junky stuff i already own.
– i want to make some men’s clothes! men’s button-ups & ties are at the top of my list.
– knitting: i only have two knitting goals this year. i want to learn colorwork and make a pair of meow mitts. and i want to knit a cardigan – the agatha is EXACTLY what i want. it’s pretty ambitious, but i want to at least start it in 2012 🙂

as far as specific garments i want to sew up for 2012, all i can think about is spring right now! i have lots of pretty warm-weather fabrics hoarded up, visions of shirtdresses & cotton circle skirts & pedal pushers dancing around in my head 🙂

so there you go! that’s my year in review – it’s been a crazy one! i can’t wait to see what 2012 will bring!
what about y’all? anything happen in 2011 that totally rocked your world? did you accomplish something (sewing-related or otherwise!) that you are especially proud of? have any burning goals you want to reach in 2012? let’s hear them! 🙂

choosing a lining for my coat

21 Dec

hey friends – i need your input!

vogue 2925
i will be making this coat, view B (the shorter version). i am still gathering supplies, but i just got my fabric swatches the other day and y’all, i am in LUV.

coating fabric
isn’t it amazing? it’s a lovely deep teal blue – almost navy – with a wonderful nubby texture that should lend itself well to hand-tailoring. it is 100% wool, with light interfacing already attached to the back so it is very stable. again, LUV.

now i need help picking a lining!

i originally had(and still kinda do) my heart set on a bright celery green for lining. wouldn’t that look amaze with the teal?! unfortunately, the site where i got my swatches from sent me a pretty ugly shade of green. it is very reminiscent of some kind of avocado appliance from the 70s – which, don’t get me wrong, i’m a sucker for ugly retro, but it looks really awful with the teal coating. i stopped by my local fabric store yesterday afternoon because they have a KILLAH selection of linings, but the green was pretty sparse. here’s what i got:

which lining?
i wish they had something that was in between the two shades! bummer!

another option is to just buy more of that fabulous teal lining & use that:
leopard jacket - L tag
i love the idea of a statement coat with contrast-y lining, but maybe this coat is statement enough & can deal with matchy-matchy? what do you think?

i am also open to other color suggestions, although i don’t want anything super neutral – like black or brown or the same shade of blue. i might consider white, although i don’t like how see-through it gets on darker fabrics. i have also tossed around the idea of yellow.

FWIW, i polled all the ladies at the fabric store on the greens & their answers were pretty interesting. the older women all voted for the bright green, saying the light was too “safe” and “predictable.” the younger girls, aka the ones my age, all voted for the light green, saying the bright was too “cartoonish.”

so, now it’s your turn. what do you think?

and while we’re on the subject of picking each other’s brains, what kind of buttons would you put on this coat? self-covered buttons? giant sparkly rhinestone buttons? something understated? chime in!

more flea market goodies

20 Dec

i have a personal rule that i don’t buy myself gifts right before christmas, but i broke it over the weekend because… well, it’s the flea market! how can i resist the beautiful siren song that calls to me on the 4th weekend of every month (3rd weekend in december)? no. i can’t.

but i can share my goodies with y’all. ooh! let’s talk fabric & patterns!

the first batch of patterns are, sadly, not my size. they’re not terribly off – i usually wear a 32 or 34 bust- and i figure i can use them to learn pattern (down)grading. or maybe save them for a giveaway? 🙂 what do you think?

mccall's 9924

mccall's 2935
look at that awesome jacket with those sassy shorts!

mccall's 3750

simplicity 3272
i wish my hair did that.

vogue 5169
this one reminds me so much of new look 6000, no? or maybe it’s just that pretty blue color.
i’m sad the envelope is so torn 😦 it was in slightly better condition when i bought it, but i ripped all the way when i pulled it out of my bag. waaaaah!

so that lot was $4. yep! i love this particular guy – he always has patterns for me, and his booth is full of cool antiques & records. speaking of which, in the same general building, there was a guy selling a singer featherweight for $250. my dream machine! i was ready to drop all my cash right then & there (and subsequently spend the rest of the month bicycling to work & eating ramen – seriously!), but i tested it & it was having major stitching issues 😦 aaand he wouldn’t go down on price. so we will wait on the featherweight.

flea market fabrics:
shiny 80s fabric
idk what this is, some kind of stretchy sateen fabric from the 80s lol. it is actually 3 irregular pieces, but i think i can make some kind of cute little cycling top out of it.

plaid fabric
giant piece of plaid fabric that might morph into a jumper.

floral fabric
isn’t this one pretty?? there are about 2 yards, and it is sooo soft.

peter rabbit corduroy :3
haha this one is pretty indulgent – and very small – but how could i leave it behind? peter rabbit corduroy? COME ON.

sheer navy/white fabric
the colors are off in this one, it’s navy blue & white. it’s a sheer polyester something – i’m thinking either a chantilly or the peony with no sleeves.

plaid polyester fabric
my favorite – some class of terrifying plaid polyester fabric! i am seeing another pair of clovers already. of course, my boyfriend took one look at the fabric & said it looked like the kind of shit we used to buy at hot topic 10 years ago (you know, back when they sold velvet gothic dresses & vampire energy drinks lol), but i have decided to ignore him.

i think this is actually upholstry fabric
a couple big pieces of this creepy green fabric… after i got it home (and ew it smells like an old man), i realized it is obviously some kind of upholstery fabric.

bandana fabric!
a nice sized piece of bandana fabric, which is clearly destined to be some class of skanky halter top, amirite?

speckled linen fabric
there were several yards of this one… i think it’s a linen-blend? kind of 80s.
fun fact: serging the edges for prewashing looks like shaving a mustache lol

southwestern fabric, anyone?
hahha so southwestern! i think this fabric is sort of ugly (and, i quote my boyfriend, “that looks like an ugly set of curtains i ripped out of a house i was gutting”), but it also looks very 50s to me & i think it would make a great shirt dress! especially since there is a LOT of it. i didn’t measure, but at least 4-5 yards.

floral fabric
i LOVE this floral fabric. it is kind of stiff, but i think a wash will soften it up a little.

total for all the fabrics: $6.
they also all smell like a really really old man, so they’ll be getting a proper wash tonight. where? at my boyfriend’s house, of course. he can’t insult my flea market fabrics & get away with it.

i also tried to buy a singer spartan sewing machine for $25 at the last booth i visited, but the woman got all bullhurt at me because i wanted to test the machine (you know, to make sure it sews!) and then yelled at me for pulling off the throat plate to check that the bobbin was intact. she accused me of trying to break her sewing machine and wasting her time because i obviously had no intention of buying it. i will admit, i cried a little after that confrontation. kind of dampened my mood… i just went home. but you know what? at least i only had to deal with her for a few minutes. she has to put up with her bad attitude for the rest of her life.

more patterns! i picked these up at the southern thrift store by my house. they have this terrible policy where they dump a bunch of “like” items in a plastic bag, staple it shut, and make you buy the whole bag. i convinced the cashier to let me open the bags & dig through, but she wouldn’t let me swap out patterns. there was something like 15-20 patterns per bag, and 4 bags of them, so you can imagine how much she hated me by the time i was done 🙂 haha! i bought 2 of the bags… here are some of my favorites.
simplicity 5973

simplicity 7591
i don’t even like this pattern, but i LOVE THAT PONYTAIL

simplicity 5355

simplicity 4948
really really REALLY wish the envelope was intact 😦

butterick 5946
lol i can’t even

butterick 9328
LOVE this one.

vogue 7384

simplicity 2458
welp, there’s the shirt dress!

simplicity 5927
and there’s the jumper!

mccall's 2185
this is totally ridiculous. the girl in the pink is my favorite.

vogue
is this a maternity pattern? it looks a lot like one of the dresses posted on liz’s blog (~new relaxed silhouettes~, third image).

simplicity 4276
i will confess that i end up with a lot of patterns just based on the illustration. helment-hair over here is no exception.

and look! a couple of men’s patterns!
simplicity 2081
mccall's 4866
too bad my boy is too small for these 😦

the bags were priced at $5.99 each, and i bought 2. in addition to the pretties here (and many many more that i haven’t posted), i got some uglies too. not a bunch of really bad ones – most were just stuff that doesn’t look good on me, like 60s A-line dresses – but oooh here are a few of the worst.
butterick 4070

mccalls 8180

see & sew 3285
this is a bad picture of a picture, but i swear those pants…things are cut out of an actual fleece blanket.

mccall's 9330
yep.

there are quite a few more patterns that i didn’t post (48 photos in all!), so if you want to see the rest, check out the set!

completed: colette’s clover, v2.0

19 Dec

or i guess you could call these version 5.0, considering this is the fifth time i’ve made these trousers (the first three being oh-god-you-can’t-wear-that-in-public muslins).

ahem.

not much to say about these – i’m still picking away at my pants-fitting, still can’t decide if i’m making shit better or worse as i slash & tape. i received a lot of good feedback on my last clover post (i definitely recommend taking a peek if you are still questioning your pants-fitting), and made some more changes to the front of the pattern – added a tiny bit back to the front rise, and scooped out a little more of the front crotch. next time, i will need to add to the sides what i took off the front (i left it off because, well, i don’t know why.), as the whole top was super tight until i reduced the seam allowance to something laughably thin.

these pants have LOTS of wrinkles, but i’m fairly certain that a good chunk of them are due to my fabric choice – that shitty stretch poplin i bought from fabric mart, which btw is on my list of online fabric stores i will not buy from again. it’s a *very* flimsy fabric, so i underlined the pants with more stretch poplin… just serged all the pieces together. there is a little sheen to the fabric so i think that is also making the wrinkles look more pronounced. i have also convinced myself that those smooth pants on the colette website must be photoshopped, and whether or not this is actually true, i still feel quite a bit better about myself.

oh, and these pants would have been ready last week, except that after i finished *everything* and put them on to check the length for hemming… the red zipper broke and i had to cut myself out of my pants. EW. i did not have another red zipper (that one was actually pulled from a pair of wool pants i harvested for the material a couple of years ago), and i didn’t want to go back to the fabric store so i just used an orange zipper in my stash. it doesn’t match, but no care!

red clovers

red clovers
the leg wrinkles are from wearing them all day! they are VERY comfortable! haha!

red clovers
see the orange zipper? yep, me neither.

red clovers
view from the back

red clovers
with my leopard jacket! 😀

red clovers - inside
here’s an inside shot – i bound the facing with white bias tape. and there’s my orange zipper lol.

i actually bought another piece of fabric that i think will make up a great little pair of clovers – more on that tomorrow!

red clovers
RED PANTSSSSSSSSSSSSSS

aw! baby’s first scarf

14 Dec

actually, this is more of a scarflette than a proper scarf – i ran out of yarn, so it’s short! but it’s scarf-like, and it’s my first real knitting project that isn’t a swatch. i know this is a *sewing* blog, but it’s also *my* blog, so we are going to talk about knitting today.

Photobucket

new techniques i got to put to the test: purling, binding off, and button holes! i also learned how to un-knit, which was very helpful since i messed up pretty much every single row in the beginning. at one point, i dropped a stitch in my un-knitting fervor and nearly had to frog the thing to fix my mistake. fortunately, i was able to correct myself and continue, although there is a wonky area near the buttons. don’t look too closely!

the pattern is the scrunchable scarf and it is knitted up on size 7 needles with alpaca wool. obviously, mine is shorter because i didn’t have enough yarn. the buttons were actually intended for my leopard jacket, but ended up being too big for the bound button holes (how the hell did that happen???? ugh.). so they went on the scarf instead!

on me
isn’t it pretty! ignore the mess in the background – hopefully the sewing fairy (aka me) is going to turn that red pile into a pair of clovers. i think, anyway.

scarflette
open. you can see how short it is – i had the tiniest little yarn ball butt left over!

button holes
my button holes!

buttons
the buttons & aforementioned Area of Wonk. like i said, don’t look too closely.
i don’t know why these buttons look black; they are actually a deep teal – basically the same color as the lining in the jacket.

buttoned
buttoned-up – i like it this way, as opposed to a tube-thing around my neck.

so… what do you think? i know it’s laughably simple, but i’m so excited! i already started my next knitting project – and my first knitting pattern (that isn’t just knit knit purl). scary pattern chart & everything! my pal sarah has been a wonderful teacher – very patient with my dumbass. so i’m thankful for that. it’s weird to be a beginner at something. i actually kind of like it, to be honest.

:D

in non-knitting news, yesterday i was surprised with a gift certificate to mood fabrics from an incredibly generous reader – words cannot even express how much i am thankful for this. and how excited i am about more fabric! 🙂 i would love to make that vogue another tailored coat – and a bombshell dress! i ordered a bunch of swatches today, so we’ll see!