Archive | completed projects – new RSS feed for this section

completed: the colette meringue

23 Nov

my first pattern from the colette sewing book! i’ve been itching to try this one, especially after sarai posted a tutorial on how to draft a waistband (which, in case you were wondering – easy easy!). also, SCALLOPS. i think i just jumped on the scallop bandwagon with this. they are a pain to mark, sew & press, but oooh they are so happy!

i used a piece of wool houndstooth that i got from lauren winter, during that awesome yardsale where i bought half of her fabric stash. this piece of fabric cost me a whopping 75 cents. everything else was already in the stash – the lining (a remnant left over from a dress i made 4 years ago – yeesh, do i throw anything away? well, it’s gone now. gone inside my skirt, i mean.), the bias tape, even the zipper & thread. 75 cent skirt, yo!

cutting this pattern out was… interesting. it calls for a lot of yardage, but i only had 3/4 yard of the houndstooth. it was 60″ wide, though, so with some careful folding, i was able to get my skirt cut out with practically nothing to spare. cutting off the top to make a seperate wasistband really helped, as it shortened the length of the skirt so that the skirt & the facing fit exactly at the 3/4 yard length. i suppose one could use a different fabric for the facings (on both the scallops & the waistband) if you were really running short. i had exactly enough, though!

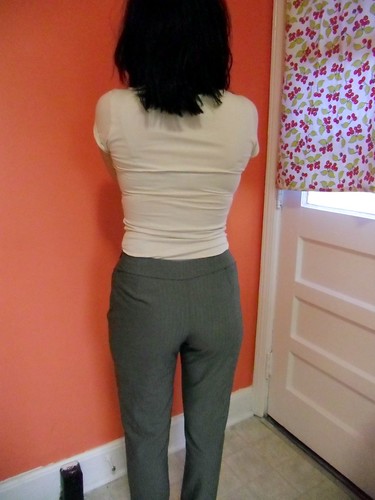
i cut a size 2 in this, no flat pattern alterations. yay! i made a lot of “style” alterations, though – added the waistband, piped the waistband seam, finished the top of the waistband over the zipper with a tab (that was accidental… for some reason, my waistband was too long? bwuh?), added a short lining for comfort. i also finished the inside of the waistband & the top of the scallop facing with black bias tape, so it looks real pretty inside :3

if you want my honest opinion on this skirt, it alone is worth the $18 that the book currently costs on amazon. go get it!

meringue

meringue - back

meringue - side
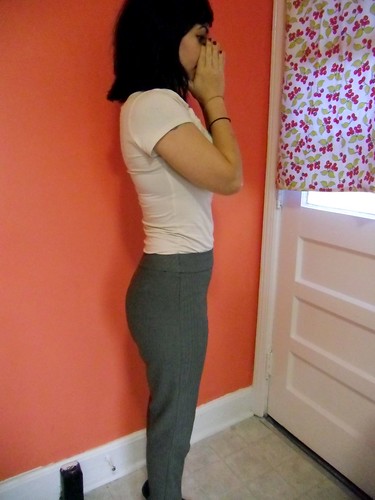
you can see my waistband tab over the zipper here

meringue waistband
piping!
i really only added piping because i wanted to test out my new piping foot 🙂 verdict: omg how did i live without a piping foot???

meringue - inside + lining
the lining makes me so happy!

meringue - hem

my only problem now is that i don’t know what to wear to thanksgiving dinner tomorrow! the floral peony was supposed to be my ~thanksgiving dress~, but now i’ve got plaid & pants & scallops and man, i just can’t decide. i love having these kinds of problems, lol

meringue

one more thing…
my first bit of knitting!!
i learned how to knit (and purl!) last night! my new friend & fellow nashville bike rider, sarah, taught me over coffee. so pumped about my future cowl 😀

clover: let’s get real

21 Nov

i mean, let’s get real-real here.

this is my 4th pair of clovers i have completed thus far. in case you aren’t up to speed with this saga, every prior pair of clovers has been demoted to “muslin” and wadded up & stuffed in the Muslin Basket of Shame (i’ll throw that stuff away… eventually). making anything over & over again – especially if you can’t actually wear it out in public – sucks. it feels wasteful – wasteful of fabric, of precious sewing time, of misplaced giddiness (idk, i get real giddy when i am making a new piece of clothing lol).

this pattern almost broke me. it might still break me because it’s not quite perfect. i’ve made a lot of fitting changes and i actually feel kind of pants-intelligent right now. so that’s nice. i don’t want to dissuade anyone from buying or making this pattern because i don’t think it’s a flawed pattern… i’ve seen many of these made up, and they look GREAT. unfortunately, the body they were drafted for is quite obviously not my body. so i’ve had to do a lot of fitting, and muslins, and more fitting.

anyway, pants #4. i took another 3/8″ off the front crotch length and slightly narrowed the inside of the legs (like, maybe 1/4″. not much). i decided to make these a wearable muslin, so i used a stretch poly-blend suiting fabric i found in my stash ($2 yard sale score!) and a zipper i pulled out of a dress someone gave me for fabric salvage. i did serge everything on the inside in case the wearable muslin turned out awesome.

after wearing them around this afternoon, i shaved about 3/8ish” off the front crotch seam & tapered the curved side seam (on the non-zipper side, sry, don’t feel like re-inserting the zipper) to a straight line. in the future, i may let out the waistband a little because it digs in when i sit down. also, i thought the waistline didn’t look terribly flattering on me – too low – but looking at the pictures it doesn’t seem so bad. what do you think? for anyone who is curious, they hit exactly at my belly button.

i guess my question is, how fitted is too fitted? of course we want a smooth line, but i don’t want to get it so smooth that i can’t move comfortably! this is where i want y’all to be honest – critique! please! 🙂

clovers
when i stand normally, they look close to perfect.

clovers
when i stand with my legs together, though, i get a little bagginess around the crotch (ughh i’m gonna get some weird google search terms for this one). how to fix this? what is stumping me is that it is all the lower crotch/thigh area, and i can’t find fitting info for that – only the top half. it kind of makes me look like i have a FUPA right now. i don’t want to look like i have a FUPA. help!

clovers
another view, another baggy crotch.

clovers back
back looks good! there are a few drag lines on the sides and the darts look like that because i couldn’t get a good press (stupid poly), but i think it’s satisfactory.

clovers side
side looks good!

clover close-up
last crotch-shot, promise
see that bagginess? what is causing it and how can i fix it?

ALL THAT BEING SAID, i like these pants. i think the fitting issues are pretty minor & most normal non-sewing people won’t notice them. so i will continue to wear these, and continue to improve this pattern block. i think they look really cute on me, and i want several pairs!

completed: peony, this time in PLAID

17 Nov

pretty sure the peony is my new favorite TNT dress, y’all. it is SO easy to make up – even with matching plaids! – and extremely versatile in all the ways you can change it up. i am already thinking about making a summertime-approps peony with a chiffon overlay & no sleeves. oooh i just inspired myself again.

anyway, before i get ahead of myself, let’s focus on the peony at hand. this is my second make up, floral being the first. in addition to the previous alterations i made to the pattern, i shaved about 1/2″ off the front neckline, as i felt it was a tiny bit too high. i omitted the facings & instead lined the bodice & sleeves. i wanted to line the entire dress, but i only had 1 yard so it was either sleeves or skirt… i went with sleeves, because i can always wear a slip with the skirt.

the plaid fabric is my new favorite! i bought it from miss lauren winter right before she moved house (and, sadly, out of my neighborhood ::sob!::), although considering she charged me $2 for the whole 2 yards it’s more like she basically gave it to me. it is a very fine/soft wool, super drapey & comfortable. the lining is a pale periwinkle blue bemberg rayon that i found in the remnant rack for super duper cheap & i’ve been hoarding for like a year.

i was concerned that this dress wasn’t totally appropriate for plaid, but i think i did an ok job at matching. this pattern really doesn’t use a lot of fabric – even with matching up the plaids, i used less than 2 yards. the side seams match perfectly (if i do say so myself) and surprisingly the darts match up. well, kind of. the bottoms don’t, but that’s just the way they are positioned. furthermore, the waistline doesn’t exactly match up & again, that’s because of how the pattern was drafted. i can’t decide if it bothers me or not. in the meantime, i’ll just wear a belt and pretend otherwise.

i actually cut out the pieces for the cummerbund (in navy taffeta), but decided to go thrifting last night instead of sewing it up. it’s all good, though – look at the belt i got for $3!

plaid peony

plaid peony - side/back

plaid peony - back
the dark vertical line is actually part of the plaid, and not my invisible zipper, fyi.

plaid peony

plaid peony - no belt
here it is without the belt
ooh the mismatched plaid at the darts actually is really bothering me

plaid peony - front, flat

plaid peony - waistline

plaid peony - back
sorry ’bout the rogue white thread lurking back there

plaid peony - lining
really pleased with myself here – i figured out how to attach the lining without having to slipstitch it to the zipper tape. so clean!

plaid peony - hem
tiniest hem ever – this dress is SHORT!

and some bonus shots…
plaid peony & lady grey
with my lady grey

plaid peony & lady grey - back
a result of gertie’s sew-along last year, my first venture into tailoring. this baby is lined, interlined, padstitched… and it is nice & heavy, just like a coat should be 😉

plaid peony & lady grey - open
LOVEEEE THIS COAT

and, in case you were curious:
SHOES
my shoes 🙂

plaid peony

i have the whole week off next week, and i think i’ve already overwhelmed myself with all the sewing projects i want to tackle. we’ll see how many actually get accomplished, though 😉 hehe

pattern testing: the minoru jacket

15 Nov

time to talk about the minoru! finally! for those of you who don’t follow (the… three of you? ever?), tasia of sewaholic patterns recently dropped her 4th pattern, a darling sporty jacket called the minoru. i was chosen to be a pattern tester (out of 600!! geez louise!), which was awesome, except for the part about dropping all my sewing fun-times for 2 weeks :). this was also during the dark month that my truck had died & i hadn’t replaced it yet… so i actually rode the bus to the fabric store. it took an hour (for maaaaybe a 14 mile drive?). that is some dedication, y’all!

anyway, a few of the pattern testers have already posted theirs, so i will follow suit and post mine.

i’d actually been toying with the idea of making a cycling jacket – something brightly colored, to increase visibility now that the sun is setting earlier & earlier. when i saw that the pattern we were testing was going to be a sporty jacket, it was like god himself had sent the pattern down to me from the heavens. i initially wanted to make my jacket in a bright yellow corduroy, but the fabric store was lacking (and i didn’t have the means to shop around), so i stuck with white. in retrospect, this was not the best idea i have ever had – it gets dirty faster (duh!), my patterned lining shows through, and it is hard as shit to photograph. btw, i think i took over 150 pictures of this jacket. it was that hard to photograph.

anyway, the pattern itself was a total breeze to work through! tasia has it labeled as intermediate, but i think an advanced beginner could easily tackle this. the instructions are great & the pieces lined up nicely! i did have to make a few changes to get the pattern to work for me – the big one was a full bust adjustment. since these patterns are for the pear-inclined, there is not a lot of room up there! i had a bit of trouble since this jacket doesn’t actually have any darts in the front, so i had to add my own dart & then slash and spread from there. i also shortened the jacket, as the original length overwhelmed my short frame.
one thing i wish i had done was interfaced the collar – it doesn’t call for it in the instructions, but it is also assumed that you are using a heavier fabric. my corduroy was very fine & lightweight (hence the see-thru), and my collar just flops. i considered interfacing it while i was making the thing up, but i wanted to stay as true to the pattern/directions as possible so i could offer better feedback. so there’s my feedback – use a sturdy fabric, or use interfacing!

anyway, i love my jacket and i love all the fun details that make it so special – the topstitching (btw – buy 2 spools of thread. you will need them!), the fine gathering, THAT ELASTIC WAISTBAND THAT IS BEAUTIFUL AND GENIUS (sorry, i got excited for a second there), the inside pockets, the collar. i will definitely make this again – in my preferred yellow, with an interfaced collar 🙂 and a hood. i think i missed out by not doing the hood.

anyway, pictures!

minoru jacket

minoru jacket - zipping

minoru jacket - collar

minoru jacket - back
lovelovelove the back

minoru jacket - unzipping

minoru jacket - unzipping

minoru jacket - ah-sneeze
i am including this picture bc it cracks me up. i was trying to show the lining & i sneezed!

minoru jacket - pocketssss!
pockets!

minoru jacket - open

and some detail shots…
minoru jacket - flat

minoru jacket lining

minoru jacket - elastic

minoru jacket - collar open

minoru jacket - zipped up

minoru jacket - open

ALSO one last thing…

minoru jacket & bikey
minoru & bike.
you jealous? 🙂

completed: colette peony, in a floral explosion

14 Nov

first off, i realize i took way too many pictures of myself making the same pose/face in this dress. i’m sorry. i tried to edit them down as much as possible. i also apologize for the crappy lighting – i think i might be the only sewing blogger who’s not married to a photographer? just me & my tripod! and don’t tell me to move away from the coral wall, or i will hit you with the empty paint can 🙂

moving on…

i finished my dress! so happy with the final piece – it is AMAZING! let’s talk shop – i made this using a stretch velveteen fabric. stretch fabric is NOT my choice for this dress, the neckline sits kind of weird & i had to do all kinds of alterations to get it to fit (as it stretched too big, when my woven muslin was a perfect fit). i didn’t realize the fabric was stretch until i received it in the mail… my bad for not reading the description more closely, oh well. i added piping to the neckline & waistline, and interfaced the facing with god ol’ cotton muslin. instead of using an invisible zipper (i was afraid it would bubble under that stretch fabric), i handpicked a lapped zipper, stabilized with a strip of silk organza.

as far as the actual fit of the pattern, me likey! it did require a little tweaking – MAKE A MUSLIN – i had to move my vertical darts over and my horizontal darts up, but the overall fit is good! and it doesn’t use a whole lot of fabric. win win! i cut a size 4 and added a 1/2″ FBA… i think this made the shoulders fit better than if i had cute a size 4.

floral peony

floral peony
using the pockets

floral peony - OMG POCKETZ
omg pockets!

floral peony

floral peony - back
back
the bunching on the cummerbund is due to there being no stabilization at the buttonhole (i used polyester taffeta for my cummerbund, fyi). next time, i will put some interfacing there.

floral peony

want to see the dress without the cummerbund? you got it!

floral peony - no belt

floral peony - no belt
(no idea what my face is doing here)

floral peony - flat

floral peony - piping at waistline
ooh i love piping.

floral peony - inside
per usual, i finished the edge of my facing with rayon seam binding. i actually found this in my stash – the color is called “toast,” but i think it looks more like “baby shit.” anyway, it matches my dress (should i be unhappy about this?). oh, the red lines are from my markings. they won’t wash off this fabric, awesome.

floral peony - hem
more baby shit at the hem!

floral peony - belt
taffeta cummerbund. i love that this pattern only uses one button – awesome if you’re a button hoarder like me and have jars and jars of awesome buttons and only one of each.

floral peony
so yep! that’s my peony! i really love this dress, the pockets, the fit – everything! so much that i’ve already cut out my pieces for peony #2… and i know y’all want a little sneaky peeky, so here you go 🙂

plaid peony

😉

completed: the galaxy dress, a loving ripoff

8 Nov

i know we’re all familar with the roland mouret’s galaxy dress:
galaxy dress - the original
although i did not discover it until last year, it became an instant “must-have.” lucky me, vogue 8280 it an absolute, blatant rip-off, making this dress completely obtainable for my greedy hands.

let me preface this post by saying this pattern is confusing as shit. it’s not necessarily difficult, per se, but the instructions jump around a lot and i noticed many people were complaining that they inadvertently caught themselves sewing up the wrong view. so, fair warning, y’all. i went over the instructions before sewing, circled & highlighted what i needed, and wrote things like “STOP!” and “DON’T DO THIS!!!!1″ under the ones that were unnecessary.

that was my smart moment.
my not-so-smart moment was skipping the muslin. oops. i ended up having to open up the shoulders & remove about 5/8” from each piece. this is an adjustment i ALWAYS make with vogue patterns – why i didn’t make the adjustment to the flat pattern, i have no idea. sometimes i just refuse to learn from my mistakes.

the pattern calls for lining only the bodice and self-facing the flanges with the fashion fabric. since my fabric is a super wooly, super itchy tweed, i interlined them with cotton & faced with my lining. i also lined the skirt and covered the sleeve heads as well. the whole thing is pink on the inside! yay pink! i also stitched down the flanges to the bodice, as otherwise they would have have just been flapping around, and no. the pattern calls for no interfacing or stay-stitching (right??), and i was afraid those seams around the neckline would stretch, so i stabilized them with strips of silk organza – both the bodice neckline & the curves of the flanges. nothin’ sadder than a gapey neckline, amirite?

i used the aforementioned itchy wool tweed (yard sale score – $3 for 4 yards OH YEAH) and watermelon-pink bemberg rayon (left over from my circle skirt) to line. i actually stashbusted the shit out of this project; the only things i had to buy were the seam binding and a spool of brown thread. basically, my galaxy dress cost me less than $10. take that, mouret!

galaxy dress

galaxy dress b00ty
this is a *very* fitted style, as evidenced by the booty protrusion

galaxy dress
i put a lapped zipper in the back since i was afraid an invisible zip would have trouble zipping over those layers. i like the effect, but i got a small bubble at the waistline. ugh.

galaxy dress
had to lighten this photo, but check out the sleeve detail! yeehaw!
also, i know i kind of look preggers here but i promise i’m not 😉

galaxy dress

galaxy dress - sleep cap
here’s a little progress shot – the sleeves are giant & droopy without support, so i made a sleeve cap to give them some lift. i used horsehair crinoline and stuck it between the sleeve & the sleeve lining. the instructions wanted me to put it on top of the lining… why?

galaxy dress - sleeve
happy sleeve!
i ended up tacking my down by about 1/2″ at the sides – they were super huge & too footballesque, otherwise!

galaxy dress
the lining took forever because i had to keep changing out the thread from brown to pink. i think it was worth it, though.

galaxy dress - hem
put a little seam binding at the hem

snap inside dress
the neckline also had it’s fair share of problems (something i could have dealt with if i’d bothered to make a proper muslin!) – it is wide. too wide to wear a normal bra with! i don’t do strapless and i don’t do braless, so i sewed these little snaps inside the V to hook my bra to.

bra snap
and here is the bra i sacrificed to the galaxy dress. it was the most low-cut out of any bra i own, and uhhh it’s teal blue.

so yep! there’s my galaxy dress, and another outfit down for fall/winter 2011! next up: the peony. i’m working on my muslin right now 🙂

galaxy dress

completed: ceylon v2.0

1 Nov

picking up where we left off…
green wool ceylon - progress

this turned out to be one of those “add-on” projects. you know – the kind that start out relatively simple (TNT pattern, easy fabric, no embellishment, etc) until you begin to branch with a bunch of “oooh, let’s add THAT to it!” i decided i didn’t like the way the fusible interfacing acted when i used it last time, so i used muslin as a stabilizer (basting it to the facing pieces, then trimming it out of the seam allowances). i decided to hand-embroider the yokes – this was actually really really easy, just time-consuming (done during my lunch hour over the course of a week or so. and yes, my coworkers are used to me doing this kind of stuff in the lunchroom :B). then i decided that i didn’t like the way the facings looked serged, so i trimmed all the edges in straight lace. i hand-hemmed the sleeves & skirt bottom. and i covered all 16 buttons, using the shittiest coverable buttons i could find (aka in my stash), without a tool. my fingers hurt and i should have learned my lesson from my last ceylon, but nope. at least i used all the buttons up – and i won’t be buying them again. at least, i don’t think so. ha.

i made one small adjustment to the pattern fit – tapered in the waist & hips to a size 0. i kept the bodice at a 4. i love the fit & i didn’t have to make any further modifications after cutting! yay! i also narrowed the skirt a little, to get it to fit on my piece of fabric. i had 2 3/8 yd of 44″ fabric (which is more than a yard less than the requirements on the envelope), but i managed to get everything cut, on-grain (!!), using some very creative cutting layouts & narrowing the skirt side seams.

wool ceylon

wool ceylon

wool ceylon

wool ceylon

wool ceylon

wool ceylon - tag & embroidery
i put a tag in… makes me happy 🙂

wool ceylon - buttons
OH GOD THOSE COVERED BUTTONS

wool ceylon - lace facings
lace-trimmed facing 🙂 you can see it in the sleeves, too – look closely.

green wool ceylon - embroidery detail
embroidery detail – forgot to take a close-up on the finished dress, whoops
here is the embroidery pattern i used – it’s free! i used 2 strands of cream-colored embroidery floss & outlined everything in a backstitch. there are a few french knots, those used all 6 strands.

wool ceylon - lace hem
lace hem

oh! i also made a covered belt to wear. it is the same shade of cream as the embroidery. i used muslin and a self-covered kit. i had high hopes of putting in cute eyelets & making the whole thing super jazzy & special, but i didn’t realize i needed a tool & those eyelets were shitty 1-piece eyelets anyway and now i’m pissed off. so have a slidey belt:
wool ceylon
what do you think? can’t decide if i like it or not. i wanted a green belt but i definitely did not have enough green wool left over after cutting out the pieces.

overall, i’m very pleased with my new dress. the fit is perfect & the wool is very warm – which is great for a southerner like me who thinks anything below 60*F should be against the law :P. the only thing that bothers me is the lace is white, and my embroidery is off-white. i considered tea-dying the lace, but it’s polyester & also i’m lazy.

special thanks to my kitchen wall for being such a gorgeous & colorful backdrop xoxo

wool ceylon

completed: colette violet blouse

12 Oct

i know what you’re thinking – how the heck did i finish this blouse so freakin’ fast!? lol if by “fast” you really mean “slow.” let’s start this post with a confession: i started this blouse over a month ago, stitched up to the point of near-completion, then set it aside for other projects. for a MONTH now it’s been staring at me, one-sleeved & pathetic. i’m so glad i got this out of the way – i was beginning to think i could actually hear it whimpering!

violet blouse

so here is my second piece for my fall wardrobe! colette’s violet, made with a vintage cotton-rayon blend (that i picked up for a dollar! nyah nyah!). i interfaced the facings & collar with muslin, rather than fusible interfacing – i hate that stuff! hate hate hate! the inside seams are bound with self-bias tape, and i rearranged the buttons to include only 6, since that’s all i had and i reeeeally like these buttons a lot.

violet blouse - up close & personal

i only made a couple of changes to the fitting – for some reason, the darts were hanging out next to my underwire. lolwut. of course, i’d already sewn up/serged the blouse (aka my ~wearable muslin~), so i unpicked as best i could & repositioned them to reach the sky. they still aren’t *quite* in the proper place but i just can’t deal anymore today. i also took in the side seams a little – maybe another 1/2″ or so?

violet blouse - side

to be honest, i’m not thrilled with the fit of this blouse. i don’t like the loose fit, i’m more of it if-i-can-squeeze-into-this-then-it-fits kinda girl. i may end up redrafting the back piece to lay un-gathered & then pop a few vertical bust darts in the next version.

violet blouse - sleeve

violet blouse - back

violet blouse & ginger skirt
here’s my outfit – with my ginger skirt!
my expression in this picture cracks me up. “well hi there!”

flat violet

handmade :)
remember those handmade tags i was working on? snuck one in 🙂 i used speedball screen printing ink & muslin.

button!
awesome buttons!

bias-bound facing
self-bound in bias tape

violet - untucked :(
untucked. i don’t plan on wearing it this way – see how sad it makes me? so sad!

FUN FACT: this pictures were taken in the same room as yesterday’s pictures. it is amazing how different this wall color looks depending on the light! today is rainy & grey, meh.

aaand i’m outta here.

violet blouse & ginger skirt

completed: tweed circle skirt

11 Oct

and i’m back to sewing! betcha thought i was gone for reals, huh? too bad!

who participated in the circle skirt sew-along? i had a little issue with time – aka, life got in the way – so i wasn’t able to finish in time for the first ’round of circle skirt party 2011. i was able to finish last night, though! and i’m wearing my new circle skirt today! and lucky me – i spilled coffee all over it this morning so it even smells good! /sarcasm.

circle skirt
this was a really easy pattern to draft & put together. i was able to smoosh mine out of one piece of fabric & eliminate any side seams (well, on the shell fabric – the lining was only 45″ wide, so there are seams in there!). although i was a tiny bit ambitious with my original length, and ended up cutting about 5″ off the finished piece. yikes! longer skirts & i just don’t mix, i’m afraid.

my shell fabric is a lovely wool tweed i bought at the flea market for $3. it actually has a herringbone pattern, which you can see on the swatch. it is lined with silky bemberg rayon – my favorite! i went with a pretty pink because, well, pink lining! the zipper is a faced slash zipper, hand-picked. i ran out of my original tweed fabric (or, rather, i had already done away with the scraps because that is how i roll), so it is faced with brown cotton… which i’m thinking was probably for the best, as the tweed is a slightly loose weave & tends to unravel. dropping in the lining was easy: i slashed a zipper opening & slipstitched it to the zipper. the top was basted to the top of the skirt shell, which is covered by the waistband. the lining is hemmed with a rolled hem and the shell has 2″ horsehair braid all around the edges – i used a little over 4 yards of braid! and i hand-stitched it all because i clearly have nothing better to do with my time.

circle! skirt!

circle skirt back

obligatory twirl photo
lol ~twirl

pink lining!
lining! 😀

circle skirt
i really love the shape the horsehair braid gives the hem. it has a very nice subtle flair. i actually have a petticoat i made using sugardale’s tutorial (which is AMAZING, by the way. this is a good ‘un, people!), but i prefer the way the skirt looks with the braid. also, i made my petticoat with horsehair crinoline, so it has great body but EW ITCHY.

so there you have it! my first circle skirt!

~lol omg~

another rooibos – v2.0

29 Aug

well, big moving day is this week – september 1st, which is this thursday! everything is all packed up, which is why i’ve been nonexistent as of late. no worries, though, i left my two current projects unpacked… so here’s a rooibos for y’all’s troubles!

i loved my first version so much, i decided to follow the rooibox sewalong on the colette blog for v2.0! well, “follow” is loosely defined – it was kind of half-ass. but it’s done! and – bonus! – my first garment for my fall 2011 wardrobe 🙂

i used very lightweight/fine wale corduroy – you can’t even tell that it is corduroy in these pictures, but i promise it is! the facing & pocket piping are sewn up with soft red plaid – from the ~plaiditude~ line at joann’s. i’ll be honest with you, i mostly bought this plaid because the name was so awful. haha! i was apprehensive because it is very thick & soft – almost like flannel – and i was afraid it would be too bulky with the corduroy. fortunately, the corduroy is very lightweight, so this fabric works as a facing. and it is sooo soft – the pockets are especially luxurious!

i kept the bodice at a size 4, but cut the waistband & skirt down to a 2, since it was a little loose the last go-around. should i make this dress again (and i probably will! i love this dress!) i will cut it down to a 0 – the 2 was still a little big! i took in as much as i could but i do feel like it’s a little loose. the belt helps a lot.

other than that, pretty straight-forward! too bad i can’t even wear it right now since it’s NINETY FREAKING FIVE DEGREES outside. oh, nashville. never change.

red rooibos
ameeeeeeeeerica!
it looks awful with my harlot-red hair, i know, but i’m pretty sure i’m going back to brown within the next month or so. don’t judge me!

my only issue with this fabric is that i can’t get the darts points to lie flat, no matter how many times i resewed them. they are almost completely flat irl, but the nap of the fabric highlights the point and, well… i look cold. oops. and it wrinkles pretty bad – i even ironed it before taking these pictures. oh well.

red rooibos
pockets!

red rooibos

red rooibos back

red rooibos - bodice

red rooibos - belt
i made the belt with lightweight belt backing & an old wooden buckle i found ages ago at the flea market.

red rooibos - collar

red rooibos - facing
facings are trimmed with red bias binding – the very last of my stash!

red rooibos - pocket
i love how the pockets turned out :3

love this dress so much! if you haven’t hollered at the rooibos yet, definitely give the pattern a chance – it’s a great shape/style & it’s sooo easy to make up!

red rooibos
seeya!