Archive | completed projects – new RSS feed for this section

Completed: Advance 8511 in Gingham

19 Jun

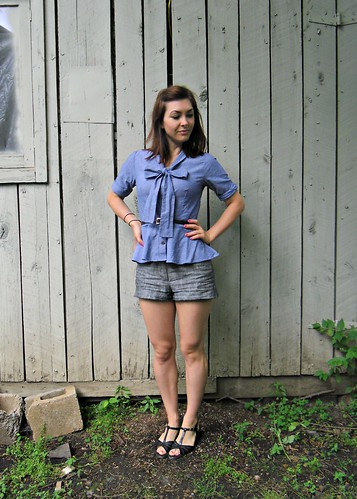
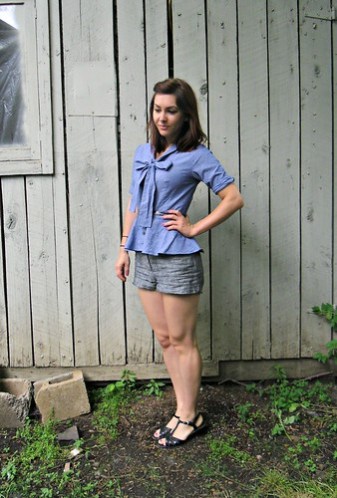
In an attempt to catch up on all the stuff I’ve finished that I haven’t posted yet (I just counted and there are 8… yikes), here’s a gingham top I made using Advance 8511, which is a vintage pattern.

Untitled

Gingham Top

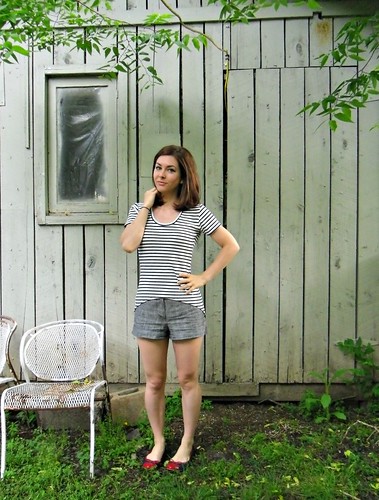
I also forgot to mention that the pictures are REALLY bad; this is what happens when you don’t wait for it to finish raining (hence, me standing on the porch) and then position yourself so that the sunlight is directly behind you, and then try to lighten the pictures and when they turn out grainy and grey, you say, “Eh, fuck it.” and post them anyway.

Not that I know anything about that.

Anyway, I’m sorry.

Gingham Top

This was a fun little pattern to make! It would have gone together a lot more quickly if I didn’t have so many fit issues. I don’t think the fit of the pattern was too bad – the size was a little big, but nothing too tragic – but rather, my fabric was a terrible choice for this pattern. But we’ll get to that in a minute.

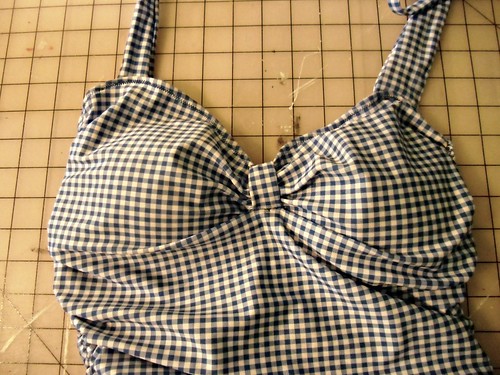
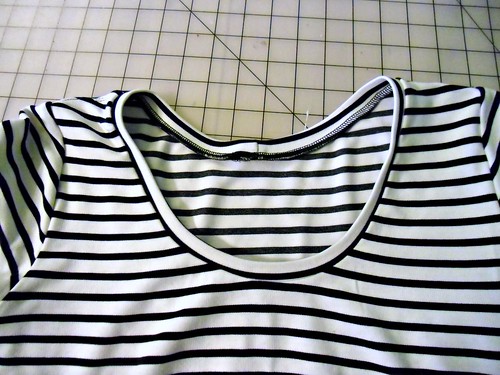
This pattern only has 4 pieces – a front, a back, a back neck facing (the front facing is all attached to the front as one piece) and the collar (no undercollar). The armholes are bound with self-made bias tape and it only uses 4 buttons. So economical!

Gingham Top

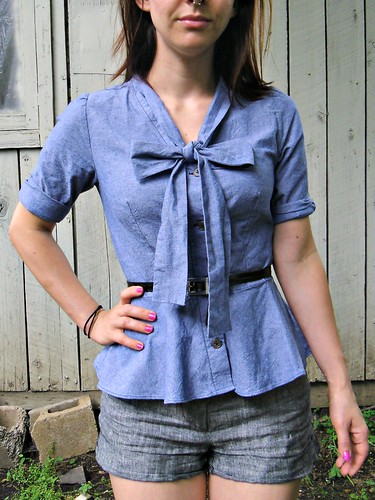
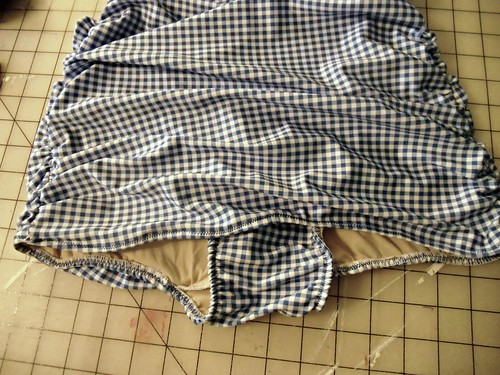
The fabric, again, is from Mood Fabrics in New York. It’s really lovely stuff – a cotton gingham seersucker with lots of texture and LOTS of stretch – but that damn stretch was nearly my undoing. I kept taking in the side seams over and over to get this shirt to fit (I know slightly-loose button-ups can look good, but not this shape/style with a woven stretch. Just… no), and I think I ended up removing a good 2″ from each side, possibly more. I don’t think stretch wovens are inherently bad (take a look at my fabric stash if you don’t believe me), but they really should not be used for a pattern that is already a little big to start.

Gingham Top

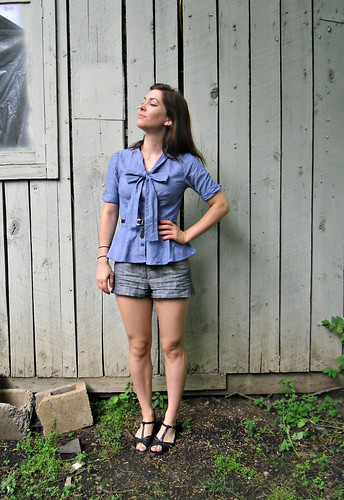
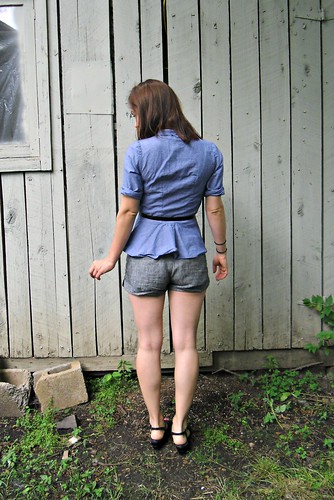
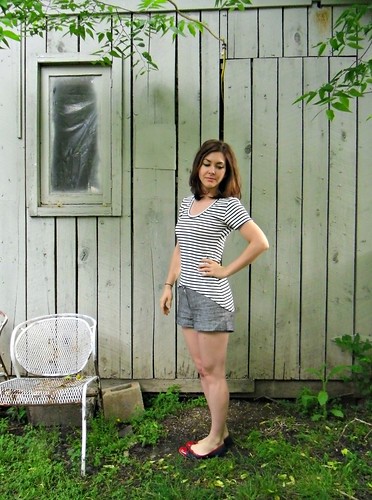
You can’t see too well (because the pictures are so bad, again, SORRY), but there are tucks at the front and back waist, and soft pleats at the neckline under the collar. I had to extend the front tucks to be longer (originally they were only about 1″ long) because they ended up giving me this weird fullness in an area where it wasn’t needed. I don’t know how I feel about the neckline pleats – they are beautiful in theory, but in this fabric I think it kind of looks like I messed something up and hid it under the collar. Oh well.

Gingham Top

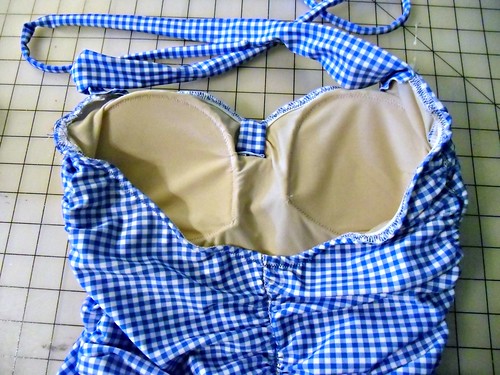
Hey look, Dolly went on a diet and now she can actually model my clothes again! And they BUTTON UP. Holy shit!

Gingham Top

Gingham Top

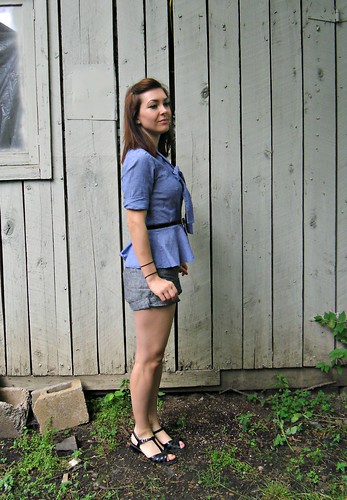
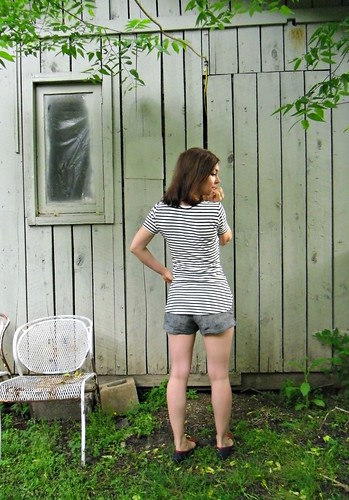
I had to add a pleat to the center back because it was MASSIVE compared to the collar. Seriously, the width of that pleat is how much bigger the back was than the collar. I double checked my pattern pieces and they don’t match either, so I’m assuming someone was hitting the bottle hard at the Advance pattern drafting headquarters that day.

Gingham Top

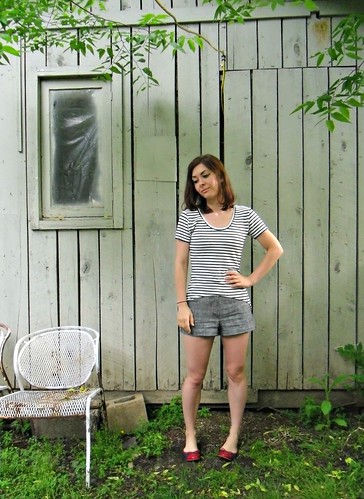
Despite the fitting issues, I do love my little shirt! Navy gingham goes with everything, surprisingly.

By the way… check out my new back porch!

Back Porch

I wish you could have seen what it looked like before (if you think it looks trashy now, let me tell you… this is an improvement). The previous renters laid this horrible fake hardwood all over the porch – you know, the kind that is supposed to go INSIDE a house – and didn’t even cover the whole flooring area. There were bare spots of concrete by the stairs. It was just drab and ugly and sad and we mostly ignored it for the past year. A couple weekends ago, we tore up the flooring (yes, we are renters, but I’m pretty sure my landlord dgaf), bought and painted the screen door, as well as hung the curtains and that tapestry. Now I am on the lurk for a tiny bistro table to fit back there.

Back Porch

Here’s another view – and there’s the old shed! I reckon you can guess where at least one of those chairs went 😉

Back Porch

Now we are actually inclined to hang on the back porch, IMAGINE THAT. If only I could figure out a way to permanently fend off the ‘skeeters…

Completed: A Chambray La Sylphide – AND THE BOMBSHELL WINNER

17 Jun

OMG you guys. I am so backed up with posting finished garments… this top is from TWO WEEKS ago. Woof.

Chambray La Sylphide

This is the La Sylphide from Papercut Patterns. I know, I keep meaning to make the dress version – it’s so pretty and floaty on the pattern picture, ahhh! – but this damn top keeps seducing me with it’s own version of awesome.

Chambray La Sylphide

This is pretty similar to my Dude’d Up La Sylphide – I sewed a size XS, took 1″ out of the back and no other alterations. The sleeves are just rolled up in these pictures, btw.

Chambray La Sylphide

The fabric is a chambray from – who else? – Mood Fabrics, which I bought while I was in New York. They have a lot of chambrays there and while I almost picked a gorgeous sateen-esque chambray that had just come in from some designer, I ended up with the more muted one because I wanted my shirt to be a little more rugged. Also, it was cheaper by like $2, ha.

Chambray La Sylphide

Ok, CONFESSION TIME: I TOTALLY stole this idea (for a chambray La Sylphide) from my friend Colleen, who suggested it first. Although, to be fair, she also voted pearl snaps – and this one just has grey buttons that I had in my stash. So, while not a 100% idea rip, it’s still an idea rip and I’m sorry.

Chambray La Sylphide

Also, I just realized I really need to repress the tips of those bust darts. HIIII.

Chambray La Sylphide

I wasn’t expecting to be able to wear this top with these linen shorts, but I actually quite like it.

Chambray La Sylphide

I really love this pattern because the top looks just as good with the peplum tucked, as you saw during Me Made May. As much as I love the peplum, sometimes an outfit just doesn’t work with it – like the Kelly skirt. Too much flare going on! And as much as I love making and hoarding clothes, I don’t need two chambray shirts… so I’m ok to let this one do double-duty.

Chambray La Sylphide

And I guess that’s it for this post.

OH WAIT NO IT’S NOT!!! We have a Bombshell winner! There were 354 total comments (my most commented-on post EVER, thanks guys haha), but I had to pull a few out for dupes/replies/no entries.

winner
It landed on my lucky number! GOOOOOO 7!!!!

… Which makes our winner Joanne!
Joanne
Joanne, I think this pattern will work out for you a lot better 🙂 And I want to see that neon floral fabric, because it sounds awesomeeee.

Thanks to everyone who entered! The pattern is available on Etsy for those who did not win. Don’t forget to join the Sewalong, it starts today! I can’t wait to see everyone’s Bombshells! 🙂

Completed: 40s Wool Crepe Wrap Dress

12 Jun

I know, this dress looks strikingly similar to the 40s wrap dress that Peter made for his identical cousin Cathy earlier this month, not to mention I’ve already dabbled in wool crepe for summer wear, as well as a full 40s wool crepe dress. Yeesh. Ya think it’s possible for me to branch out a little here? Nuh uh, no way. Not me.

Red Wool Crepe 40s Dress

I actually bought this fabric ‘way back when I was visiting Mood Fabrics in NY. I’m sure y’all are sick of hearing about it at this point, but heyyyy I’ll be working through that stash for at least the next couple of months. Just so we’re clear.

Anyway, fabric. As I mentioned before, I wasn’t planning on buying any wool crepe – but again, Carolyn talked me into it. She’s SUCH a good enabler! This wool crepe is actually a bit thinner and drapier than most wool crepes I’ve come across, making it a good weight for a smart summer dress (oh god, did I really just describe a dress as “smart”? I am totally stuck on this 40s thing…). With Carolyn’s advice, I underlined the entire dress in a lightweight cotton batiste, to combat the slight sheerness and make the dress more comfortable to wear in the heat.

McCall 6113

I used McCall’s 6113 to make this dress up. Isn’t the pattern gorgeous!? A friend found it (along with an entire paper grocery bag full of patterns – ranging from the 40s to the 80s, all in my size. I MEAN COME ON, WHAT ARE THE ODDS) in her attic, and gifted the whole stash to meee! Yes!! The pieces are intact, but unfortunately… the instructions are not. Wah wah. Thankfully, I’ve made a few wrap dresses in my day, not to mention I feel fairly confident in my assemblage skills, so I decided to give it a go.

McCall 6113 - pattern piece

… this is what I found when I pulled the pieces out. Not only is everything labeled (thank you, printed patterns!), but there are construction notes printed ON the pattern sheet, AND the notches are numbered in the order that things go together. PRAISE THE LORD. Although, in all honesty… I probably could have put this together without the help. But MAN, it was nice to eliminate most of the guesswork!

Red Wool Crepe 40s Dress

Despite the pattern being in my size, I did have to make a few adjustments to get everything to fit nicely (I generally like to go down a size or two – sometimes more – since I find most patterns tend to have more ease than I prefer to wear. Yep, even vintage patterns. What gives; am I just in denial of my size or something??), mainly in the form of taking in the side seams and shortening the shoulders, as well as hacking about 5″ off the length. I made a muslin for fit, but it ended up also giving me a great idea of how the pattern was put together so I had less guesswork with my wool crepe. Which is good, since wool crepe can be a sneaky little bitch when it comes to ripping out stitches.

Red Wool Crepe 40s Dress

In hindsight, wool crepe is definitely a little on the bulky side for the gathers in this dress. I’m afraid I look a bit boxy at the waistline here 😦 Oh well!

Red Wool Crepe 40s Dress

I do love the little tucks in the back 🙂

Red Wool Crepe 40s Dress

And the curved hem at the overlap.

Red Wool Crepe 40s Dress

I don’t know what’s going on with this picture, I just thought it was funny. ~Maybe she’s born with it, maybe it’s Maybelline~

Red Wool Crepe 40s Dress

Oh, did you notice my pretty embroidery? This all happened entirely on a whim – I finished the dress, put it on and looked in the mirror, and it just looked… red. Overwhelmingly red, and plain! I decided to add a small punch of (neutral)color by embroidering the shoulder detail. The embroidery is from the Hoop Love Vintage Transfers Flickr Group, and it’s all just a basic back stitch with french knots in the middle of the flowers. Ha, that sound so easy but it seriously took me about 6 hours to do. Embroidery is definitely a time-suck!

Red Wool Crepe 40s Dress

Here you can see the underlined inside, as well as the series of snaps and hooks that hold the dress together.

Red Wool Crepe 40s Dress

And there it is closed!

Red Wool Crepe 40s Dress

How many of you will groan if I finish this post with something like, “WELL I GUESS THAT WRAPS IT UP!!”

Sorry.
Not sorry.

The Bombshell Swimsuit: a Review and a Giveaway!

10 Jun

Remember this little teaser during the last week of Me Made May?

5/27

The pattern has been released so I can announce it now… allow me to introduce the Bombshell Swimsuit, from Heather Lou at Closet Case Files!

And now, I’m going to post pictures of myself in a bathing suit, on the internet. Eep.
(Also, can we talk about how Landon laughed at me when he saw me tromping out the backdoor in this swimsuit with these shoes? Excuse me, but if I’m going to stand half-naked for pictures on the internet, I’m at least going to make sure my legs look AWESOME, ok??)

Bombshell Swimsuit

When Heather Lou contacted me about testing this swimsuit pattern, I hadn’t even finished reading the email before my yes response was being sent right back to her (ok ok… let’s be honest here, it was more like OIASDL;GAJSD;LFAJSDF OMG FUCK YES !!!!!). I’ve never made a swimsuit, although this year I was ready to try. I had bought some fun swimsuit fabric and lining while in New York, and had a 70s bikini pattern that I planned to make up. But have you SEEN this sexiness?! Bikini went on the backburner, Bombshell hit my cutting table.

Bombshell Swimsuit

I won’t lie, there was a minute there when I hesitated, and then got scared. Like I said, I’ve never made a swimsuit before, let alone any sort of lingerie. As much as I looove working with knits and stretchy fabrics, sewing on elastic with that a zigzag stitch is totally uncharted territory for me. Not to mention I didn’t have enough fabric to muslin this, so it was really a testament of trusting the pattern sizing, and crossing my fingers in hopes I got it right the first time.

Bombshell Swimsuit

Spoiler: I did! 🙂

This is PRETTY CUTE, amirite?! Let’s see, I sewed the size 8 – I fit exactly into the 34-26.5-36 measurements – and the fit is SPOT-ON. I did not many any changes to the sizing of this pattern whatsoever. Dreamy, right? I used a gingham swimsuit lycra for the suit, and a proper nude swimsuit lining for the inside. I put bra cups in the front to avoid any nippage. The only thing I did not do was use proper swimsuit elastic. Ahhh, I’m so sorry! Truth, I was pushing really hard to finish this before I went on vacation, and I didn’t have a chance to run to the fabric store for swimsuit elastic (if you are sitting here thinking, “wtf are you on, Lauren, elastic is elastic is elastic” let me tell you that swim elastic is different because it won’t break down over time like standard polyester elastic). I did have some cotton elastic that *said* it was good for swimwear, but we’ll see if that actually stands the test of time. If not, I can always replace the elastic later. Ain’t no thang!

Bombshell Swimsuit

I LOVE THE WAY THIS SUIT LOOKS ON ME, THOUGH. Look at how flattering it is – and fully covered! Like I said before, I was very hesitant to actually wear this in the water, for fear that it would… I dunno, disintegrate and float away into the ocean, maybe? Shouldn’t have worried, though, as this baby stuck to me like a comfy second skin and didn’t budge at all while I was thrashing around in the waves. And I felt SO SWANK sitting on my beach chair, reading a book and sipping a cocktail.

Bombshell Swimsuit

As far as the actual construction… I really should not have worried! The instructions can look a bit intimidating at first glance (Me: “OH SHIT what is all this elastic stretch percentage talk here I can’t math this HELP”), but each step made perfect sense as I approached it. Making this swimsuit was very intuitive – for someone who’s never made swimwear before – and there are lots of pictures and words in the instructions to guide you along and hold your hand. If you still need help, there is now a Sewalong to really clear things up!

Bombshell Swimsuit
Bombshell Swimsuit
(I don’t know why these pictures turned the color all crazy. Sorry.)

Bombshell Swimsuit

So… a little tip about those bra cups. I actually tried to buy them while I was in NY, but I got SUPER overwhelmed by all the options available (Sonja and Oona can attest to the fact that I was lurking in the back of each store, putting cups over my boobs and trying to decide was size to get! HAHAHA). I ended up going home with none. Fast forward to this swimsuit, and part of my freakout was that I didn’t have any bra cups to put in – and no time to order online, let alone go to the fabric store. So how did I end up with cups, you might ask? I went to the thrift store, grabbed a bikini top from the 99¢ section, and cut the cups out! They fit just fine and I know they’re good for swimwear because, duh, they came out of a bikini 🙂

Now here’s the best part – Heather Lou has graciously offered up a freebie pattern to give away to one of y’all! YAY!!! BOMBSHELLS FOR EVERYONE!! Don’t let yourself get scared away from the concept of sewing swimwear – it’s really fun and YOU CAN DO IT.

For a chance to win a PDF copy of the Bombshell Swimsuit, leave a comment here on this post and let me know what fabric you’d use to make it! If you have a specific fabric in mind, or just a color or pattern that you’d love to see it made up in, do share! I’m nosy and I need to know! This giveaway is open worldwide – as long as you have email and can receive PDF attachments, you can win this pattern. I will close the comments next Monday AM, 6/17, so get yer entries in while you can!

GIVEAWAY IS NOW CLOSED

Bombshell Swimsuit

If you want to go ahead and buy the pattern, you can do so here ($10 only, hells yes). Thanks to Heather Lou, for letting me test this amazing pattern and also for providing a giveaway copy!

Good luck, y’all!

Refashioners Reveal!

6 Jun

The Refashioners of 2013 is in full swing over at Portia’s blog… have you gone to check it out yet? I confess, the posts are the FIRST thing I view every morning (yep, even before I check my email! What is WRONG with me!) because I can’t even wait. And hey, look who’s on there this morning… me!

Refashioners

Yep, Portia sent me a big orange sateen pencil skirt, which I turned into a cute little pair of booty shorts, a la Papercut Patterns Rite of Spring Shorts. Hot? You bet!

Refashioners

To see the full refashion in all it’s gory details, click over and check out my guest post! And do see the rest while you’re over there… Marie’s refashion in particular has me seething with jealousy. The good kind, anyway 🙂

Refashioners

Thanks so much, Portia, for letting me play this year! I’m so excited to see everyone’s makes!

Completed: The Cascade Skirt

3 Jun

I think this might be my favorite thing I’ve made yet!

For those of you who have been around for awhile, remember this amazing fabric?
Fabric from Macedonia :D
It’s from Macedonia – my best friend bought it for me while she lived there last year. I’ve hoarded it for over a year, waiting for the ~perfect pattern to come my way. That proved to be a bit tricky – the paisley motif is fairly large (bigger than my hand), so it definitely needed to be made with a pattern that didn’t have a lot of little pieces. Since I look awful in shift dresses, I thought a maxi dress or skirt would be a good way to showcase the fabric – a lovely, floaty cotton voile. But, almost all the maxi dress patterns I found either required stretch fabric, or gobs of yardage (and I only had 2 yards). So I sat, and I waited as patiently as I could.

Then I got the Cascade pattern for my birthday, and it was like the heavens opened up and started singing to me RIGHT THEN.

Cascade Skirt

I mean, that skirt is pretty heavenly, y/y?

I did have to make a few changes to get this pattern to fit on my short yardage – I had two yards at 60″, and the pattern calls for 3. I did take about 5″ off the back length (partially to preserve precious yardage, partially because I am not an Amazonian Long Legged Beauty like the model and thus did not need a skirt that came down to my ankles :P); I also used the waistband option that buttoned, rather than the ties – again, this saved a lot of yardage. Also, just a head’s up, but I chucked another 2″ off the length once I had the skirt assembled, as it was still a little long. I love the length now!

Cascade Skirt

I sewed the XS and other than taking up the length, I didn’t make any adjustments. This is a VERY easy pattern – it definitely has a lot of wow factor, but it’s super super simple to put together. Even with the french seams and the rolled hem that is FOREVER long, it came together very quickly.

Cascade Skirt

I even had time to throw together a little tshirt to wear with it 🙂 This is the Briar top, the cropped version with short sleeves. It’s basically the same as the ones I’ve made before, just shorter! I tucked the back into the skirt for these pictures, FYI.

Cascade Skirt

But let’s get back to that skirt.

Cascade Skirt

Fuck yeah.

Cascade Skirt

This shit totally makes me feel like Shakira, and I mean that as the highest possible compliment.

Cascade Skirt

And it’s perfect for showcasing this large print, so yay!

Cascade Skirt

The button-band of this skirt is actually really great for using special buttons, since you only need two.

Cascade Skirt

I love these buttons! I’ve been hoarding them for years; since I only had 2, I couldn’t find a suitable use for them. Nailed it 🙂
Also, I totally used purple thread. I didn’t have any pink on hand and I think the purple actually works really well 🙂

Cascade Skirt

Cascades! One thing to keep in mind if you make this pattern is that the wrong side of your fabric will show at the back (that is, assuming you don’t line it). So make sure your fabric is pretty on both sides! As you can see, mine is almost the same – just a little less bright.

Cascade Skirt

Cascade Skirt

Not much else to say here (sorry for the picture overload, btw – I got excited I guess, haha), but I’m so glad I found a use for my special fabric!

As a side note, guess who IIIIIIIIIIIIIII hung out with on Friday…
Oh nbd just hanging out with @elisalex !!!!!
Yep, that would be the lovely Elisalex from By Hand London!! EEEE!!! She was in ‘Murica for a week, and made an evening pit stop in Nashville, so OBVIOUSLY we met up and went dancin’! I also was there for her very first PBR (sorry, Oona! I know you hate that stuff, haha!) 🙂 She’s just as fun (and gorgeous!!) and you’d expect in person. It was a magical evening and it was STELLAR to meet her and I’m already trying to figure out how to save up enough to go visit HER! So hopefully soon there will be a LLADYBIRD-UK edition. Yes? Yes.

Also, one last thing!!

Refashioners

The Refashioners is live, starting today! Head over to Miss P’s blog to check out all the posts for the next two weeks 🙂

The lovely ladies involved this year are Karen, Tasha, Marie, ME (!!!), Zoe, Sally, Joanne, Liz, Dixie, and Elisalex. I am DYING to see what everyone made up, can’t wait!

Completed: The Briar Tshirt (with Bonus Thurlows!)

21 May

Hey, look, I finally got my ass into gear and hopped on the Briar bandwagon! Yay!! I know I’ve hated on the high/low hems in the past (aka mullet hems) but if anyone can make a high-low hem look like something I need in my closet, it’s Megan Nielsen, Our Lady of the High/Low.

Stripey Briar, Linen Thurlows

Actually, I made TWO!!

Red Briar, Linen Thurlows

Oh, and another pair of Thurlow shorts for good measure 🙂

Linen Thurlows

I mean, why would I pair my beautiful new tshirts with an old pair of shorts? AS IF.

Red Briar, Linen Thurlows

This red one is the first one I made (and sorry in advance for the overly saturated pictures – red is hard to photograph!). I used a super drapey rayon knit from Fabrics for Less in NYC; it’s delicious and airy and PERFECT for this kind of top. I don’t normally wear such loose-fitting clothing (and I know y’all are laughing because this is hardly loose-fitting, but it is for meeeeeee ok!), but I LOVEEE this way this looks and feels. Must make several more.

This version has a tiny pocket (which, yep, you totally can’t see) and I finished the neckline with a binding – partially because the fabric is soo drapey, it wouldn’t work with the normal stretched bands, and partially because I wanted to try a new technique! I must say, I’m really happy with now the neckline turned out. It’s perfect and flat and looks really good. Megan Nielsen, you are a binding genius.

Red Briar, Linen Thurlows

I was smacking a mosquito in this picture (the ‘skeeters were sooo bad this morning, ugh!), but I like that it shows the tshirt doesn’t gape out when you bend over. Nice!

Red Briar

For this shirt, I sewed an XS and took in additional bit at the side seams because it was a little loose. I also cut about 3″ off the length (I cut it off the bottom for this one, but for the next one I did properly slash and shorten the pattern pieces like a good seamstress ;)).

Red Briar

Oh, yeah, and I used the last of my neon yellow twill tape to stabilize the shoulder seams 😉

Stripey Briar, Linen Thurlows

I made the second version immediately after. Ha! This one is a fairly hefty weight knit from Mood when I was in NY. I’ve been hoarding this fabric for the months since and I’m so glad I went with this pattern because I think it’s pretty perfect! Of course, I got way too excited/ahead of myself and neglected to match the stripes at the side seams… oh well!

Stripey Briar, Linen Thurlows

This version is pretty much the exact same as the red one, except that I finished the neckline with a band instead of the binding. I actually tried the binding first, since I loved it soo much – but my machine was NOT having it. The fabric was too thick, anyway. So, band it is!

Stripey Briar, Linen Thurlows

Stripey Briar

I left off the pocket for this one, and also ended up taking in the side seams quite a bit – at least 1″. Since the fabric is fairly heavy, it looked weird all blousey. Like it was too big. This looks much better, and bonus – it looks great tucked in!

Stripey Briar

I really love this fabric and I wish I’d bought several yards of it, oh well!

Linen Thurlows

For the shorts, I don’t have much to elaborate on as this is like my squillionth pair. Haha! I used my TNT pattern and whipped these up in a couple of evenings (they are RILL easy after you made a bunch of them, just fyi!).

Linen Thurlows

For fabric, I used a beautiful, soft grey linen that I got from my new favorite local fabric source, Muna Couture. Muna’s shop is actually a dressmaking shop – and she makes some pretty incredible ball gowns and wedding dresses – but she also sells fabric. Not just fancy dress fabric (although there is plenty of that, and it is AMAZING), but also basic stuff for daily wear, like wools and linens and prints. I got this remnant from her and it was *just* enough to squeeze out some shorts. I love that they’re linen – so breezy and nice for summer! They do wrinkle a bit with wear, but not too bad 🙂 The white lining is fabric leftover from my Madeline bloomers.

Linen Thurlows

This is the only bummer about the shorts – I drew on the fly with my disappearing wax, and it didn’t disappear! WTF!!! I managed to fade it out a bit (put a piece of paper over it, applied heat, and then rubbing alcohol very sparingly, if yr curious), but it’s still pretty disappointing that you can see it. Sooo with that being said, important lesson learned here – ALWAYS test your marking utensils before marking on your fabric! DUH. I should have been doing that anyway, but I wasn’t, and now I know, and it won’t happen again. Learn from my mistakes 🙂

Side note, today is the last day to get 15% off at Sweet Little Chickadee, so get on it, son! Use the code LLADYBIRDBIRTHDAY and get to shoppin’! You could even get the Briar and Thurlows, y’know, if you wanted to be like me 😉 ha!!

Another side note, it’s my birthday todayyyy!! Yay!! Happy birthday to all my birthday twins (there were several of you, yay 5/21!!!) and all the other May Babies 🙂

me & my dad :3

Here is my gift to you, baby L with my dad 🙂 AWWWW!!!

Completed: A Hawaiian Lonsdale

13 May

I actually had this finished a couple of weeks ago, but it’s taken me this long to post since I had to get a special bra to wear with it. And by “special,” I mean strapless. I don’t know why I’m talking about my bra right now, let’s talk about this dress instead!

Lonsdale

This is the Sewaholic Lonsdale dress. REAL TALK: When this pattern first came out, I had absolutely no intention of sewing it up as I assumed it would be mega unflattering on me. Not because of the bra issue, like most people pointed out – I have no problems with wearing a strapless bra, it’s like a staple in my lingerie wardrobe (and yay that I finally have one that fits!) – but because the bodice doesn’t have any darts, which I figured wouldn’t work with a large bust. Also, this pattern eats up a lot of fabric and I just wasn’t feeling it. So no Londsale for me, at least not while everyone else was snapping them up.

Lonsdale

While I was in NY, we had a mini sewing stuff swap (which I’m REALLY sad I missed out on dumping into… I will have to come back with a suitcase full of patterns and we can do it again, ok?? Hmm plane tickets appear to be cheap right now…) and Sonja added this to the pool, encouraging me to try it. So I snapped it up and found this fabric the next day… it’s from Chic Fabrics, and it was $5 a yard. HELLS YES. Lonsdale, comin my way!

Lonsdale

As I was trying it on (no muslin, and not really even a tissue fit… I just based my size off the finished measurements and started cutting), I realized that this dress is SUPER cute and flattering. A bodice with no gathers or bust darts, who woulda thunk?

Lonsdale

I also totally get why everyone keeps freaking out over the skirt, it’s really flattering!

Lonsdale

(Not really sure what I’m doing here… smelling the breeze, maybe?)

This is a size 0, by the way. I did not make any alterations to the pattern, except my zipper insertion (lapped instead of centered) and I cut something crazy like 5″ off the hem. I like my skirts to hit above my knee.

Lonsdale

Sorry for the shit picture and my sad little droopy bow, but isn’t the back cute?? I LOOOOVE that the straps are adjustable, since I can never seem to get them right on the first/second/eighth try. Now I don’t have to worry, whoop whoop.

Lonsdale

I definitely want to make a couple more of these – or even just Lonsdale skirts, gawd – as I can see myself wearing these aaaall summer. I think you could probably reduce the amount of fabric needed, too, with some careful planning. Part of the bulk of fabric yardage comes from the bodice being double-layered (you can see the second layer a little bit in my close-ups, as my fabric is slightly sheer), and the ties are one big long piece that goes into forever. I think this could be REALLY fun with the lining being a contrasting fabric – you’d see the contrast in the ties and around the neckline.

Lonsdale

Here’s a terrible close-up. Sorry! The sun was REALLY bright and I don’t do that whole wait-until-it-gets-less-bright patience thing very well 😉

Lonsdale

Lonsdale

If you’ve been holding out on this pattern because of the large bust issue, maybe this will sway ya 😉 It swayed me, anyway!

Can’t wait to bust this shit out on my vacation! LONSDALE 4 LIFE.

Completed: Rite of Spring Short-Shorts

6 May

Wooohoooo y’all, Katie was NOT kidding when she described this pattern as “Pin-up style shorty shorts.” These puppies are SHORT.

Rite of Spring Shorts

‘Scuze my white legs. Sorry not sorry.

Rite of Spring Shorts

These are the Rite of Spring shorts from Papercut Patterns and I am 1000% in LOVE with them. I couldn’t imagine how they were going to turn out based on the pattern art and photos – in some ways, they kind of look like underwear, almost – but having made them, I do they think they are definitely just like those pin-up style shorts that we are always gawking over in Time Magazine photos or whatever.

Rite of Spring Shorts

Just be sure you’re ok with showing a LOT of leg because, well, they’s short.

I cut these in the very smallest size – XXS – and shaved an extra 1/4″ off each seam to get a close fit. That’s it! I am actually surprised – and DELIGHTED – at how well these fit straight out of the package, especially considering how much trauma I went though to get my Clovers to fit. I was expecting to have to mess with the crotch length, the depth, the rise, all that shit – but they’re pretty perfect. So yay!

Rite of Spring Shorts

I have so many favorite parts about this pattern, I don’t think I can just narrow one thing down. I love the curved side seams that make your waist look half the size it actually is. Piping is optional – but if you’re making these, I strongly encourage the piping, especially if you’re working with a busy fabric.

Rite of Spring Shorts

I love how the back curves down too – for a little extra butt coverage. I think my very very favorite thing is that the back hem is actually faced with self-fabric – so if it flips up, you still see the right side. I mean, I might be showing asscheek or whatever but GOD FORBID you see the wrong side of the fabric amirite 😉

Oh, and the rise is super high – like past the belly button high – so these are totally suitable to wear with crop-tops.

Rite of Spring Shorts

And look at how the hem flips out on the sides! DARLING, JUST DARLING.

Rite of Spring Shorts

Putting these together was surprisingly quick and easy. There are only a 4 pieces, and even with the piping and the zipper I still had them done within a couple of hours. They also just use the tiniest scrap of fabric (I mean, duh, they’re tiny as it is – but sometimes shorts suck up a surprising amount of fabric, you know?). I should’ve measured, but I think I used something like half or 5/8 yard. The fabric is actually leftover from my Miette Wrap Skirt, and the piping is leftover bias binding from my Blue Lace Robson Trench.

Rite of Spring Shorts

The pattern calls for an invisible zipper in the back, but I was in major stash-bust mode so I subbed in a lapped zipper. I think an invisible zipper would definitely look nicer, but this isn’t so bad!

Rite of Spring Shorts

I’ll confess, I was hesitant about adding a zipper right up the middle of that back seam because I wasn’t sure if it would backfire and look terrible. I don’t think it does, though – it’s totally inconspicuous!

Rite of Spring Shorts

I didn’t do the best job of putting these together, as they’re more so a wearable muslin (oh you just wait and see what I have planned for this pattern…), but I think they’ll actually get a lot of wear during Me-Made-May! Polka dot shorty shorts, yay!

Rite of Spring Shorts

Here you can sort of see the polka-dot piping. Unfortunately, my fabric had the polka dots printed so that they kind of don’t show up on the bias strips… so my piping is only half-assed polka dots. Oh well!

Rite of Spring Shorts

If you’re lurking on this pattern as hard as I was, be aware that Papercut Patterns is currently offering free worldwide shipping. HOT DAMN, Y’ALL. Butt shorts for everyone! 😀

Completed: The Blue Lace Robson (!!!)

2 May

Ok folks, here ya go – big reveal time!

Lace Trench

LOOK THAT GORGEOUS BLUE TRENCH COAT.

Lace Trench

JUST LOOK AT IT.

Lace Trench

For the full nitty-gritty of this project, see my posts part 1 and part 2 for the making of.

Lace Trench

If you just want quick facts, here ya go! The pattern is the Robson Coat by Sewaholic Patterns. I cut a size 2 at the shoulders/neckline, graded out to a 4 at the bust, and then down to a 0 at the waist/hips. I removed about 3″ of length from the bottom, and about 1″ of length from the sleeves.

Both of the main fabrics are from Mood – the blue lace for the top (and yeah, sorry, but I bought the last of it! HA!), and the cotton sateen underlining. The polka dot batiste I used for the bias stripes came from my local fabric store. I’m sure Mood had something perfect in the store, but it’s hard to color-match from several states away (and if you were wondering… I had one of the employees help me pick the underlining to make sure I had the right color).

Lace Trench

Fair warning: this coat eats up a LOT of fabric! Not the full 6 yards as suggested by the pattern envelope (at least not in my size!), but I still wouldn’t recommend this for a very expensive fabric unless you are just really really in love and willing to deal with the cost. I spent about $175 on materials for this coat – that includes the blue lace, the navy underlining, the polka dots that I used for the bias strips, the interfacing, the thread, and the buttons. Yes, part of this *was* subsidized for Mood as part of the Mood Sewing Network, but I still had to pay quite a bit out of pocket. I’m not saying it’s not worth it – because it isssssss – but be forewarned that this coat can get very very expensive, very fast.

Lace Trench

Still, it’s a helluva lot cheaper than that $2000 Burberry trench I see floating around Pinterest. Forreal!

Lace Trench

Plus, it’s not a boring neutral color. That fucker is BLUE.

Lace Trench

Anyway, I used a little under 4 yards of 54″ wide fabric to cut the coat. Keep in mind that I did shorten the length (and my ONLY regret is that I shortened at the hem instead of at the waist because the pockets are a bit low. Oh well! I don’t use pockets that much anyway). My cotton sateen was 50″ and I used about 4.5 yards of that. For the bias tape, I bought 2/3 yard of 45″ fabric and made my own 1/2″ tape…. I did not use the whole 2/3 of the yard, as I stopped when I got to 20 yards. I did however, end up using about 15 yards of the stuff to bind my seams. I know the envelope calls for less than that, buy an extra package if you’re unsure!

Lace Trench

Lace Trench

I can wear the lapels up or folded down. Which one do you like better?

Lace Trench

Lace Trench

Here it is open. Omg I felt like such a flasher taking that picture, ha!

Ok, I’m running out of things to say so here’s a picture dump.

Lace Trench

Lace Trench

Lace Trench

Lace Trench

Lace Trench

Lace Trench

Lace Trench

I could not be more thrilled with my finished coat – all the workings of a classic trench, but sewn up in a beautiful (and colorful!) lace! Yes!!

Special thanks to my friend Jenna for taking these gorgeous pictures (oh yeah, you didn’t think I took these, did ya? :)) and capturing our beautiful city in the background. She is the best, and if you don’t already follow her you are SORELY missing out. Also, sorry not sorry for the picture overload… I’m just elated, ok!?

Welcome to Music City, y'all!

Yay Nashville!