Tag Archives: boylston bra

Completed: Cherry Print Knit Boylston Bra

4 Apr

What’s up everyone! I’m bringing it back a little old school today with a lingerie project – yes! I haven’t shared one of these in ages, since I feel like they can get a little redundant to talk about (I mean for me specifically, as the writer. How many times can you discuss the same pattern repeatedly before you get bored as hell? Yeahhh I’m not doing that!). But this project in particular is a little different and I think warrants its own blog discussion. So here we are!

Also, side note – I’m in the airport lounge as I write this and despite trying to find a sneaky little place where no one could see behind me, I think I failed and undoubtedly there is someone who is watching me upload photos of my underwear to the internet. So, there’s that too.

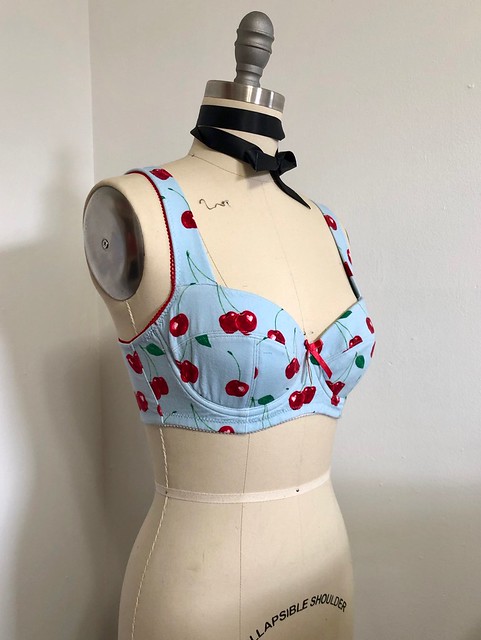
Boylston Bra made with Cherry Cotton Knit from Mood Fabrics

Anyway, about the bra in question! This is the Boylston pattern from Orange Lingerie. I’ve made this pattern a few times in the past, but it has admittedly been a minute since I whipped one up. My cup size has changed in the past couple of years, and while I wasn’t entirely sure what the new size was, I knew it wasn’t whatever I had been previously sewing. This is a balconette-style pattern, but it was, um, VERY balconette on me haha. I know one of the biggest hesitations that people have with starting to sew lingerie is the understanding that your first project(s) may not fit! And while I totally believe that it’s not an absolute waste if you were able to learn from the process, it still really sucks to make something that doesn’t fit the way you intended! This is where I stood with Boylston (and honestly, most bra patterns) until I finally sucked it up and just tried out a cup size bigger to see what would happen. And guess what?? EVERYTHING WAS FINE.

Boylston Bra made with Cherry Cotton Knit from Mood Fabrics

Boylston Bra made with Cherry Cotton Knit from Mood Fabrics

Boylston Bra made with Cherry Cotton Knit from Mood Fabrics

So that’s where this bra comes into play! I made the size 30DD, which is exactly the right amount of cup coverage (finally!). For fabric, this bra is made with… wait for it… jersey knit! Yes! Ever since this pattern was released, I have been DYING to try it in a jersey, which I believe was originally suggested by Norma in the big reveal. Since this pattern relies on foam cups, you can use pretty much any fabric as that area is already stabilized. I fell in love with the idea, but honestly, it took me almost this long to find a fabric that I felt deserved to be made into a bra.

My jersey knit is from Mood Fabrics and it was one of those last-minute purchases that grabbed my attention when I was filling up my cart and I just couldn’t say no. Y’all know I love a good cherry print – however, I don’t wear light blue. But it was on saleeee and it was cherriessss and I just… well it arrived at my house and I had to do something with it. This print was a great contender for turning into a bra as it is reasonably stable (not super flimsy and lightweight, like the knits I like to wear as garments) and the print is small so it’s not totally cut up by the pattern pieces. This specific fabric is unfortunately sold out, but Mood Fabrics has tons of other fun prints available on their website. The Cotton Jersey Prints specifically is the line that I pulled this one from, FYI!

Boylston Bra made with Cherry Cotton Knit from Mood Fabrics

After I pre-washed my fabric, I cut a small yardage off and block fused the entire thing with lightweight fusible weft interfacing. I wanted the knit fabric to be stable so that it would be easy to handle, and also work for a bra pattern (this pattern does not call for stretch fabrics, except at the very back band, so you want to stabilize your fabric in order for the garment to fit properly). Once the fabric was fused, I then cut all my pieces except for the back band (which, again, needs to remain stretchy). I also cut the cups out of foam, the bridge and frame pieces with sheer cup lining, and the back band pieces with medium weight powermesh. I like my bras to be lined (hence the sheer cup lining) and the powermesh was needed to keep the uninterfaced knit back pieces from stretching out over time.

Boylston Bra made with Cherry Cotton Knit from Mood Fabrics

Once all that was cut, this project sat in a WIP box for about a month. Ha! (not for lack of wanting to sew – but for traveling + moving house!) But once I was back in Sew Mode, this came together in a couple of hours! I raided my stash for notions and was pretty pleased with how well everything matches! I’m actually trying not to stash lingerie notions anymore (it can be really obnoxious to have everything you need for a project except some weird width of elastic in a particular color, or whatever) and in the future will just buy on a per-project basis. But in the meantime – I need to work through my stash. Other than the cherry fabric, this was 100% a stash-busting project! Yeah!

One question I get pretty frequently whenever I post a lingerie project is whether the pattern (whatever pattern I’m sewing) is good for a first-time bra sewer. While I do generally recommend Orange Lingerie as a good resource for first bra patterns (my first bra was a Marlborough!), I honestly would not recommend the Boylston for your *very* first. Making and inserting the foam cups can be a little confusing, and if you’re already embarking on a new adventure in lingerie then you probably don’t want to add any more stress than necessary! Once you’ve sewn up a bra or two and understand the general idea of how they are put together, though, I think this is a great next project!

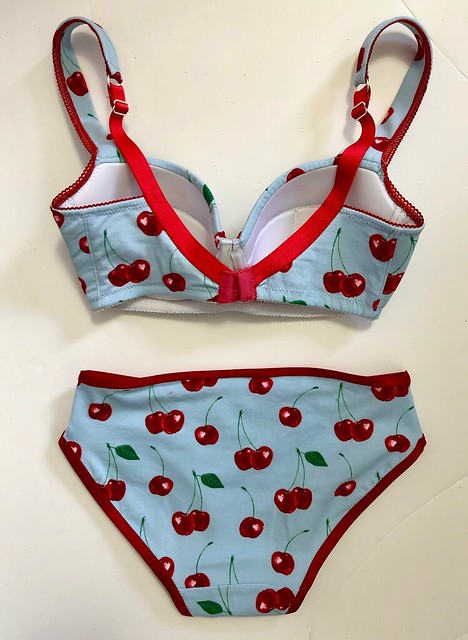
After I finished the bra, I had enough fabric left over to make some matching undies!

Acacia Undies made with Cherry Cotton Knit from Mood Fabrics

I used the knit fabric (uninterfaced, to retain the stretch), and finished the edges with red fold over elastic. The pattern is the Acacia Underwear from Megan Nielsen patterns. These were super fast to sew and look really cute with my new bra!

Boylston Bra made with Cherry Cotton Knit from Mood Fabrics

Boylston Bra made with Cherry Cotton Knit from Mood Fabrics

I actually have tons of this fabric leftover (I think I bought 2 yards and lingerie sewing just barely sips on fabric yardage), so I may make some matching knit PJs. It’s a little too thick for what I like to wear as a tshirt, and the color isn’t something I’d reach for in the every day – but who knows, maybe wearing this set will change my mind 😉

Boylston Bra made with Cherry Cotton Knit from Mood Fabrics

Anyway, I think I’ve waxed poetic enough about this pattern *and* I’m pretty sure they just swapped out breakfast for lunch at the buffet which I desperately need to investigate so consider this blog post officially done!

Have you tried this pattern before in a knit fabric?

** Note: The fabrics used in this post were provided to me by Mood Fabrics in exchange for my participation in the Mood Sewing Network. All opinions are my own!

In Progress: Silk Polka Dot Boylston Bra

10 May

sewing with spiegel boylston bra

Hey everyone! I’m back with another bra post… again! This time, I’m trying something a little different though – I have made this bra *entirely* on my Spiegel 60609 machine. If you’ve followed my past bra posts, you will know how much I love using my old standby Bernina 350 for assembling lingerie, especially since the variety of feet that I have make things super easy. However, I was really curious to see how the Spiegel 60609 held up when it involves fussy lingerie sewing, so I used it for this project. And now I’m going to report my findings to you!
A few things I noticed that I think bear mentioning:
– I’m not a huge fan of the way the seam allowances are marked on the throat plate of this machine, as it makes it a little difficult to get a precise 1/4″ seam allowance. However, this is really easily solved by laying a piece of tape or even a Post-it note where your 1/4″ line should be. This is what I did, and it worked fine.
– The feed dogs (what move under your needle to push the fabric along) on this machine are AMAZING. Seriously, I didn’t have to pull my thread tails at all when starting or stopping a seam. The machine just pushed everything through without any snags or chewed up fabric – even with using silk crepe and teensy 1/4″ seam allowances. Color me impressed!
– The one downside I see to this machine is that you can’t move the needle in either direction – which is what I typically do to get accurate edgestitching (on my Bernina, I use the stitch-in-the-ditch foot and move the needle all the way to one side, it gives me a perfect 1/8″ without having to even really think about it). With that being said, I used the clear foot that comes with the Spiegel 60609, and found that the opening off the center of the foot is exactly 1/8″ from the needle. As long as you line this opening with the seam that you are edgestitching, you will get an accurate stitch. It does mean that you need to pay attention and maybe sew a little slower – but the 60609 also has a speed dial to slow things down, so no excuses now! 🙂
– There are a BUNCH of zigzag stitches on this machine!! For elastic insertion (which I’ll go over next week in part 2), I used stitch #226. I found the width to be perfect for what I needed.

The pattern I am using for this bra is the Boylston Bra from Orange Lingerie. This beautiful balconette pattern works for both foam cups and fabric cups, and features self-fabric straps and a really nice rounded shape. I’ve made it a few times in the past, and it’s a favorite of mine 🙂 I am making the size 30D.

For fabric, I am using silk crepe from Mood Fabrics (look familiar? I used it to make a top! Yay for lingerie using tiny scraps, ha!) for the outer, black power mesh from Tailor Made Shop for the back band, sheer cup lining from Bra Maker’s Supply, and black foam bra padding also from Bra Maker’s Supply. The elastics and notions are from various points in the NYC Garment District – I just have a giant stash that I pull from as I need stuff 🙂

I hope you like watching step by step progress shots, because that’s what you’re getting this week! 🙂

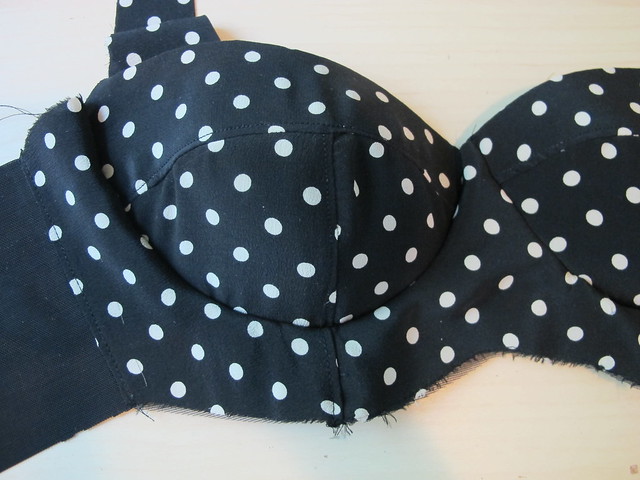
The pattern has you start by assembling the cups – there are 3 pieces that are sewn together with a 1/4″ seam allowance. Don’t know why, but I don’t have a picture of this step. You’ll just have to trust me haha 🙂 Make sure you backstitch at each end, as it’s really easy for stuff to come unraveled and make your (lingerie-makin’)life hellish!

Making a Boylston Bra

For the foam cups, I cut all the same pieces and remove the 1/4″ seam allowances (more info on this here!). Then you butt the edges up against each other and attach them – in the same order as you sew the fabric cups – using a zigzag stitch.

Making a Boylston Bra

Here is what the pieces look like when they’re attached. Pardon my yellow marking – those are the pattern notch markings (I use wax instead of snipping, since the seam allowances are so tiny).

Making a Boylston Bra

Topstitching the pieces as instructed is also especially important, since a lot of fabrics used in lingerie don’t press very well. Here is what I was talking about in terms of using the foot as a topstitching guide – if you line up the open side with the edge of your fabric, as shown here, the needle will automatically hit exactly 1/8″ from the edge.

Making a Boylston Bra

The fabric straps are folded in half and then sewn to the top of the cups, as shown, with the folded edge facing the center of the bra (the raw edges will be finished with elastic eventually).

Making a Boylston Bra

Next, the foam cup is placed against the right side of the fabric cup, and pinned into place along the top edge. I also like to run that edge of the foam under the serger (with a 3 thread overlock) just to help flatten things a bit more, but that’s an optional step. Sew this seam at the normal 1/4″.

Making a Boylston Bra

After sewing, you flip the foam to the inside and pull the fabric cup taunt to the edges, and pin everything down. This might require a bit of finessing with the fabric, which is normal! It’s also normal to have some excess fabric that needs to be trimmed off. I love how this finishes the top edge of the cup and also catches the strap! Once everything is as smooth as you can get it, go ahead and baste around the raw edges to secure everything, and then trim off any excess fabric so it’s even with the edge of the foam.

Making a Boylston Bra

Assembling the bridge, cradle, and band are similar to assembling the cups – use 1/4″ seam allowances and follow the topstitching guide in the pattern. I chose to line my bridge and cradle with sheer cup lining, because it gives some extra stability to the silk crepe. Also, you can use the lining to encase the raw edges so the inside is nice and clean! You just want to lay your pieces so the fabric is on the right side, and the cup lining is on the wrong side – with the seam you’re attaching sandwiched in the middle. After sewing the seam, the outer fabric and cup lining flip up to cover the raw edges.


Making a Boylston Bra

After the cups and bridge/frame/band are assembled, then you put them together (and THEN it really starts to look like a bra!). This part can seem a little fiddly, but it’s doable as long as you go slow and be mindful of what you’re sewing (again, slowing down the speed on the machine helps a lot). I find it helpful to use less pins – since you’re sewing a convex curve to a concave curve, you want to be able to stretch and pull the curves as you approach them (and pinning too much can limit that, at least in my experience). I pin the beginning and end of the seam, and the notch points marked on the pattern. That’s it! Another tip is always start at the center front – it’s very important to get those edges lined up perfectly.

Making a Boylston Bra

Once everything is attached and I’m happy with how it looks, I trim down the foam seam allowance to reduce bulk. Time to add the underwire channeling! 😀 😀 😀

Making a Boylston Bra

I find this step a little weird to explain and even harder to photograph, so here’s a picture of the instructions. The channeling gets attached to ONLY the cups of the bra, right on the seam allowance. Ideally, I like to be right along the seamline that I just sewed, but close enough is good enough 🙂

Making a Boylston Bra

Again, the little notch in the clear foot that comes with the 60609 is perfect for lining up a 1/8″ seam allowance when attaching the casing. Sew all the way around until you get to about 1/2″-3/4″ away from the edge at the underarm, and leave that part unsewn (this will make it easier to attach the underarm elastic).

Making a Boylston Bra

Here’s the casing after it’s been attached! For now, only one side is sewn down – the other side will be sewn once some of the elastics have been added.

Making a Boylston Bra

I think that’s enough bra talk for today! 🙂 Next week, I’ll go over the steps for attaching the elastic and finishing the bra – aka THE FUN PART – and showing my completed Boylston! As always, let me know if you have any questions about this part of the process! 🙂

One more thing! We have a giveaway winner from last week! After some careful contemplation (aka Random Number Generator, hey-o!), our winner issssss….

winner

Yay congratulations, Rosemary!! I can’t wait to see what you make with your voucher! 😀

Thanks to everyone who entered the giveaway – and big thanks Contrado for your awesomely generous prize donation!

I’ll be back next week to finish that bra! Stay tuned!

Completed: Black Lace Boylston Bra

11 Mar

Ooh la la, y’all!

Black Lace Boylston bra

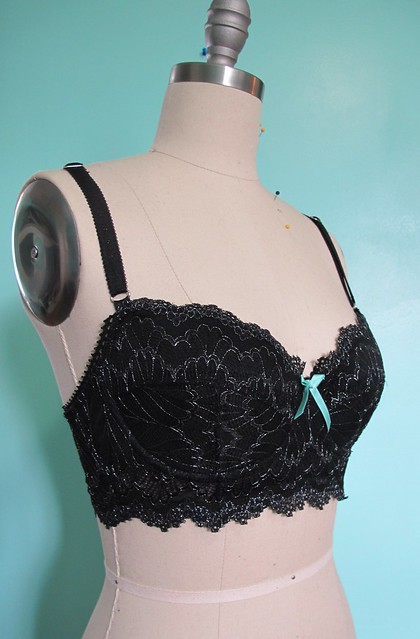
Hands down, this is definitely the sexiest bra I have ever made. Although, to be fair, it’s kind of hard to steer away from sexy anything if it involves black lace amirite.

Black Lace Boylston bra

It’s been a couple of months since I made this thing, which means I am going to have to dig deep into the recesses of my brain to try to remember all the little construction tidbits. On the flip, however, it does mean that I’ve worn it a lot in that time and can seriously vouch for the fit and comfort factor.

Black Lace Boylston bra

Black Lace Boylston bra

I used the Boylston bra from Orange Lingerie as the base for this pattern. Having made this pattern several times before, I did not make any additional changes to the fit (other than my previous edits to the back band). I sewed a 30D, which is in line with the size I wear in RTW. The big changes I made were in terms of construction – namely, trying to figure out how to incorporate both foam cups and a lace outer, while retaining all those cool little scallops that make the bra so pretty. I think this rendition is pretty good, although there is definitely room for improvement in future versions. Always learning 🙂

Black Lace Boylston bra

Black Lace Boylston bra

Like I said, getting that form cup + scallops gave me a bit of a head scratch, so I took to some store-bought bra snooping to try to figure out how to make it work for this lil guy. It appears that most RTW bras have the foam cup and lace outer cup sewn separately, and then tacked together at the top in a few places. With this in mind, I finished the top edge of my foam cup with a simple 3 thread overlock (it’s not really imperative to do this, as the foam doesn’t unravel – but it does look nice!), and then simply laid the constructed lace cup on top and lined the innermost points of the scallops with the edge of the foam cup. Rather than tack it down, I actually stitched all the way across. The lace is super busy, so the stitching doesn’t show- but it’s very secure. For the remaining edges of the cup, I followed the pattern as instructed.

I also had to figure out how to do the straps, as the patterns calls for self-fabric straps with a little bit of strapping elastic at the back. I actually spoke with Norma (she of Orange Lingerie, and the mastermind behind these patterns) at length about this when I met with her in Boston, and while she gave me some really good advice on how to do the fabric straps with a scalloped edge – I ended up not having enough lace to cut them! Whomp whomp. Maybe for the next one. For this particular bra, I had to stick with regular elastic bra strapping. I sewed the underarm elastic as instructed, stopping right where I planned on adding the straps (as the pattern is written, you attach the fabric straps and then sew the underarm elastic all the way up. Since I had no fabric straps, I had to improvise!). When I trimmed the excess elastic, I made sure to keep intact scallops so things looked more intentional. The front of the straps are attached with the rings going through a tiny piece of elastic – again, something I snooped on existing bras. The back is attached the same way the pattern instructs.

Black Lace Boylston bra

To get the scallops along the bottom, I used the same method of flat attaching the elastic, instead of turning it back, as I did on my lace Watson bra. Since having finished this bra, Erin has published a wonderful post on how to make a lace frame bra, one method which gives a beautiful gothic arch along the bottom (instead of the straight band you see here). I am really excited to try that method!

Black Lace Boylston bra

I really love the lace I used for this bra! This is the second piece that was given to me by Tailor Made Shop, and if it looks familiar – it’s because I also have some in navy (which I made into a lace Watson bra). It looks like the shop is out of this stuff in black, but they do have navy, pink, purple and white 🙂

Because the lace is a bit lightweight, I underlined all the pieces. The bridge and frame have sheer cup lining for stability (mine is from Bra Maker’s Supply, but you better believe I am excited to restock from a US source haha!), while the band pieces are underlined with power mesh. I didn’t underline the cups, since there are foam cups and that’s pretty supportive enough 🙂

All elastics and notions are from my stash, which the exception of the scalloped bra strapping – which is also from Tailor Made Shop 🙂

Black Lace Boylston bra

Black Lace Boylston bra

Black Lace Boylston bra

Fit-wise, this is one my best yet! The bra is super comfortable, super supportive, and gives me a really nice shape (hell yeah my boobs look awesome in this thing). It’s not a push-up, but there is definitely some lift action going on in there. If you would like to see a picture of me wearing it, click here. This should go without saying, but, again, PLEASE do me a solid and don’t post this image all over social media 🙂 Posting strictly for science purposes.

My only complaint is the horizontal wrinkle along the bottom of the bridge. It only shows on the outside, when I’m wearing the bra, which leads me to believe it’s from excess lace fabric in the front (the inside stays smooth regardless). Ugh! It’s not a huge deal – the bra is still wearable and absolutely no on has noticed (or at least pointed out) the wrinkle, so I ain’t gonna let it bother me. But the next one will be wrinkle-free, hopefully 🙂

Black Lace Boylston bra

Ok, I think that wraps up about all the bra talk I have in me for today! 🙂 Happy Friday, y’all!

Completed: Boylston Bras; Take 2 & 3

21 Aug

More bras this week! Yay!

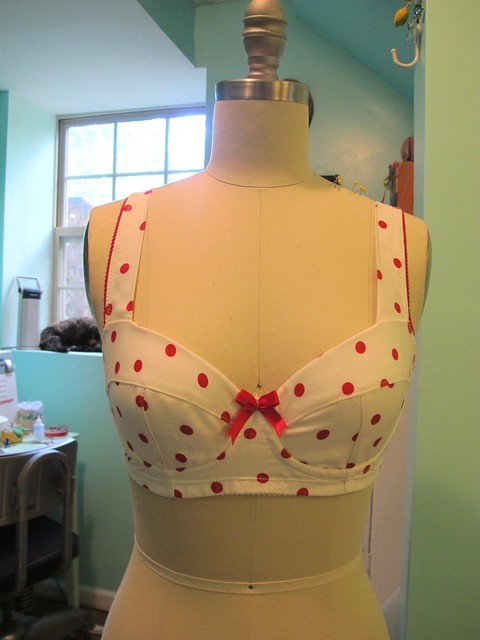
Boylston Bra Starting with the prettier one, even though I actually made it second. For both of these bras, I used the Boylston Bra pattern. Guys, I really really love this pattern. I love how it comes together, I love the pretty details (like the fabric strap!), I love that the fabric requirements are so easy to work with (very little fabric, very stable fabric, foam cups, etc), and I just love the shape it gives! It’s a very pretty bra and the pattern is so good. This polka dot bra was the result of a pretty good stash-bust, apart from the foam. Since this pattern is designed for firm woven fabrics – especially with the addition of the foam cups – that means you can make it out of pretty much anything. Sooo I’ve been going kind of crazy with my fabric scraps! I especially thought that this sweet polka dot rayon (the same fabric I used to make my Simplicity mock-wrap dress that I posted last week) would be extra adorable as a bra.

All I had to do was order foam – I had nude and black in stash (from Bra Maker’s Supply, because their stuff is the best). Unfortunately, the Sweet Cups store (the US version of Bra Maker’s Supply) didn’t have any white (see what I mean about limited selection? Wah!), and I wanted white. I bought it from this Etsy shop, which is apparently in the process of closing now 😦 I’m not really sure what “spacer foam” is, but it works pretty well for a bra. It’s a little stretchier than the stuff at Bra Maker’s Supply, and slightly thinner as well (it’s not as cushiony). I read somewhere that you can buy this by the yard at places like Spandex House in the Garment District, so I will probably stock up when I’m there in November. But even 1/4 yard is TONS of foam, especially if you are making teeny little bra cups like what I require hahaha. Heyo, silver lining! Boylston Bra

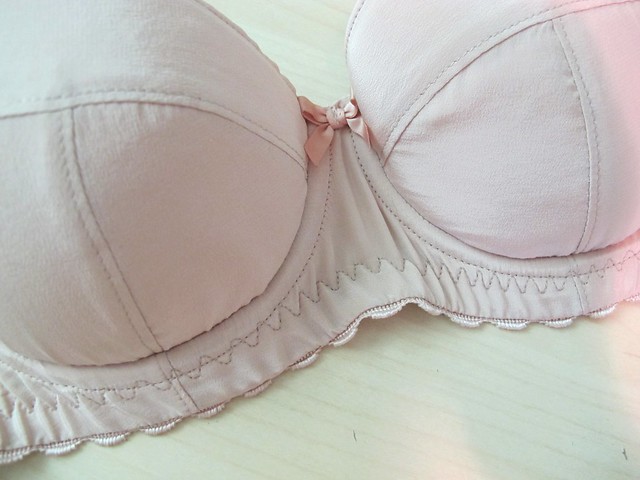
Other than the foam, this whole project was a de-stash. All the elastics and underwire channeling are from the Garment District, I think, and the strapping is leftover from my red bra kit (there wasn’t enough elastic included to make full straps when I was using it to make a red bra, so I had to buy red strapping. But that’s fine because the amount they gave me is perfect for fabric straps! Yay!). I know the pattern doesn’t call for a bow in the center, but I like the bows! This particular bow was ripped off of a retired RTW bra. Ha!

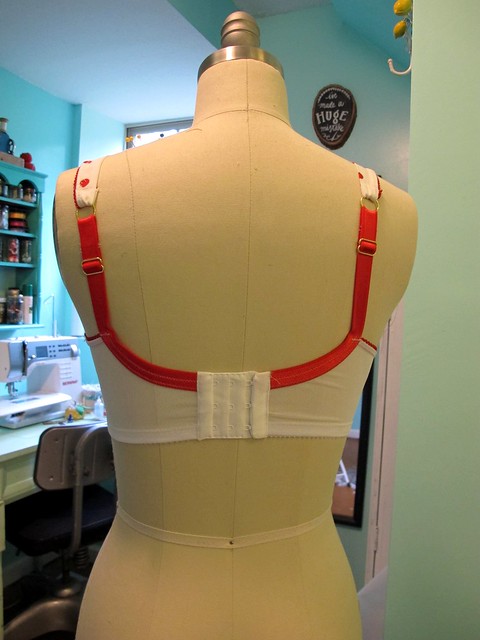
Boylston Bra Here’s the back. I used a firm white powermesh (also from the stash) for the back band. I like the mix of white and red elastics and trims. I’m getting better about mixing and matching my lingerie trims, I think.

Not much else to say about this one. Here are some detail shots: Boylston Bra

Boylston Bra Boylston Bra

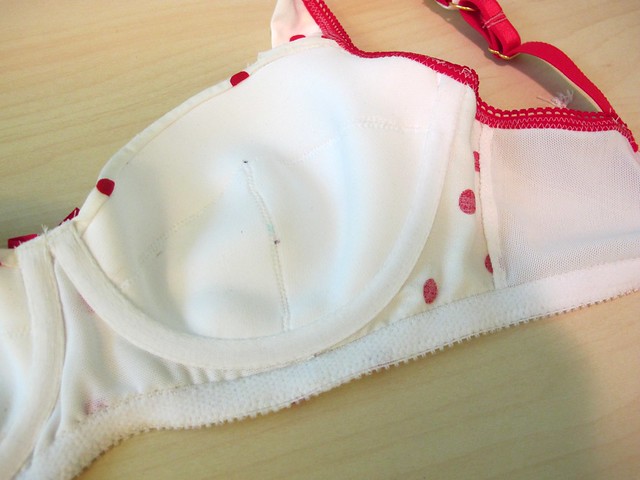
Boylston Bra UGH at those black dots in the cups! Those are my notch markings for assembling the cups – I used a ballpoint pin (I think I got that tip from Cloth Habit) to mark the notches, since you can’t really clip the notches and my usual fabric markers and chalk don’t really write well on foam. Except, I forgot that ballpoint pin is FOREVER and I somehow managed to mark both sides. So that’s pretty lame, but, whatever. Can’t do anything about it now except acknowledge the lesson and move on with my bra making! Boylston Bra

Boylston Bra If you’d like to see a photo of what the bra looks like on an actual person, click this link. I’m not embedding it into the post (or uploading it to Flickr for that matter, yeesh) to cut down on the number of people who see me in a bra, as well as spare any eyes that don’t want to see that sort of thing (um, hi mom! :)). But I acknowledge that it’s really hard to see how a bra fits if it’s not actually on a person – and my dressform doesn’t really fill it out correctly. And those floating ghost bra pics just don’t cut it (plus they are a pain to make haha!). So pleeease do me a solid and don’t post that photo around the internet or pin it on Pinterest or anything like that 🙂 Posting only for science purposes 🙂 Love y’all! OK, MOVING ON. Boylston Bra

Here’s the other bra I made, using the same Boylston pattern. Nude bras are a SERIOUS hole in my summer wardrobe – er, lingerie drawer. I have a couple, but I always need more. I wear a lot of light/sheer colors in the hot weather! So I really need to make more flesh-colored bras to wear under my clothes, so I can rotate them and let them rest from time to time. This particular make is pretty boring and looks downright sickly on my dressform (don’t hold your breath about me modeling a shot of this one because, eeew), but let’s rejoice that I made it nonetheless! I know it doesn’t look very filled out on this dressform, but I promise it fits me just fine and the cups don’t wrinkle like that.

Boylston Bra Another stash-busting bra, I used silk crepe scraps to make up the outside, and my beloved nude bra cup foam + nude power mesh for the innards. The silk crepe is the same stuff I used for the neck binding of this SJ sweater – which was given to me as a scrap bust, so it’s like, extra extra free. And as sickly as the color looks, it’s pretty close to my skin (did you not click that picture link? I mean. No one is complimenting my ~rosy glow~ over here hahaha). So it works quite well for what I need it to do! Boylston Bra

I had someone ask me about the strap assembly – the fabric straps are made with a piece of fabric folded in half and then picot elastic attached to the outside edge to finish it. There is a little bit of elastic at the back, with rings and sliders. The fabric straps are pretty stable in their own right and work quite well, although these particular straps (and not any other Boylston bra I made, for some odd reason) are a tiny bit too long for me. I shortened the elastic as much as possible and they’re still a little more than what I need, so I really need to just dissemble the strap where the ring is attached and shorten the fabric strap by an inch or so. You know, at some point in my life. Maybe tomorrow.

Boylston Bra Again, all the little bits and pieces that make up this bra were from my stash. The sliders and bow were taken off another retired RTW bra. The sliders don’t exactly match, but they “go” well enough. Boylston Bra

Again with the perma-ballpoint marks! Argh! I made this bra before I made the dotted one – and cut them both at the same time. This was the bra I realized the error of my ways on, unfortunately. I also dyed that channeling, all by myself. I used coffee this time, which gives a much less yellow beige than tea does. It doesn’t quite match the rest of the beige of the bra, but it’s close enough for me.

Boylston Bra I tried using the 3 point zigzag stitch for the bottom elastic of this bra. I don’t like the way it looks at all – it’s too busy, especially where it intersects with the underwire channeling. I much prefer a standard zigzag set a little wider (like what you see on the polka dot bra). Also, I know that the elastic is super wrinkled and bunchy looking when it’s flat, but it smooths out really nicely when I’m wearing it. That being said, I definitely pulled the elastic too taut when I was applying it – something I was able to fix with my next bra, the polka dot one. You really only need to stretch the elastic ever so slightly under the cups and at the bridge when applying it – mostly so it’ll turn to the wrong side more easily and look smooth. Not look like the hot mess I have going on here. Boylston Bra

One of my favorite parts about this pattern is being able to add a cute little picot edge at the sides. I love the way it looks!

Boylston Bra

Ok, I think that’s it! I’ve got a few more ideas for this pattern, so I hope you’re not sick of seeing a million renditions of it just yet! Up next, I want to try making some lace versions – I have a couple of gorgeous pieces from the Tailor Made shop that I’ve been waaay too scared to use, but i think it’s time to bite the bullet and woman up a bit! I also want to experiment with changing the straps – maybe leaving off the fabric strap and using elastic (either removeable or sewn on) in it’s place. I wonder if this pattern would work as a strapless? Would it be as simple as smoothing down the top of the cup, adding some boning to the side seams and possibly rubber elastic at the top of the cup? What do you think?

As a side note, I wanted to share an update with my Made Up pledge. My first rendition of a swimsuit was a HOT MESS (not so much the pattern or the construction – more like, I wanted a string bikini and I absolutely hateeeee the way I look in them! Definitely should have done some sneaky try-before-you-DIY shopping for that one, it would have saved me a bit of headache), and I was all set to try pattern #2 when I realized that I don’t have enough fabric 😦 I made an emergency order for a piece of really cool swimsuit fabric, but it doesn’t appear to have shipped out yet. We leave 2 weeks from today, so hopefully it’ll get here soon!

Completed: Silk Leopard Print Boylston Bra

5 Aug

Man, I am SO far behind in terms of what I made vs actually posting it. This is from 2 weeks ago. Ain’t mad about it!

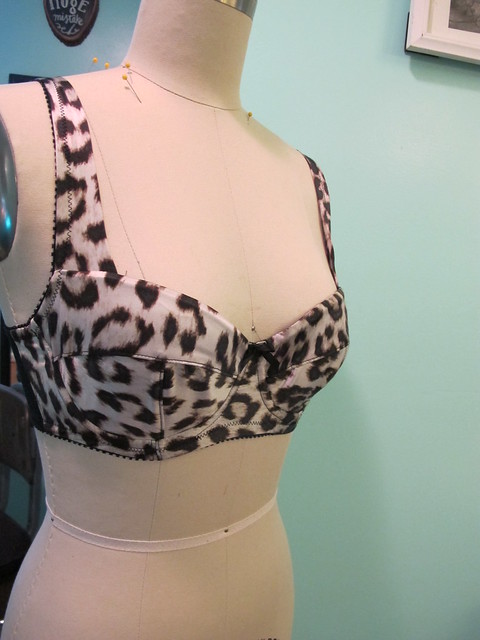
Silk leopard print Boylston braThe pattern here is the Boylston bra, which is the newest pattern from Orange Lingerie. I think I mentioned this before, but I’ve been waiting for a hot minute for this pattern to debut – Norma showed me a photo of one of her samples when I met with her in Paris (man, that sounds so fancy! I wish I was that fancy irl haha) and I was super excited about the idea of making a bra with a woven fabric. Also, tiny prints. You need a tiny print so that it doesn’t get lost in these little pattern pieces. And isn’t everything tiny automatically twice the fun? Yes.

Another big selling point of this bra vs the Marlborough is that the Boylston has been designed to be made with foam cups (you can also make it without foam cups and just have a soft, lined bra, if that’s your jam!). At the time of my snooping, I wasn’t terribly interested in foam cups (I am now, though), but I loved the idea of a lined bra, again, made with a tiny print. Also, the balconette shape is new to me – I don’t think I’ve ever actually owned a bra with this silhouette because I’ve never found one that fit properly. So obviously it was time to try something new! Silk leopard print Boylston bra

Since I’ve already made the Marlborough bra a number of times (one two three, etc etc), and I was pretty comfortable with the fit, I compared the pieces of the two patterns together to see if there were any similarities. Both the bridge and the back band on the Boylston and the Marlborough are almost exactly the same. The cradle is also pretty similar. Obviously the cups and straps are different, but I felt pretty confident that I could cut my usual size in the Boylston and not have any weird surprises. So I made my bra up in a 30D, same size as the Marlborough was for me. I also applied my Marlborough back band changes to the Boylston pattern – I figured if the bands were drafted the same, then they would probably need the same LT-alterations (mostly shifting the curve so that the straps hit the right spot, and extending it to be slightly longer. Which means technically this band isn’t a 30, but, whatever. It fits me now, that’s all that matters). The cup wrinkles you see on the dressform aren’t there in real life; she’s just a slightly different size than I am.

Silk leopard print Boylston braI tried to wait & hang around to see if anyone else made this pattern before I dove in, so that I could steal their ideas without having to figure things out on my own. But, y’alls is too slow for me! I waited a couple agonizing weeks and said, fuck it. Cut that sucker up, stitched her together, new bra by the end of the day. Yay! Silk leopard print Boylston bra

I wanted to try something super duper fancy for this bra, so I made it out of silk! The outer is this leopard print silk charmeuse from Mood Fabrics, and it’s REALLY nice stuff! I used the shiny side facing out – normally, I prefer the matte side of silk, but the shiny side definitely looks more bra-like (and I’d guess will also wear better under clothing, since it’s ~slick~). For the cups, I did try out foam for the first time – and I’m a total convert. Bra foam RULES, you guys!! Making the little cups was really fun (and having little foam boobies floating around the sewing room is a total thrill, let me tell you) and they definitely make this bra look way more RTW than anything else I’ve ever made. I’ve hated foam bras for quite a while now – mostly because of that weird half-grapefruit shape that they all come in. My boobs definitely aren’t shaped like that, so they never fill out the bra correctly – there’s always a giant gape at the top half of the cup. What’s nice about this pattern is that the cup is seamed, so you get a more natural shape which in turn makes the foam cup fit better. I bought this foam from Sweet Cups Bra Supply (which is the US version of Bra Maker’s Supply – cheaper shipping, but the selection isn’t quite as extensive, wah) and I really like the way it feels, as well as how it sewed. One of those little foam pieces was plenty for this bra – I estimate that I have enough to cut at least 2 more bras, maybe 3. So it’s not terribly expensive, either.

While this bra pattern was designed to work with foam, the pattern isn’t actually drafted to be foam-friendly – you have to do that yourself (does that make sense? The stye works with foam, but the pattern needs a couple of tweaks for the best sewing results.). Part of my waiting around for someone else to make this pattern was that I could not figure out how to seam up the foam on the bra – wouldn’t the seam allowance be bulky? I did some lurking and found this make a foam cup bra series on Cloth Habit, which answered pretty much all of my foam questions. I retraced the cup pieces onto light plastic and removed the seam allowances, and followed Amy’s tips for sewing everything together and trimming down the foam within the seam allowances to reduce bulk. I’m really pleased with the results. I think this bra looks totally professional.

Silk leopard print Boylston braAs with my other bras, I used firm powernet for the back band and lined the bridge with the same powernet. All the elastics and notions are from my stash (mostly from the Garment District, but I buy my underwires from the aforementioned Sweet Cups because I love their wires! In fact, I love everything I’ve bought from that site. Their quality is the best!). Interestingly, I had *exactly* enough of all the elastics I used – nothing more, nothing less. Dunno how that happened, but I won’t argue with it! The cups are lined with the foam, and thanks to the elastic and underwire channeling, the only seam you see is the side seam that connects the bridge to the band. I serged that seam with a 3 thread overlock; next bra I make, I might experiment with binding it or even adding a lightweight boning. So many options! Silk leopard print Boylston bra

Silk leopard print Boylston braSilk leopard print Boylston bra

I worried about the straps getting stretched out of shape, since they’re silk and all (a double layer, but still). The edges are finished with elastic, though, so that helps them keep their shape. I’ve worn this bra a LOT since I finished it. I’m actually wearing it right now as I type this 😉 hahaha!

Silk leopard print Boylston braThe only thing I will change for the next bra is that damn seam allowance at the top of the cups. Instead of following Amy’s advice and using 1/8″, I used the pattern’s 3/8″ and as a result, the foam is really bulky and there’s definitely a ridge at the top of my bra. Using a smaller seam allowance would have eliminated that. Oh well! Silk leopard print Boylston bra

Here are the foam cups. Aren’t they adorable! They are sewn up with a basic zigzag stitch, the pieces butted together with no overlap. I’ve seen some people cover their foam cup seams, or use a satin stitch to piece them together – but I like the basic ol’ zigzag. It’s strong enough, not very noticeable, and super quick!

Final thoughts – this is by far the prettiest, best-fitting bra I have ever made. I think the shape is really beautiful and modern, but not Victoria’s Secret’s idea of modern (no big half-grapefuit foam cups, PLS). I don’t have any photos of me wearing this one, sorryyyyy, but I’ll make an attempt for the next one (as of this writing, I have 2 cut and ready to be sewn, so it’s safe to say that there will be more of these in my life!). I LOVE that the pattern is made for non-stretch fabrics, and thanks to the foam cup – you could make this bra out of almost anything. Which has definitely got me thinking hard and lurking into the depths of my fabric stash! The fabric straps are pretty, and bonus – they use less elastic than normal elastic straps (so, again, yay for using scraps!). I also think the cup piecing could lend itself to some gnarly colorblocking. We’ll see! I also wonder if this pattern could be converted to a strapless? The shape is pretty similar to the RTW strapless that I own; except the cups have less coverage on this one.

As far as how easy the pattern was to make – well, I definitely did not make it any easier on myself thanks to my fabric choice! Silk charmeuse is hard enough to deal with on a good day, but we are talking about teensy little pattern pieces here. A couple were cut off-grain and had to be recut. I didn’t have too much of a problem assembling and topstitching, but I’ve also made a few bras at this point so I’m pretty confident in those skills. The only construction part that was hard was getting the elastic around the underarm and up the strap. That curve was difficult to navigate. I don’t think this is a hard pattern, per se, but I don’t know if I’d make it my first bra pattern. Definitely not in silk charmeuse with foam cups, at any rate. Maybe start with the Watson or the Marlborough first 🙂 The instructions were good, pretty similar to the ones for the Marlborough. I did notice that Norma added grainlines to the pattern pieces, which indicate the stretch direction so cutting is easier. That was a MASSIVE help! I do wish there were more markings on the pieces themselves – mostly, top and bottom markings. I’m not really sure if my cups are upside-down or not, because there’s really no way to tell.

Tried a new bra pattern tonight! This is the Boylston from @orange_lingerie, sewn up in silk charmeuse with foam cups! Another nail-biter till the end (will it fit?? will it fit??), but I'm happy to report that it fits awesomely. Now to put foam cups in e

Ok, who else has bought this pattern and when are you gonna make it?! Guysss! I need to see more Boylston bras up in here, please and thank you!