Archive | completed projects – new RSS feed for this section

Completed: A Slinky Red Butterick 5078

15 Jan

This doesn’t really warrant much of a post – it’s a knit dress, I’ve already made the pattern before, wah wah – but I thought it warranted at least a mention, after I made the changes I was musing over.

Butterick 5078 - slinky red
This is my second version of Butterick 5078 – and way better! So much better!

Butterick 5078 - slinky red
For one, the fabric is better. I wish I could share a little piece with all of you because it is SOOOO SOOOOFFFTT. It’s a rayon knit that I picked up at my local fabric store’s 40% sale (I should go back. Should I go back? ARGH), and it’s even softer than the purple bamboo knit that I used to make that Tiramisu (which, ps, I’m wearing right now. Actually, I wear it like once a week. THIS.DRESS.IS.THE.BOMB.). The color is a rich vibrant red, and it is slinky as all get-out. So, perhaps most people wouldn’t want a slinky red dress. But I like! Slinky and feels like pajamas, yeah!

Butterick 5078 - slinky red
I used the same sizing and everything as before – the 8 – but I did make a few changes:
– Lengthened the bodice to cover all my boobs and not cut across the middle of them. To do this, I put on my first incarnation of the dress and measured how much I needed to add, and then just added it to the bottom of the pattern piece. It was somewhere in the realm of 3″, FYI.
– I removed 3″ of the skirt length from the pattern pieces, so I didn’t waste any of my precious fabric.
– I changed up the construction sequence of the dress, to make it easier and more, uh, knit-friendly. Most everything was constructed flat (the pattern has you do everything in the round, including the sleeves. ewww), and then I zipped up the side seams at the last minute. This was extra convenient, as the super drape powers of this fabric made it a bit big when I first sewed it. It was very easy to take in the side seams!
– The biggest change I made was to eliminate that runched drape deal at the waistline. I considered adding it – even cut out and assembled the pieces – sewed the dress up, thought, “Oh God, I have made a huge mistake”, pulled the runching back on over the dress and realized I would have made a bigger mistake by adding it. I dunno, that runching just looks weird on me. Sorry.

Butterick 5078 - slinky red
I am fully aware you can see, like, everything through this dress. NO CARE – it’s like a slinky, sexy pajama. Ooh ooh!

Butterick 5078 - slinky red
I also think it’s interesting to note how different the neckline looks with a drapier fabric. Unfortunately, this one isn’t so gape-friendly. I do have to be careful when I bend over (and wearing a tank underneath to counteract isn’t an option: see above re SLINKY).

I guess there’s not much else to say about this dress. I do think knit dresses are my new go-to for cold weather, though. I can cozy them up with tights and boots and a handmade sweater, and I feel polished while still being totally appropriate to roll up on the couch. I need to dig into the rest of my knit stack from Textile; I’ve got a few stripey pieces that I’m dying to play with!

Butterick 5078 - slinky red

Butterick 5078 - slinky red
Kitty approved? Sort of.

Completed: the Elisalex Dress

14 Jan

I know I’m SUPER late to the dance party on this, but I just looooove the new goods from my girls over at By Hand London. A pencil skirt with generous ease at the hips?? That made me sit straight up and divert all my attention at once (a feat on it’s own!). So when I was offered to try my hand at the patterns, I responded with an enthusiastic “UHM YES PLEASE!!” and was immeditely given my very own hourglassy pencil skirt pattern of dreams, as long as the Elisalex dress pattern.

Elisalex Dress

I’m going to fully disclose here and let y’all know that I’ve actually been working on this pattern for over a month – we got off to a very rocky start, unfortunately. My first problem stemmed when I couldn’t find any finished measurements listed anywhere in the pattern, and for some reason I had a huge issue with measuring the pieces (which is not the fault of the pattern, I was just basically being a dumbass. It happens.). Once I got the sizing sorted out, the muslin I whipped up gave me the biggest hunchback that you ever did see. Just… oh my god, it looked like I had a growth back there HAHA. I had to cut quite a bit off the center back to get a snug fit – about 1.5″ per side. I hesitate to blame this back on BH, as I’ve seen a few of these dresses in the wild west (aka, internet) and no one has mentioned the size of the back, which would indicate that this is a Lauren-fitting problem, not a poor drafting issue. Happily, the rest of the bodice muslin looked fine, so I cut my fabric, cranked up the music, and started assembling the dress.

Oh, the fabric, by the way. Isn’t it AMAZING!? It was a (super sweet and incredibly thoughtful!)gift from my homegirl Erin of Miss Crayola Creepy. She bought a bunch of this stuff at the LA Garment District, apparently it’s ~Prada~ ooohhh!! Don’t worry, she kept some of it for herself – you can see what she made with it here. I’ve been sitting on this fabric for foreeeeever, just waiting for the perfect pattern to come up. With the marriage of the Elisalex and the dreamy Prada floral twill, I thought I had it made. I HAD IT MADE.

Elisalex Dress

But you know what? That tulip skirt, as beautiful as it is – it really sucks with this drapey, stretchy fabric. Ask me how I know. Wait, no, I’ll tell you. It droops and sags and it looks like a shit sack made out of beautiful fabric. There’s a reason they tell you to use a weighty fabric to make this dress – the skirt needs the structure for those beautiful pleats. I had done goofed, again. Sooooo I threw the bodice on my dressform and gave up for about a month. Womp womp.

Elisalex Dress
I finally pulled the UFO off my dressform last week and decided it was time to asses the situation – normally, I’d throw in the towel at this point, but considering both the fabric and the pattern were given to me with wonderful intentions, I thought it was pretty shitty to just toss them out. So I made it work. I scrapped the droopy skirt and traded it for a circle skirt – I had to shorten it a little to get it to fit on the rest of my fabric, but it works! I sewed some 2″ horsehair braid at the hem to give it some lift and combat any potential droopiness. And then I spent like 3 days handsewing the the lining and hem, bc, FUCK, there is a lot of handsewing involved.

Elisalex Dress
It was worth it, I think 🙂

Elisalex Dress
The finished size ended up being a 6 at the hips/shoulders, grading out to an 8 at the bust. I didn’t bother with a FBA, I think the fit is fine. In the future, I need to lengthen the bodice as it is a bit short on me and hits at a kind of frumpy place… hence the belt.

Elisalex Dress
The back is my favorite part! Love love LOVE that V detail- so pretty!

Elisalex Dress
Here it is without the belt. See what I mean about it being a hair short? It kind of makes me look like a box. A beautiful autumn box (perhaps full of Pumpkin Spice Lattes, mm)

Elisalex Dress
I added a little bit of trim around the neckline and the sleeves as well, to help break up the pattern a bit.

Elisalex Dress
Oh, and I subbed out the exposed zip in favor of an invisible one! Mostly because I really wanted to try out my new Bernina invisible zipper foot 🙂 This fabric did NOT like that invisible zipper – it bunched up soo bad, and I had to rip it out several times. The mess you see right now was the best attempt I managed, haha!

Elisalex Dress
LOVE ME A GOOD CIRCLE SKIRT.

Elisalex Dress

Elisalex Dress
Neon yellow Bemberg rayon lining, courtesy of my remnant hoarding 🙂

This dress is quite comfortable and well-suited for those of us who like to be a bit active, see:
Elisalex Dress
Great for kicking at the cat when she tries to get in the picture frame

Elisalex Dress
Trying to pull the cat out from under the desk because you know she’s totally giving the camera the evil eye and could quite possibly be scaring small children

Elisalex Dress
WHAT’S THE MATTER, Y U NO WANT CUDDLEZ

Elisalex Dress
Aw, so sweet!

Elisalex Dress
Nope, nevermind.

In closing: Elisalex is a YAY, just make sure you muslin that baby out first if you are prone to hunchbackness 🙂 And yes, I have plans for that Charlotte skirt! Just you wait and see!

Completed: The Film Noir Coppélia

8 Jan

Okkkk, I wouldn’t normally post the exact same fucking thing almost twice in a row (only broken up by the La Sylphide On A Dude Ranch), but I feel like I owe it to this pattern to show y’all that it also totally rocks in a neutral/solid fabric. Like a gorgeous little backdrop in wooly wrapped goodness.

Film Noir Coppélia
Again, this is the Coppélia pattern – this time sewn up in a dreamy, drapey wool knit. I’m not sure exactly what this fabric is; I bought it at the giant fabric sale last week and the bolt said it was a wool blend. My burn test seemed to indicate that it was pure wool – or at least blended with something natural, as the ash was not that sticky hard horrid bead of death that you usually get when you burn polyester. At any rate, it’s warm and snuggly and soft, and the texture almost looks like gauze when you hold it up to the light. Pretty!

Film Noir Coppélia
Also, let the record show that my wool version was birthed because Katie said she was making a bunch of these in merino knits and I got jealous and decided to copy her. SORRY NOT SORRY.

Film Noir Coppélia
Can someone explain to me why it is so difficult to find wool knits in the first place, though? Especially in not-neutral colors. What I reeeeally wanted was the emerald green wool jersey I found at Textile a couple of months ago (and not because emerald is the new ~color of the year~, but more so because I look bomb ass in emerald, trufax), but it was $30 a yard and I was holding out for the 40% sale, except it sold out at some point between those dates and now I am a sad person and SOMEONE FIND ME JEWEL COLORS OF WOOL JERSEY PLEASE AND THANK YOU.

Film Noir Coppélia
Black is good, though. I feel like such a lady.

Film Noir Coppélia
At least black goes with everything… including my Giant Plaid Circle Skirt. You dig?

Film Noir Coppélia
I tried to take motion pictures to show the no-gape in all it’s glory, but my hair was in the way for most of them. Here is… something.

Film Noir Coppélia
This one fits a little different than the Disco Queen version… mostly because the fabric is much stretchier. I really like it; it’s very comfortable and slouchy without actually being sloppy. Look at how much longer the ties are when they stretch!

In other COMPLETELY RANDUMB news, Andrew WK hollered at me via Twitter last night:
WHAT THE FUUUUCK omg omg omg
UMMMM WHAT THE EVERLOVING FUCK THIS IS SO AWESOME HOLY SHIT.

In celebration, I give you this gif of me being excited out of thin air:
gif
OMG SO EXCITE

Completed: La Sylphide, Dude-Style

4 Jan

Ok, I actually finished this *before* the Coppélia, making this top the very last thing I sewed for 2012 (finishing up on 12/30, no less!). I hate posting stuff out of order because I’m weird like that, but it is what it is!

Anyway, here she is – the La Sylphide, another sweet gem that Katie from Papercut Patterns sent me. I’m not sorry if I’m coming off as a bit of obsessed – I think this pattern line may be my new fave for 2013! Yay!

La Sylphide
As you can see, my version is quite a bit different from the pattern cover – I really dude’d this one up with the plaid and pearl snaps. Yeehaw!!

La Sylphide
This is technically a wearable muslin – I wanted to test the fit before I made my ~real~ version, hence why it’s a top instead of a dress. And if you think I’m wack for making a muslin with plaid… I guess I am kind of wack. But the shirt turned out really awesome, so no complaints here!

La Sylphide
Size-wise, I cut the XS. The ONLY alteration I made was to suck in the center back by 1″. Again, this is a pretty typical alteration for me as I have a small back (I wear a 32 or 30 bra band, fyi). Everything else fit perfectly! So happy!

La Sylphide
The pattern calls for a floaty/drapey fabric, which is what the samples are sewn with. They are totally lovely – and totally what I want to make my future dress with – but I’m actually really happy with how this cotton/poly plaid ended up looking with the pattern. It doesn’t have as much body as say, quilting cotton, but you can see there’s not a lot of drape to my top. It has a nice structure that really makes the peplum stand out. And the bow! I love how crisp the bow is in this fabric!

La Sylphide
Sorry this picture is blurry. You can see my center back seam here. Well, sort of.

La Sylphide
I’m pleased to report that the plaids matched up pretty well here. I probably could have done a better job with the peplum at the center front – but I was running low on fabrics, and I guess this is acceptable for a wearable muslin. I also think this would look much better with the tie cut on the bias, but again, low fabrics means we make do with what we have.

La Sylphide
I am going to change my name to the Plaid Boss. Because, FUCK, I love plaid.

La Sylphide
Don’t worry – the stuff under the bow matches too 🙂

La Sylphide
I decided to go with pearl snaps instead of buttons for this guy. I was eager to try out the buttonholer of my new machine, but I also really love using hammers on my sewing projects. Plus, pearl snaps just really fit with this style of shirt, you know? The original pattern calls for 4 buttons on the top, but I was getting too much gape so I added a few more. I am also fully aware that the snaps are on the wrong sides. I thought I was being sneaky and clever by checking Landon’s shirts and doing my snaps the opposite way, but I forgot that pearl snaps are the opposite of buttons, so I ended up with a double negative button situation. Oops.

La Sylphide
I love the way the sleeves are sewn here – there is light interfacing at the bottom, which with the top stitching makes a little built-in cuff. The sleeves are attached to the bodice in the flat, and then the side seams are sewn up after. It makes easing everything in much quicker!

La Sylphide
Also, I’m sorry for the weird wrinkles. I took these pictures after a full day of wear, so the peplum is a little squashed at the back.

La Sylphide
Pearl snaps are awesome because at the end of the day you get to rip your shirt off and pretend like you are the Hulk.

La Sylphide
As a side note, did you notice my cute little tights!? DID YOU??

Tights!!:D
Rain and lightning! Aren’t they the cutest!? I love that the lightning cloud looks like the TCB bolt hahaha.
My friend Victoria just opened a Galaxy Cauldron Tights and she sent me a couple of pairs to try out. These are the Stormy Skies. I was pleasantly surprised at how thick they are – not as thin as those cheap $5 ones from Target (which was what I was expecting, tbh). There’s a bit of heft to them, and the design is my favorite thing ever right now. I guess you could also wear the print at the back, like calf tattoos, but I like them on the front. They make me so happy! I thought y’all would like them too 🙂

La Sylphide
I guess that’s it! I’m fully infatuated with Papercut Patterns at this point and I can’t wait to make the full dress of this (and maybe some more plaid peplum tops, because of reasons).

Completed: the Coppélia Cardy

2 Jan

Happy New Year, everyone! I hope the holidays left y’all with plenty of relaxation, time with friends, wonderful gifts, and of course… alcohol. Can’t forget the alcohol 😉 So sad, January 2nd is now upon us so I guess it’s time to revisit the Real World, take down my Christmas tree, and dive back into my nine to five job. Wah!

I’m going to kick this year off with the very first thing I made in 2013- the Coppélia from Papercut Patterns
Coppélia Cardy
YUM. That’s my short-list review of this cardy, if you must know.

Santa (or maybe Jesus?) must have been following my wishlist something fierce, because Katie generously sent me this pattern (along with the La Sylphide and DON’T YOU WORRY, because I have words for that one too!!). My experience with Papercut Patterns is brand-spankin’ new – I’ve long admired the sweet styles that are offered, and the delightful packaging that the patterns are wrapped up in. And you know what? I was NOT disappointed with the actual pattern – or the finished garment. I could wax poetic about this wrap all day, but I’m going to stop because I don’t want to make anyone sick. Just know that when it comes to Papercut Patterns, the answer should always be yes.

Coppélia Cardy
I know my fabric choice here is a little… different. Haha! Honestly, I’ve actually had a hard time lately pulling myself away from the looks that I see outlined on the pattern envelopes. For some reason, this isn’t too much of an issue with Colette Patterns, but something about the photography with these particular patterns just makes me want to wrap myself in pastel chiffons and roll around in a field of wildflowers. Except it’s winter here (ooh 40* brr! DON’T JUDGE ME) and I look like shit in pastels. Anyway, every time I thought about my future lover Coppélia, I envisioned her in white. Realizing that I need to make a wearable muslin for this top (since I’m unfamiliar with how these patterns are drafted), and then realizing that I had a very large yardage of this god-awful zigzaggy sheer polyester monstrosity that’s been sitting my stash for at least 3 years… Coppélia The Disco Queen was born. And OMFG I KIND OF LIKE HER.

Coppélia Cardy
The fabric is kind of uncomfortable, though. What can I say? It’s a very heavy, very cheap polyester that I bought from $1/yard table at Walmart. And it’s totally sheer. But it works, somehow.

Coppélia Cardy
The size XS fit me *almost* perfectly straight out of the envelope. I had to pull a good 1″ chunk out of the center back – which, I’d already cut my pieces, so the back now has a seam – but I have a fairly small back/ribcage, so this does not surprise me. I also tapered the sleeves down to an XXS as they were a bit baggier than I prefer. In the future, I will shorten the sleeves as well – they’re a bit long (I folded the cuffs back so it’s not noticeable on this top). All in all, the fit is pretty nice, though!
Also, I have no idea what I’m doing in the above picture. Sniffing my armpit, I guess?

Coppélia Cardy
I love how cozy and snuggly this top turned out! I can only imagine how much I’ll love it in a nicer fabric – especially something with a bit more drape. This is an actual wrap top – which means when I untie the ties, the whole thing opens up in the front like a cardigan (i.e., not a mock wrap!). Surprisingly, the gape factor here is pretty much nonexistent. I spent all day in this shirt and never once worried about exposing more than I intended. Yay!

Coppélia Cardy
If you’re wondering how I already made a top this year and we’re only 2 days in – it was a SUPER fast make! I used my serger to sew most everything (except a small bit of topstitching along the bottom hem for the band), and I think my total sewing time came in around 45 minutes. I didn’t stay out late on NYE – I’m an old lady when it comes to my bedtime, I was out by 10:30PM! – so I was up by 10AM, had a leisurely breakfast and quickie sewing sesh, then made it to Gallatin to eat black-eyed peas and collard greens with my parents by 1PM 🙂 Yay for New Years!

Coppélia Cardy
The pattern instructions are great – they are brief and to the point, without a lot of unnecessary hand-holding (although they are not so brief that a knit n00b would have no idea what is going on). Same with the pattern markings – there are notches to match the pieces, but not a metric shit-ton. This is perfectly fine and dandy with me. I don’t need a bunch of notches to match up a sleeve seam, you know? Just tell me how to get it on the bodice, I think I can figure it out from there!

Coppélia Cardy
I also really love the construction method for this top – it was very straightforward and intuitive, very very similar to how to like to sew my knits. So maybe I’m just a little biased haha 😉

Coppélia Cardy
Here’s a good look at the sheerness of the fabric – the zigzags are solid on top of a knit mesh (that’s my hand behind it). It’s not so noticeable on this top, especially since I am wearing a nude bra, but it would definitely show in something like a dress. Hence why I had so much yardage and never did anything with it – the fabric is heavy enough on it’s own, and adding an underlining just makes it even worse. So I’m glad I figured out a use for it 🙂

Coppélia Cardy
I definitely plan on making more of these – I actually skipped my lunch break today to take advantage of the semi-annual sale at Textile Fabrics (which, if you live in Nashville: GO. 40% off everything, yo!). I only let myself buy knits, but I got some awesome stuff – stripes, silky drapey rayon, and a lovely woolish sweater knit that is turning into Film Noir Coppélia STAT. Which I’m hoping will be easier to match with bottoms 🙂 Haha!

Hopefully a first successful sewing project means all of 2013 will be successful sewing projects too! HAHA ok, maybe that’s a little optimistic – but optimism is good, yeah?

Happy 2013, y’all!

Completed: The Tiramisu!

13 Dec

WHOOOOOOOOOOO LOVES CAKE? I’m talking about the new pattern line, the brainchild of our beloved StephC (although the food is all kinds of delicious too, mmm). Tiramisu is her first offering – a knit dress with a mock-wrap front (in cup sizes A-D), short kimono sleeves, and pockets.

I was actually part of the crew of ladiez who were initially chosen to test the pattern before it went to print. There was a small snafu with the tester printing (so it goes), which is why you see my dress at the same time you are (hopefully!)holding your own copy of the pattern. I’m still treating this like a test pattern, which is why I actually paid attention to the instructions and made notes as I sewed. I also made a muslin. I never make a muslin for knits – are you proud of me? ARE YOU?

Despite treating this like a test, I’m sorry to report that my pictures are still total shit. You know, winter, lack of light, I’m not getting up early, blah blah. Also, my hair looked REALLY good last night and I need to take advantage of that. Them’s the breaks!

Anyway, check out my new dress!

Purple Tiramisu
~So in love!

Purple Tiramisu
It looks totally different in a solid color, yes?

Purple Tiramisu
For this lil guy, I used a gorgeous purple bamboo knit that I bought at Vogue Fabrics while I was in Chicago. I actually bought it specifically to make this pattern; I’ve been holding it for a few months haha. I wish I had a big enough piece to send every single one of you a little swatch – it is the softest thing I have ever put on my body ahhhh!! And the color… none of these photos (mine or the ones from Vogue) do it justice. It is the most beautiful eggplant purple in the world.

Purple Tiramisu
Basically, I never want to buy another knit that isn’t bamboo again. Ever.

Purple Tiramisu
So let’s talk about the pattern! The sizing is pretty brilliant, and in fact my favorite part – you pick based on your high bust measurement, and then corresponding cup measurement (which is more of a measurement of proportion rather than the actual size bra that you would normally wear). The waist band is chosen based on your actual measurement (rather than the usual, “Well, if your bust is x, then your waist is y.”). It sounded confusing at first read, but once I actually got the pattern in my hands and looked over the sizing information, it was pretty easy to determine what size I should cut.

The size I ended up with was 30D, based on my measurements, and the waistband was cut for a 25″ measurement. I had to make a couple small changes to get my preferred fit, but even straight out of the envelope it was looking pretty good!

Purple Tiramisu
The changes I made were actually pretty mundane:
– I took about 1/2 off the bottom of the front bodice, as it stretched a little too low in the muslin (PROTIP: When making a muslin for this dress, you only mock-up the bodice & midriff. Since the skirt weighs down the whole top and thus affects the fit, it is pretty important to pull down the band to mimic this if your fabric is on the heavy side. Otherwise, you may end up with a longer bodice once you sew the skirt on!)
– I took at least 1″ off the side seams, for a much more snug fit
– I took 3.5″ off the hem, as below-the-knee doesn’t look so hot on me. The skirt is 20.5″ now.
Ok, looking back, I realize that those bust changes mean I actually ended up with a 30C. WHATEVA.

Things I love about this dress:
Purple Tiramisu
DAT SKIRT.

Purple Tiramisu
SOFT POCKETS.

dancin
NO GAPE.
Seriously, the bodice engineering on this thing is a thing of beauty and wonder.

Purple Tiramisu
One thing I did note with this particular dress is that the pockets do add a bit of bulk at the hips. I think this is unique to my particular fabric (it’s quite clingy due to the 4 way stretch), as it’s not apparent on Steph’s version (or the bonus version), but I think it bears mention if you are concerned about that kind of thing. I’m not, personally, so the pockets will stay.

Oh, here are some pictures without the belt, btw:
Purple Tiramisu

Purple Tiramisu
It’s still pretty! I just like to belt, well, everything 🙂

Purple Tiramisu
The only thing I would change next time I make this is to sew the sleeve binding on after the side seams are sewn. It’s a personal preference – I know why the pattern has you sew the binding on before (so you can test and tweak the fit – and yes, it comes in handy!), but I just like the way it looks as an, er, uninterrupted tube. It also may or may not have anything to do with the fact that I sewed the sleeve binding to the bottom of the midriff on my first go (and no, I’m not bitter or anything, why do you ask?).
Another thing I’ll mention is that the fabric estimates are generous. I only used 1.5 yards of my 60″ fabric. Even at $15 a yard, that’s a pretty cheap dress!

Purple Tiramisu
I know my threads look as white as I am, but I promise they are purple! Also, this picture is boring as hell.

Purple Tiramisu
Anyway, super happy with this one! I can see this in lots of different fabrics – it’s so comfortable, especially since you don’t have to worry about THE GAPE.

With that being said, if you haven’t already done so – you really need to pick up a copy! And OMG so excited about the upcoming Pavlova!!

Completed: Velvet Thurlow Shorts

7 Dec

Hope y’all aren’t Thurlow’d out yet – because I need to unveil my new velvet shorts!

Velvet Thurlow Shorts
Ok, ok, so they’re actually more like a velour – the pile is very short. Regardless, aren’t they luscious? Just right for adding a little ~glam to my outfit, except in super comfy short-form.

Velvet Thurlow Shorts
For those of you who are staring at me right now and trying to figure out why anyone would wear shorts with tights in December, I just want to point out that today’s high in Nashville is 66*. That’s almost too warm for tights!

Velvet Thurlow Shorts
Not much to report on the construction of these – for construction deets, you can check out the whole tag for my Thurlow Sew-Along (albeit with pants instead of shorts – they go together the same way, though!). I did not make any changes to this pattern other than my initial fitting changes. As a result, they came together quite quickly!

Velvet Thurlow Shorts
I did have to futz around a LOT with the cutting layout, as this piece of velvet was super duper tiny – I think I might have had 3/4 yard, and it was irregularly shaped. I found it lurking in the bin at the Goodwill Outlet, so I have no idea where it originated from. I had to omit the cuff section on my original pattern pieces, as there simply wasn’t enough room for the whole thing. The front pocket facings are actually pieced together from several different scraps – luckily, you don’t see much pocket facing from the front, so you can’t really tell.

Velvet Thurlow Shorts
To compensate for my lack of main fabric, I used a very fine wale corduroy (I couldn’t find a proper black velour, for some reason??) to make the cuffs and the waistband. I think it helps break up that crazy velvet pattern a bit, which is a good thing! Oh, and I omitted the belt loops. I was planning on adding them – even cut the piece out – but they just looked too busy. This velvet is a little bulky, so I was trying to keep things sleek 🙂

Velvet Thurlow Shorts
I did make welt pockets in the back, using the floral velvet. You can’t see them to well, though.

Velvet Thurlow Shorts
But I promise they are there!

Velvet Thurlow Shorts
I hemmed these a little longer than my previous shorts – I tried with my normal inseam (which is, like, nonexistent. I’m short!), and they just looked like velvet hot pants. So these are a little long, for me, anyway!

Velvet Thurlow Shorts
Told ya there was a pocket there 😛

Velvet Thurlow Shorts

Velvet Thurlow Shorts
Oh my god this picture is so bad HAHA

Velvet Thurlow Shorts
I decided to hold back on the crazy lining and let the velvet be the ~star of these shorts. Also, I had black broadcloth in my stash and everything I looked at in the fabric store just looked awkward and sad. So.

I’m sorry these pictures are so bad. I guess I could have gotten up early to take them, but, eh, it’s winter and you get nighttime pictures.
Here are some weird outtakes to make up for that. I have no idea what I’m doing in either of these, btw. Dancing, I guess? I was listening to Ace of Base.

Velvet Thurlow Shorts
lol, the things I do for you guys.

Velvet Thurlow Shorts
Oh, and my whole outfit is handmade! The top is my Mustard Renfrew and the sweater is my Central Park Hoodie (and I guess you all realize now that I still haven’t added any closures, aha).

How do you feel about wearing shorts in the winter? What if they are velvet shorts?

Completed: McCall’s 5972, The Vintage Floral Sheath

4 Dec

I just realized the title of this post is a little misleading. This is a new dress, made from a new(ish) pattern. I’m fairly certain that even the fabric is somewhat new. I’m calling it vintage because of the colorway and the overall look of the finished piece 🙂 Just so we’re clear!!

Vintage Floral Sheath
ANYWAY, meet my new favorite dress, y’all!

This is McCall’s 5972, which is Laura Ashley pattern. Funny, I actually bought this dude a few years ago with the intention on making view C, with those ridiculous neck ruffles. Spoiler: I still haven’t managed view C. But I have made view B twice – once in a gorgeous purple lambswool (pre-blog, so no pictures – but I wear it frequently in the winter!), and then this piece you’re looking at right now.

Vintage Floral Sheath
The fabric is a bit special, only because it’s fucking GORGEOUS and I had the tiniest piece. I found it at the flea market over the summer, although I don’t think it’s vintage – it’s a Waverly print (says so right on the selvage) and it’s definitely upholstery fabric. I would not be surprised at all if this is a print that they are currently selling at Joann’s. However, that doesn’t make it any less amazing, amirite.

Vintage Floral Sheath
I’m really surprised that I was able to get this much dress out of the fabric. Like I said, my piece was pretty small – I think I had about a yard and a half, but it was only 35″ wide (I suspect it was 60″ at some point, as there was only one edge with a selvage. Also, holy shit I am abusing these parenthesis today). I initially wanted to make a wiggle dress, but I knew there was no way in hell I’d have enough fabric. I barely squeezed this one out as it was – I cut everything on a single layer. Almost all the pieces are cut on the fold, which meant I had to do a lot of flipping and tracing. It was worth it, though! I even had enough to cut the collar, although I did have to slice it on the center back seam since there wasn’t enough fabric to do it in once piece. I’m so pleased with my fabric stinginess!

Vintage Floral Sheath
I know the belt that I’m wearing here doesn’t really match. Shh! I plan on making a self-covered belt (I should have just enough fabric to pump one out), but I need to buy belt backing.

Vintage Floral Sheath
I made this dress entirely with stash stuff! The lining is china silk. I usually prefer to line with Bemberg Rayon – I think it feels so freaking luxurious, even better than silk! – but this stuff actually matched perfectly. And, surprisingly, it was easier to sew than the rayon. Imagine that.

Vintage Floral Sheath
I did have a bit of an issue with the fit. As I said before, this is the second time I’ve used this pattern. The first dress fits wonderfully, just the way I like it. For this reason, I did not make a muslin. I don’t know what happened between the pattern and the first finished dress, but there is definitely a size discrepancy – and I’m not really sure what I did to make it fit (other than, you know, NOT ALTERING THE PATTERN TISSUE), since it was finished so long ago and I didn’t leave my future self any notes. Thankfully, I’m a bit of a stickler when it comes to fit – I try on my stuff frequently as I go, just to be sure there aren’t any little surprises waiting at the end. I caught this right before I put the zipper in. I ended up taking in the zipper side seam by quite a bit – 1 3/4″ at the bodice, 1 1/2″ at the waist, tapering down to nothing by the hip. I may need to go back and deepen the darts on the front skirt; they bag out a bit because I guess I don’t quite fill it out. So weird!

Vintage Floral Sheath
I only made a couple of construction changes to the pattern:
– The finishing calls for bias binding at the armholes. NOPE, SORRY. I pulled out my Rooibos pattern and followed the instructions for inserting the bodice lining – and it worked! No handstitching here, and it looks much cleaner 🙂
– The collar does not call for interfacing. I decided to underline mine with some of my precious silk organza. Ah. I love silk organza ♥
– I inserted a lapped, hand-picked zipper instead of the invisible dude. So pretty and sleek and yay!
– Due to aforementioned fabric shortages, the underside of the collar is china silk (same as the bodice lining), instead of self-fabric.

Vintage Floral Sheath
Ignore that belt and imagine this with something more, er, matching.

Vintage Floral Sheath

Vintage Floral Sheath

Vintage Floral Sheath
Here’s that handpicked zipper! See the stitches? NEITHER DO I.

Vintage Floral Sheath
Probably should have stuck a zipper guard in there. Oh well, no care!

Vintage Floral Sheath
I took a few extra steps to make this special – including binding the waist seam.

Vintage Floral Sheath
And this lace hem is super happy 🙂

You know what else this dress looks super good with?

Wait for it…

Vintage Floral Sheath
THAT DAMN AGATHA CARDIGAN, YEEEEAH!!

Vintage Floral Sheath
Seriously, tho, let’s talk about how this is a fucking match made in Heaven.

You probably noticed Amelia lurking on the serger table during all these pictures. That is basically what she does the entire time I’m in the sewing room (unless she’s napping on top of my pattern. Or fabric. Or scissors), and the reason why I moved my sewing machine to be away from the window. Her big butt was always in the way!

Vintage Floral Sheath
Notice her look of pure disgust. This cat hates me hahaha.

Vintage Floral Sheath
Shitty Cat is staring into your soul.

Completed: My Central Park Hoodie

30 Nov

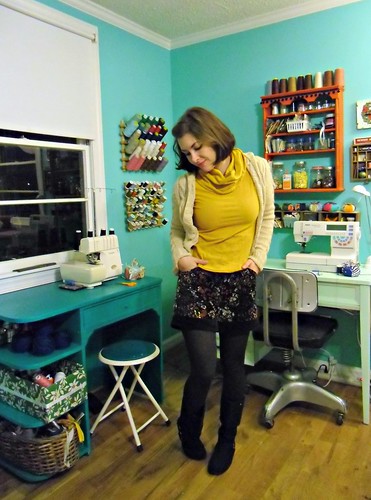
A funny thing happened last weekend – I celebrated (ok, I’m using that term very loosely here) my 1 year knitting anniversary! Crazy how it’s only been one year – I feel like I’ve been knitting an entire lifetime. And hey – I made 4 sweaters in the meantime (Agatha, Miette, Blagatha, and Chuck. Whew!), amongst other things. And here it is – my 5th sweater!

Central Park Hoodie
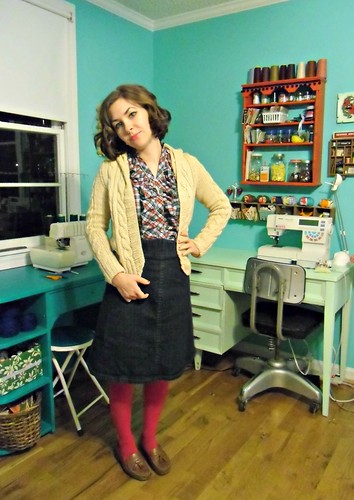
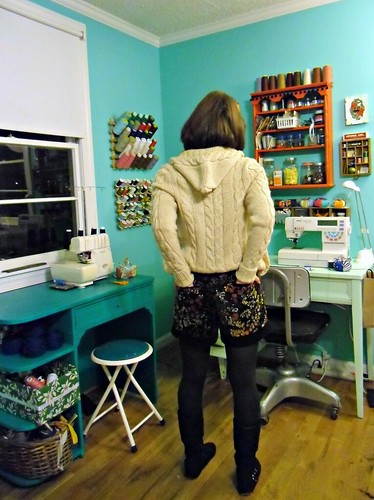
This is the Central Park Hoodie, which is kind of Ravelry-famous. I was really excited to knit this pattern; it’s been sitting in my queue for months. I put it off for so long because I thought it was be ~sooo hard~ with all those cables.

Spoiler: this was the most boring pattern I have ever knitted.

Central Park Hoodie
To be frank, I hated this sweater pretty much the entire time I was knitting it up. Isn’t that dumb? I don’t even know why I finished it; I knew it would be a UFO forever if I put it aside, and anyway, I guess I wanted to give it a fighting chance. I’m glad I finished it because – surprise! – I do actually like it, but we were definitely livin’ on a prayer there for a while.

Central Park Hoodie
I hesitate to blame the pattern for my h8 – although the pattern is not without it’s faults. First of all, it’s very dull. Apart from a few cables (which are easy as FUCK, don’t ever let someone tell you that it’s hard!), it’s all stockinette, all day. And since this hoodie is knit in pieces rather than the round, that’s a hell of a lot of boring purling! Speaking of which, I have learned that I do not like knitting in pieces. Seaming is lame. From now on, I’ll probably knit everything top-down in one piece. But I am glad I learned how to seam.

Central Park Hoodie
My real hate here focuses on this yarn. I used Ella Rae Classic Superwash – it was on sale, so the total ended up at around $35 (for wool yarn! UH HUH!). Hey guess what THIS YARN SUCKS ASS YOU GUYS. Sure, it’s soft and springy and it was cheap as shit – but it’s got some kind of weird agenda where it likes to grow the second it gets wet. I don’t know if that’s a quality of just the Ella Rae superwash (I hope so, because I found a heathered, non-superwash Ella Rae last night that was amazingly beautiful and now I want to buy large quantities of it), or all superwashes. Knitters, what’s the deal?

Central Park Hoodie
ANYWAY, the growing was an issue here. Thank god I properly blocked my swatch, so I knew the width would sort out (as each panel I knit originally looked child-sized. No lie, the ladies at my knitting group kept asking me if I was sure I was I knitting the right size haha), but length was an entirely different issue that I forgot. The sleeves, for example, should have blocked at 24″. Mine are 31″. I knit them to the correct size, I just didn’t account for them growing like teenage boys once they got in contact with water. Ugh.

Central Park Hoodie
I solved the sleeve problem by rolling back the cuffs. And look – sleeve cables! Whee! Oh, I knit the sleeves at the same time; partially because I wanted to try something new, and partially because they were boring as hell and I knew the second one would never get knit.

Central Park Hoodie
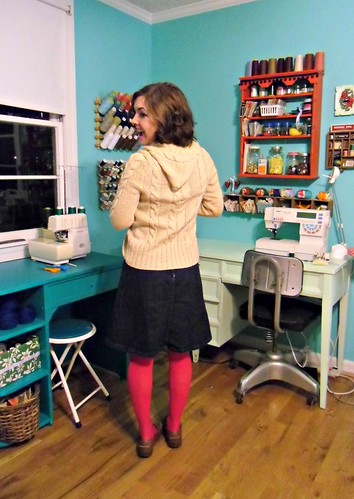
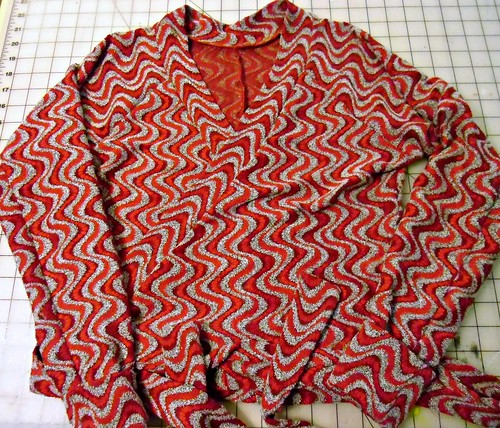
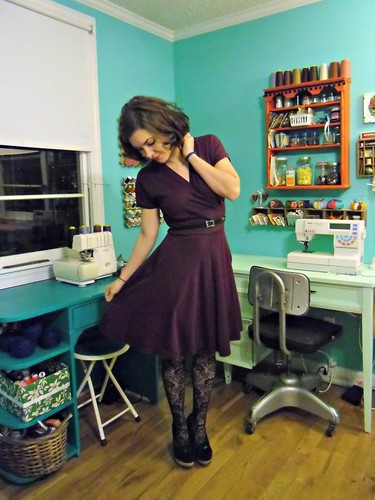
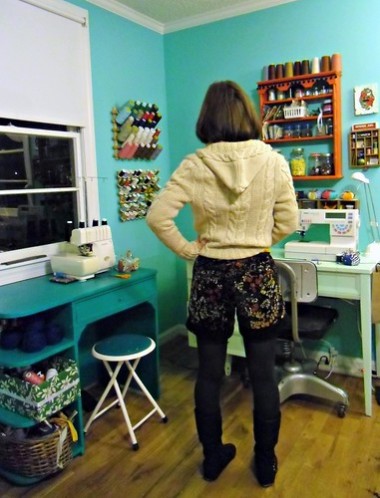
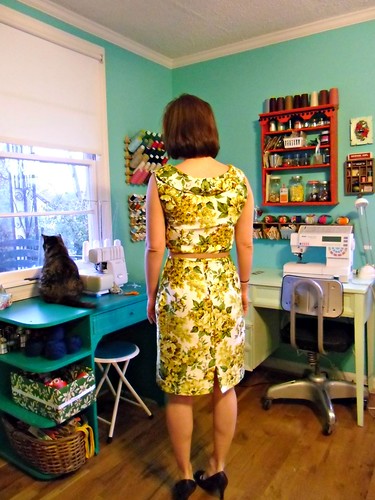
My other mistake (apart from the growing conundrum) was that I did not bind off the ribbing loosely enough. I tend to bind off very tightly – even using a larger needle doesn’t help much – so this is no surprise. But, oops, see how much longer the back is from the front? Even coaxing the fibers open with a blocking didn’t solve this issue. I ended up tacking down the bottom corners of the binding, to make the hemline look circular and what I hope appears intentional. Ha!

Central Park Hoodie
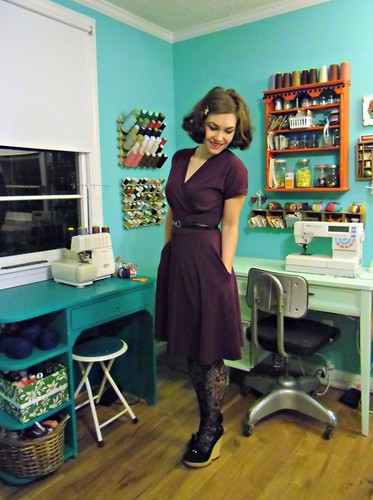
I mean, it’s sorta cute I guess.

Central Park Hoodie
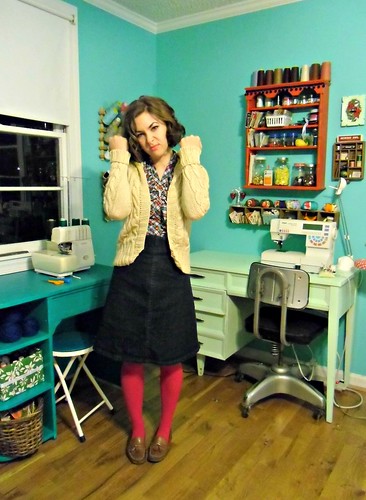
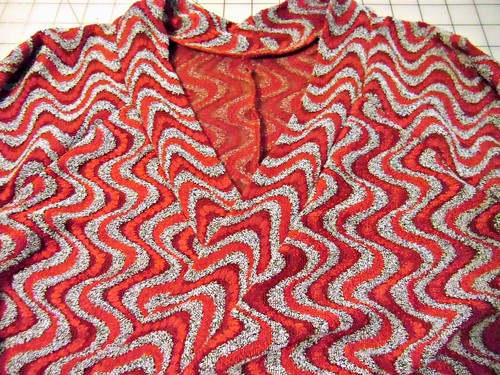
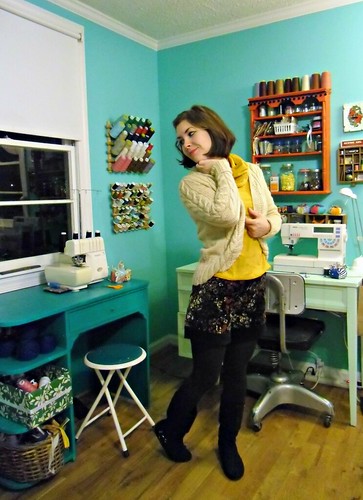
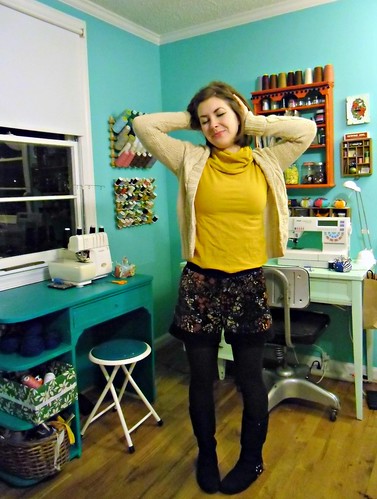
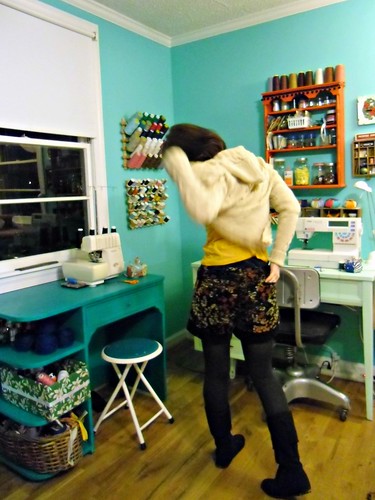
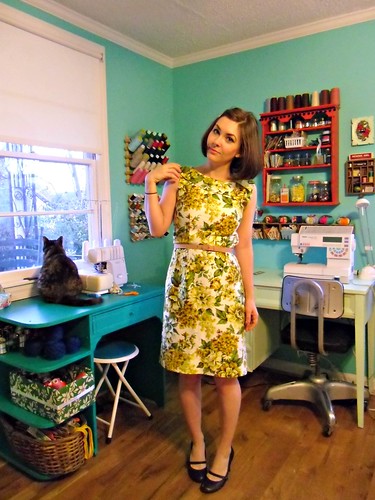
Due to the ulta-tight binding, the hood doesn’t exactly sit comfortably. As you can see, I am very unhappy about this. OH WELL.

Central Park Hoodie
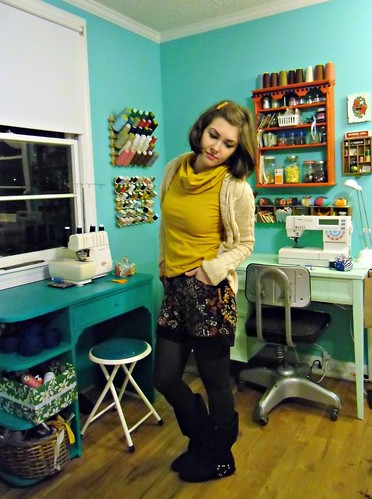
I would like to add (haha I just typed ass accidentally there, wtf) some closures to the button band. As much as I like the slouchy open look, I’m not an open cardigan kinda gal. I don’t know what to add, though! I think buttons are a no-go, since I can’t add buttonholes at this point (the stitching is very loose and open). I considered a zipper but I don’t think it will look right with the wide band. Snaps? Frogs? Toggles? What would you do?

Central Park Hoodie
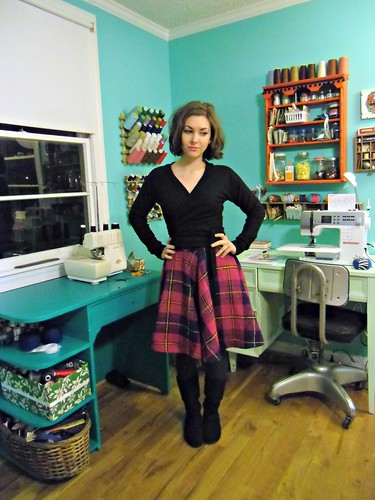
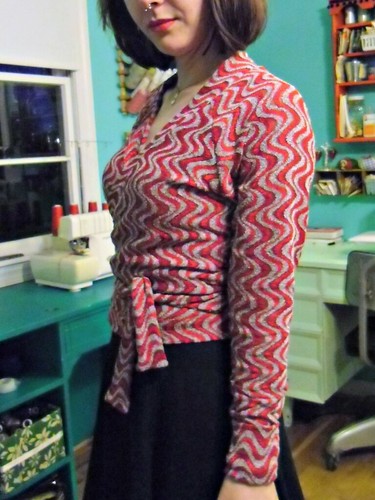
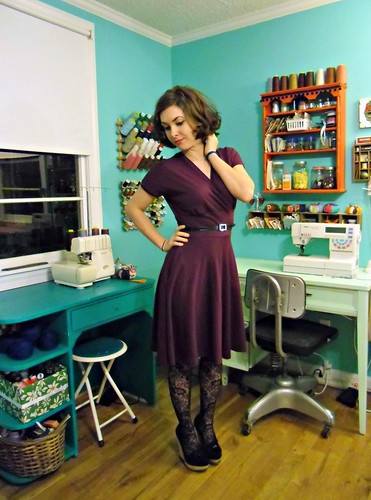
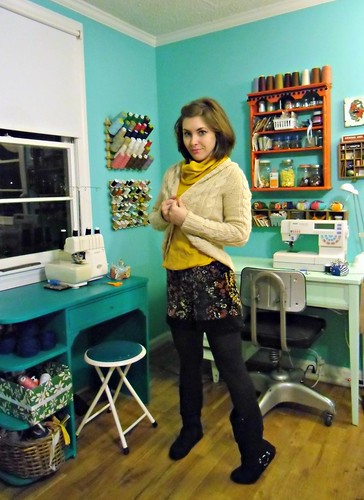
I pinned it closed for the pictures. I do like the way it looks when it’s closed!

Central Park Hoodie
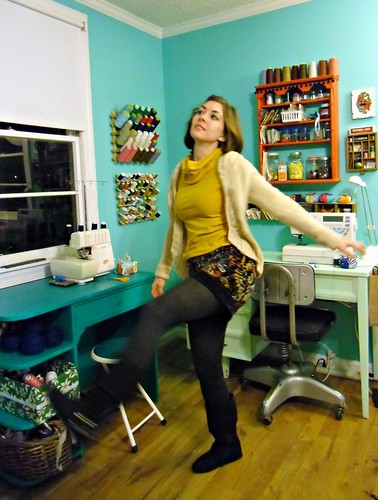
Overall, it’s a pretty cardigan. Not exactly what I had in mind, but I’m pleasantly surprised!

Central Park Hoodie
I’m just glad that it’s finally DONE and I can move on with my knitting life!

Central Park Hoodie
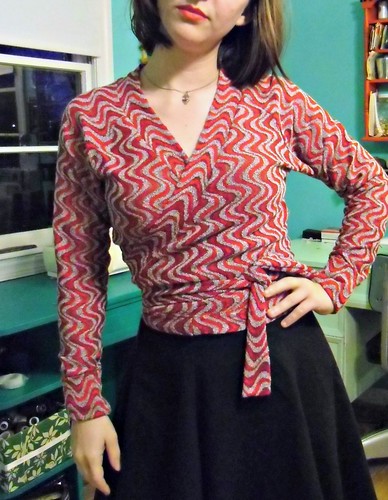
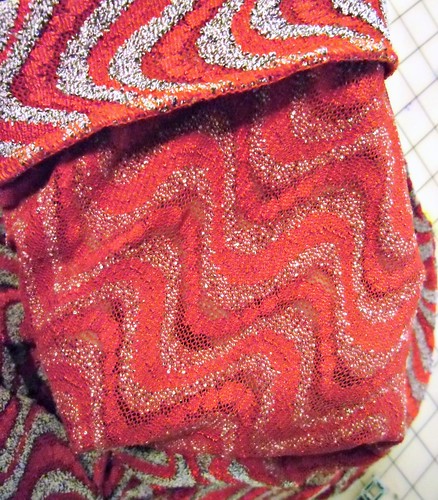
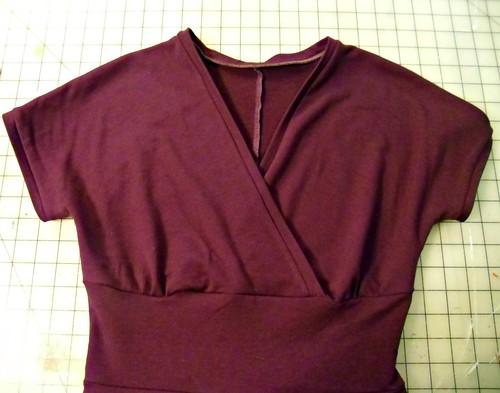
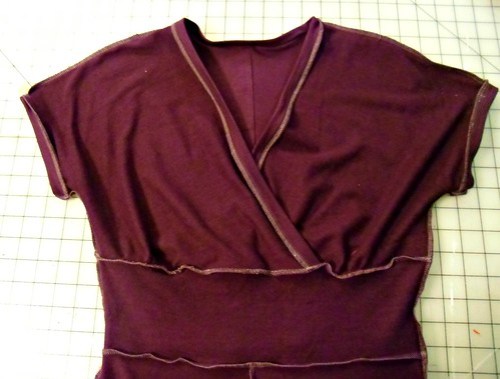
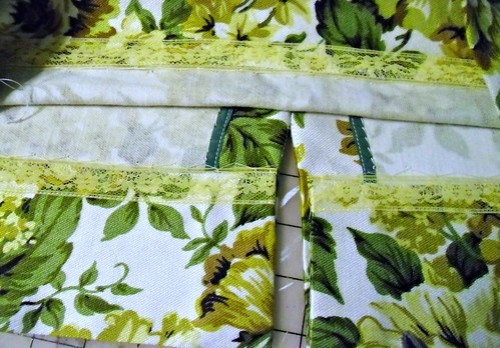
See how open the stitching is? Thank you, Ella Rae, for your shitty superwash yarn.

Central Park Hoodie
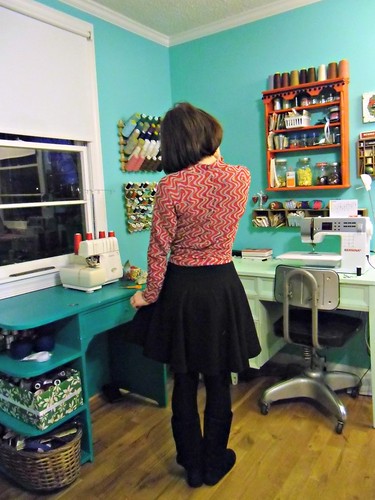
And here you can see my first attempts at seaming, to the right. It’s not perfect, but it’s not terribly bad either!

Central Park Hoodie
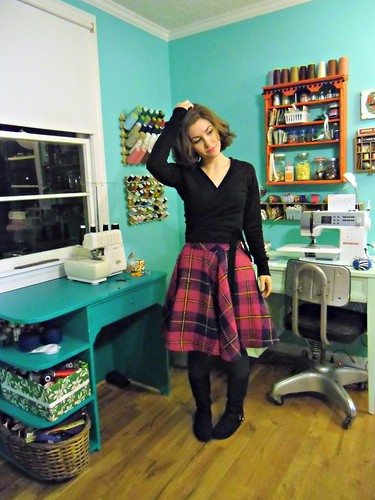
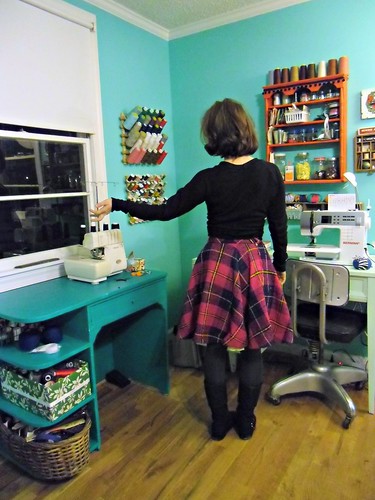
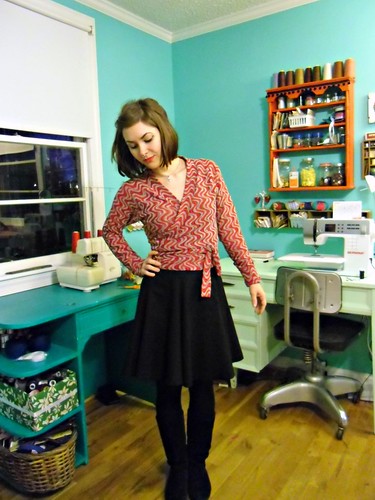
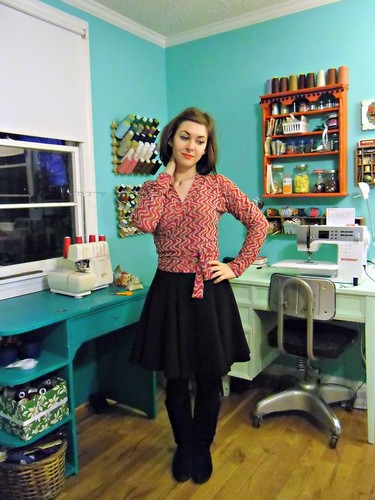
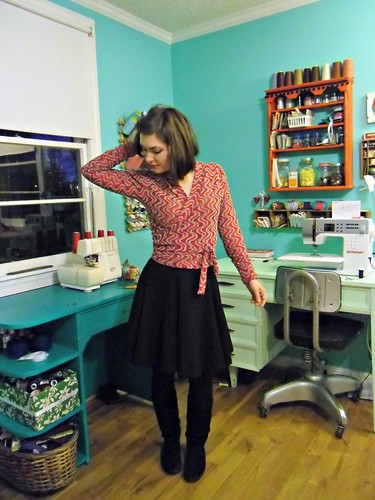
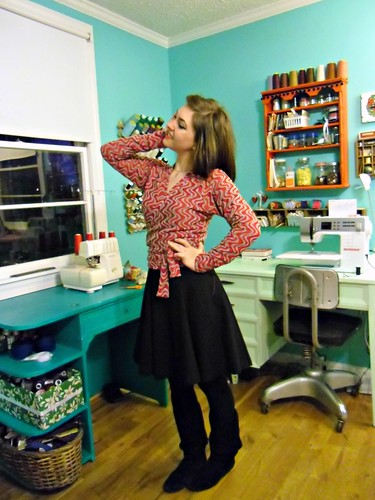
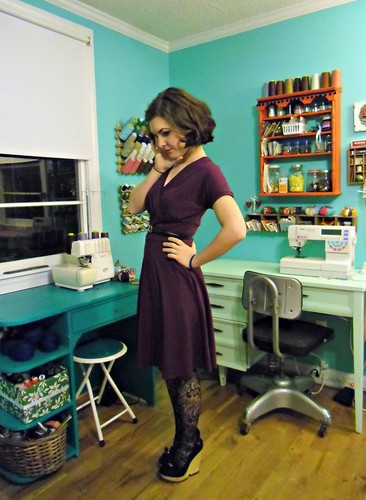
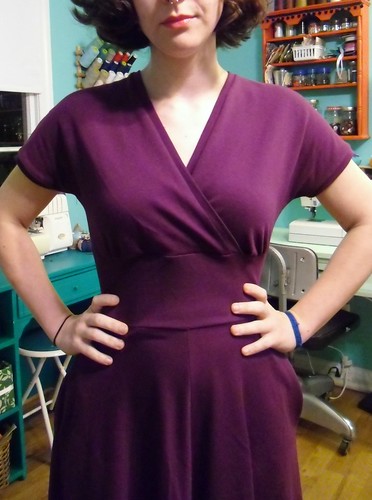
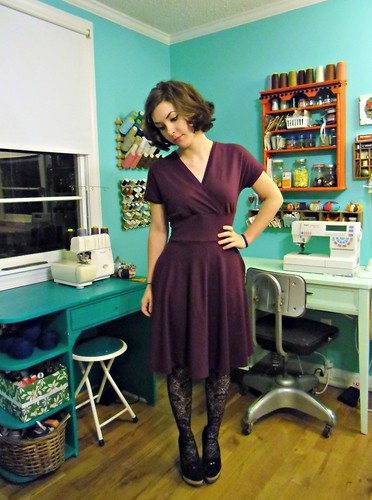
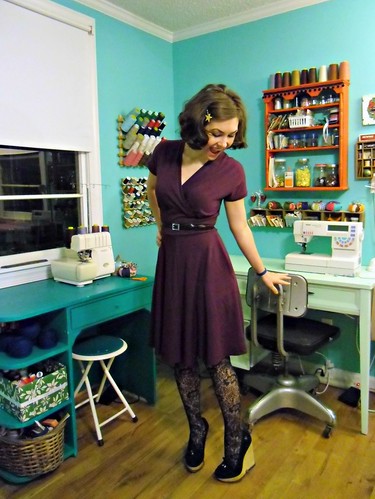
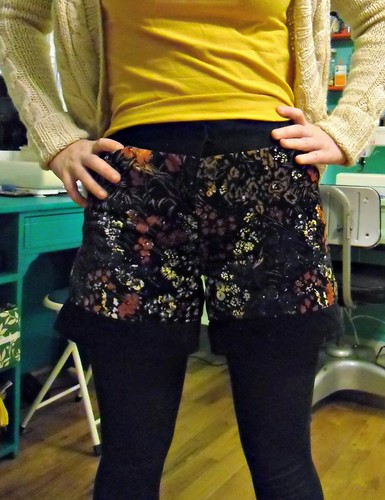
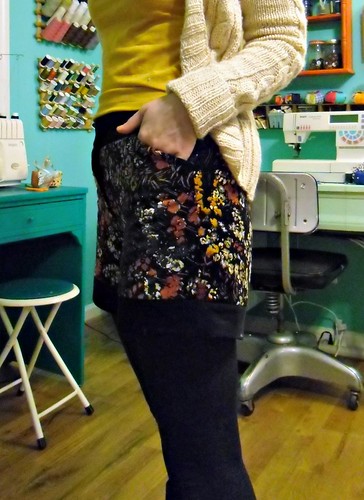
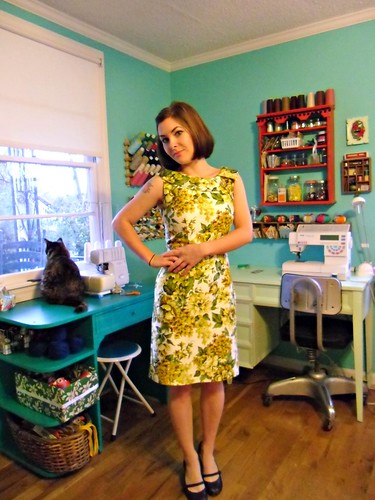
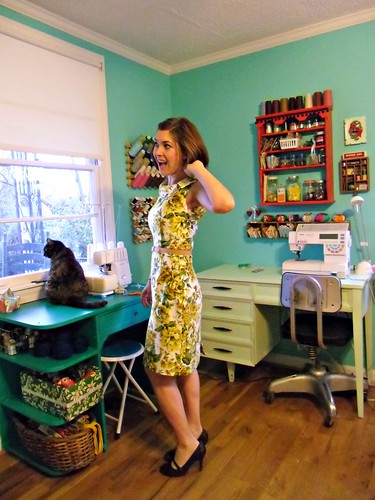
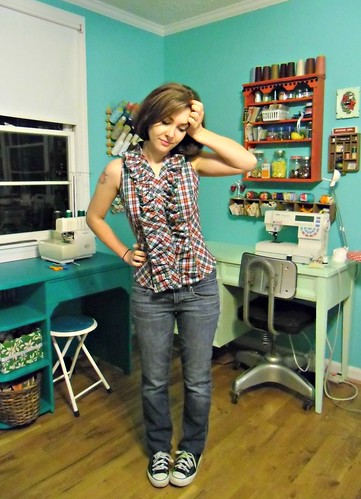
My whole outfit is handmade, btw! That’s my Plaid Clusterfuck top (see, it does look ace with a high-waisted skirt and a cardigan!) and my Denim Ginger (which is hands-down the me-made piece I wear the most – at least once a week!).

Ok, a couple more questions to wrap up an OBNOXIOUSLY long post!
My grandma asked me to knit her a scarf. Yay! She said she wanted something very simple, not too long and of an average width. And she wants it to be an actual scarf, not a cowl or anything like that.
Knitters: What stitch pattern would you suggest? Stockinette is sooo boring, and anyway, the yarn is acrylic (at her request), so I can’t block it into laying flat. I was thinking of a simple lace pattern or something with a lot of texture, like a seed stitch. Any suggestions? I know she said “simple,” but I’m also mostly certain that she said that because she thought anything more would be too much of a hassle. Which, as a knitter, I would rather be engaged and a little challenged!
Non-Knitters: If you asked for a simple scarf and were handed something with a little more design to it (like lace, ribbing, or texturized) – would you be totally butthurt that the person did not take your request into consideration? Or would you pleased to get something fancy and really only requested something simple because you didn’t want to be a bother?

Completed: The Plaid Clusterf-

29 Nov

The real name for this shirt is actually The Plaid Clusterfuck. I wanted to put it in the title of this post, but I realize that a lot of people have my blog linked so that the titles show on their blog and I don’t want to make anyone mad soooo YOU’RE WELCOME. Also, meet the Plaid Clusterfuck, as well as my unstyled hair. I like to call it my Brentwood Soccer Mom hair.

Plaid Clusterfuck
Princess seams, bias side panels, and a front ruffle? DON’T MIND IF I DO.

Oh, do you like my little sewing corner? I did some freshening up in the ol’ sewing room over Thanksgiving weekend. I got a second desk from Lauren Winter, painted it a really obnoxious shade of teal green (and I will never do that again. SOO many coats, even with a primer, and it’s STILL not solid! BOO), and also touched up the mint desk as it was filthy with dirty kitty paw prints. Next order of business is to deal with the other side, where my fabric is stored. Mama needs more shelves, wah!

Plaid Clusterfuck
This is McCall’s 5803, which is so out of print, it’s not even in the out of print section of the McCall’s website. Also, it is a Hilary Duff pattern. Remember when she tried to do that?! HAHA. Anyway, I picked this pattern up for free99 during the free out-of-print pattern sale at my local fabric store (actually, it was on the same day that I got that Butterick knit dress pattern. I love free shit, gah.). I thought the shirt was really sweet, in a kind of over-the-top way.

Plaid Clusterfuck
I tried a new FBA on this pattern, adding 1.5″ to the side front. I still don’t really get princess seams; I can never really figure out exactly where that seam is supposed to hit. But I think this one worked out ok.

The original pattern is cut in a size 4, with the aforementioned 1.5″ of bust room added. I also shaved the front seams down by about 5/8″, the back seams by 3/8″, and the side seams just under the arm by 1/4″. I still think the armscyes are a bit too high, but at least they aren’t stupid droopy like The Dress Who Shall Not Be Named. Oh, and I also lengthened the button placket by about 1/2″ and shortened the collar band by a LOT – it was way too long for the neck opening. I’m not sure if that’s because of a pattern error or because I cut that piece of the bias and it stretched when I was fusing the interfacing to it. Either way, it fits now, so whatev.

Plaid Clusterfuck
I had a devil of a time trying to match the plaid up at the princess seams. I futzed around with that shit for-fucking-ever – I’m the kind of plaid cutter who cuts everything on one layer, one painstaking piece at a time – and the lines STILL didn’t match up. UGH. So I ended up cutting the side front and side back panels on the bias, with the front and back on the straight grain. The neck band and button placket were also cut on the bias, as was the front ruffle. Hence why I am calling this shirt a Clusterfuck – it’s going in all kinds of directions! I’m actually surprised at how well it works, to be honest.

Plaid Clusterfuck
Here is my shame, though – THE SIDE SEAMS DON’T MATCH. ARGH!! I guess I forgot to flip the pieces so they were opposing (instead of mirroring). BLECH. And, of course, I didn’t have enough fabric to recut. Not that I would have anyway; by the time I discovered this little issue, I had already serged everything together. It’s not the worst thing ever, but it still drives me nuts. Oh well, I guess we can’t always have perfectly matched plaids 😥

Plaid Clusterfuck
Let’s keep this our Sacred Secret, k?

Plaid Clusterfuck
I just love these front ruffles! FESTIVE.

Plaid Clusterfuck
I don’t know why there are basically two of the same picture. Sorry.

Plaid Clusterfuck
Here’s a better picture of those mismatched plaids. FUCK.

CIMG0063Plaid Clusterfuck
This shirt ending up costing VERY little to put together. The fabric was part of a big lot I picked up from a fellow blogger, the buttons came from the flea market last week (2 cards for $1!), and even the pattern was free. Not bad!

CIMG00Plaid Clusterfuck64
I topstitched the placket and collar band because I think it makes the shirt look more profesh. Also, I totally love these buttons.

Plaid Clusterfuck
This was not intentional, but look at how nicely the plaid matches up at the button plackets.

Plaid Clusterfuck
The ruffles are finished with a rolled hem edge (done on my serger), instead of the suggested turning under and stitching.

CIMG0050Plaid Clusterfuck

As a side note, I’ve been watching my stats for the past few days and I’m like 50 hits away from reaching half a million! HALF A MIL, Y’ALL. OHMEGERD.