
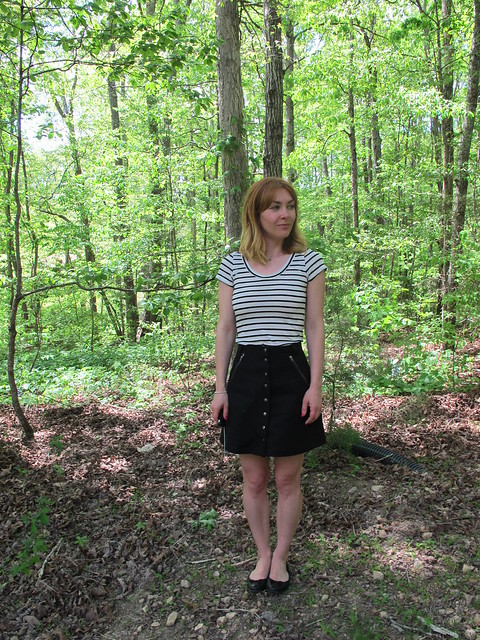
I’m really behind on posting my projects – I finished this skirt almost two months ago, LOL WHOOPS. To add insult, I took these photos around that time as well – and have since changed my hair color :3 (spoiler: it’s still red). But these will do for now! Let’s just appreciate Past Lauren in this post, yeah?

Another Rosarí skirt! How predictable of me. What can I say – when I like a pattern, I like it enough to make it over and over and over until everyone gets sick of it (everyone except meeeee, that is). This is my second version (you can see my first version in mustard corduroy here), and I’ll just go ahead and admit that there is a third version that’s currently waiting to be posted. Don’t look at me like that. I wanted to try all the views offered in the pattern. ha!
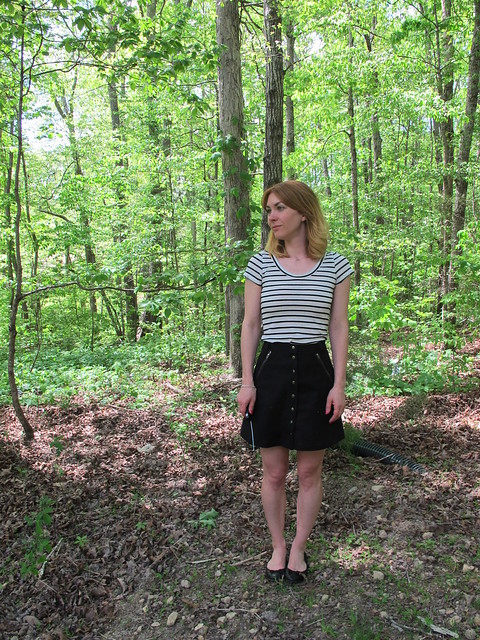
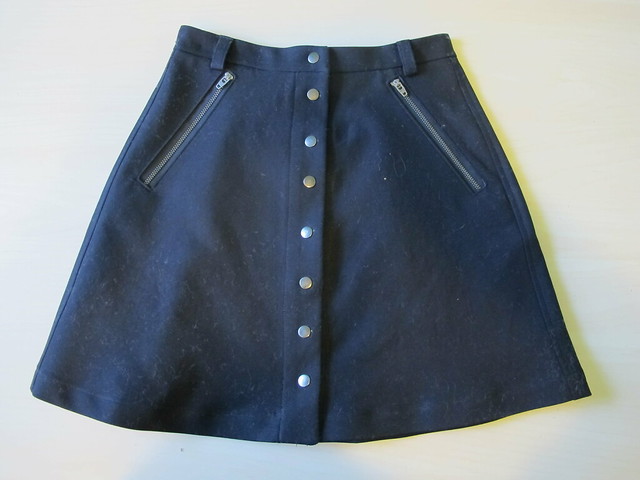
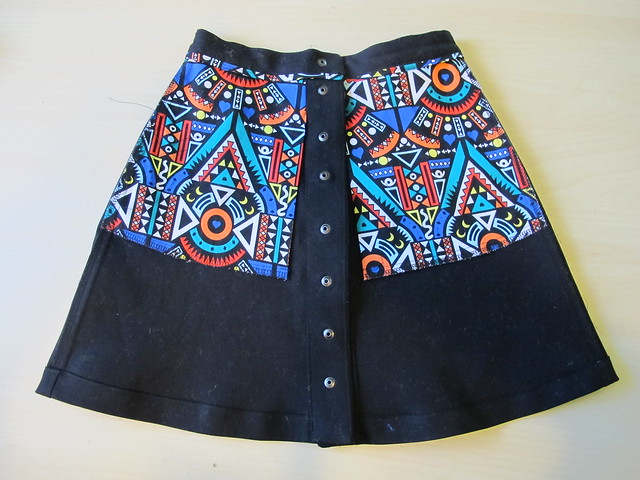
This version is the same size as my previous – 34 – with the D pockets. I am not normally drawn to things like pockets with exposed zippers, but I saw a really cool version during my daily Instagram lurking and that shit immediately moved to the top of my sewing queue. Made in black fabric (which, honestly, a black summer-weight skirt is missing from my wardrobe. Well, not anymore!) with matching snaps down the front, it kind of has a cool rocker vibe… as long as you don’t look at the person wearing it :B

I found the fabric while I was in NYC at Mood Fabrics. It is a bottom weight black cotton twill with a really generous stretch. I actually bought a lot of twill while I was there because I’ve found that I don’t like ordering stretch fabrics (for bottoms, anyway) online. I find it really unpredictable in terms with what I end up receiving (I like my pants fabric to have a LOT of stretch), and nine times out of ten I can’t be arsed to wait on a swatch and/or that shit sells out way too fast. My new strategy is to wait until I get into the Garment District (which at this point has morphed into twice a year, yay) and then just stock up my suitcases. And then fly Southwest cos, 2 free checked bags woohoo.
ANYWAY, I am all about this stretch twill! It’s nice and heavy and it has enough stretch so that the skirt can be fitted but still super comfortable. The only downside is that is shows cat hair REAL fucking bad. I think that tends to be the case with all black fabrics, but this one seems to have a special cat hair magnet. I am not the kind of person who stresses over lint and cat hair, but I actually bought a lint remover specifically for this skirt. It is that bad. And, yet, there is still fuzz all over the skirt in these photos. Oh well.
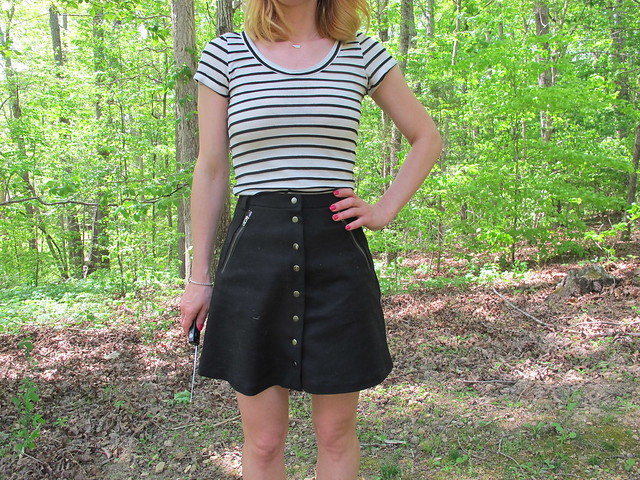
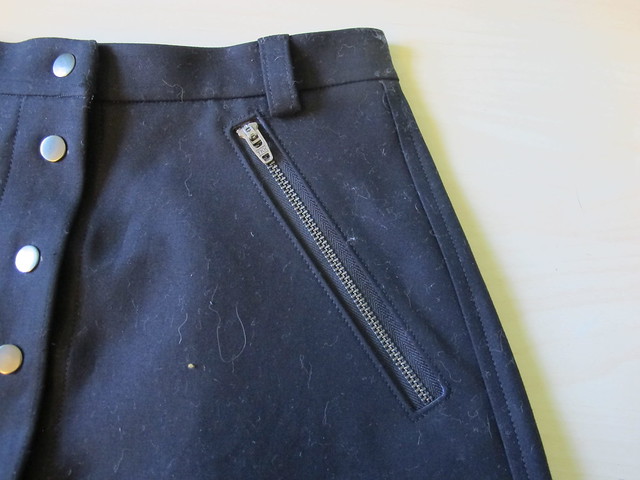
I kept the style of the skirt fairly simple because I wanted the focus to be on those pockets! The zippers are from Sil Thread in NYC, which is my favorite place to buy zippers… they cost around $1 each (more or less, depending on length) and come in a nice range of colors and metal finishes. They didn’t have quite the right length, so I just shortened them at the bottom (basically catching the zipper teeth in my topstitching and *then* cutting the excess of). Even with shortening the zipper, doing that exposed zipper pocket thing was super easy. The pocketing is used to make a facing for the cutout, and then you just slap in the zipper and topstitch it down.
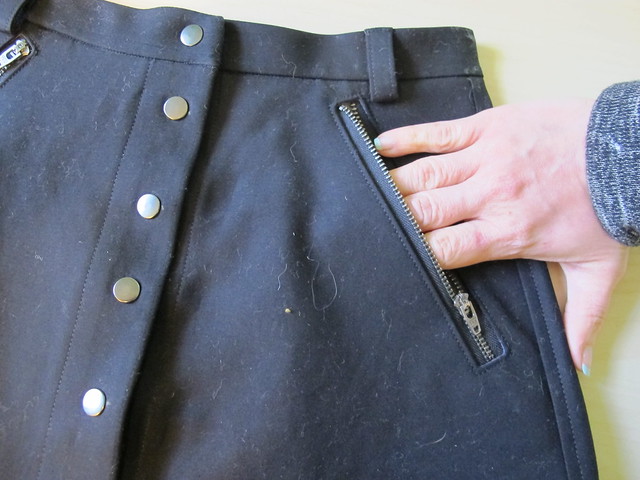
Same as with my corduroy version, I used a professional snap setter (courtesy of Elizabeth Suzann studios) to set the snaps down the center front. I’ve used the Dritz kits before (both the hand held one that looks like a hold punch and also the little metal thing you use with a hammer) and they work ok for what they are. That being said, I have access to one of those honkin’ big cast iron ones that they use in factories, so obviously I am gonna take advantage of that haha.
The only downside to these big industrial snap setters is that they mean BUSINESS. As in, you better be real sure of your placement because that shit ain’t going nowhere once it’s set. My coworkers warned me of this, and I smugly went ahead and set the first snap at the waistband… upside down. Whoops. Thankfully, I was able to pry it out with the help of a flathead screwdriver and seam ripper, but believe me when I say that I was really sweating for a minute there.
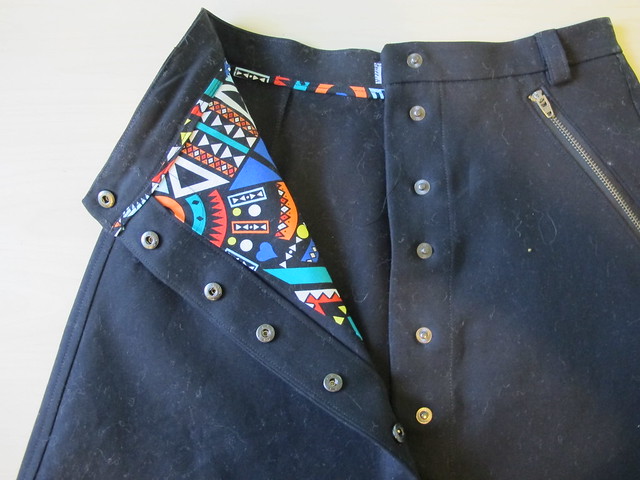
Oh hey, I didn’t even show y’all the cool POCKET LINING!
This lil’ piece of awesome is also from Mood Fabrics – you can find it here. It’s labeled a stretch twill, so I bought a yard of it last year to make some cRaZy shorts. Unfortunately, I wasn’t thrilled with the weight (it’s a bit on the light side) and the fact that it was printed off grain and thus hard to match the print. I gave up and stashed it, and have only now found a use for it. It makes REALLY FUN pocket lining! And since it’s stretch, it stretches with the outer fabric. I thought I would be real clever and sew it wrong side facing out, so that the inside of my skirt looked super fun. The only downside is that now the inside of my pockets don’t look super fun… they’re just kind of, fabric wrong side white. Oh well. It’s not like I walk around with my pocket zippers flapping open.
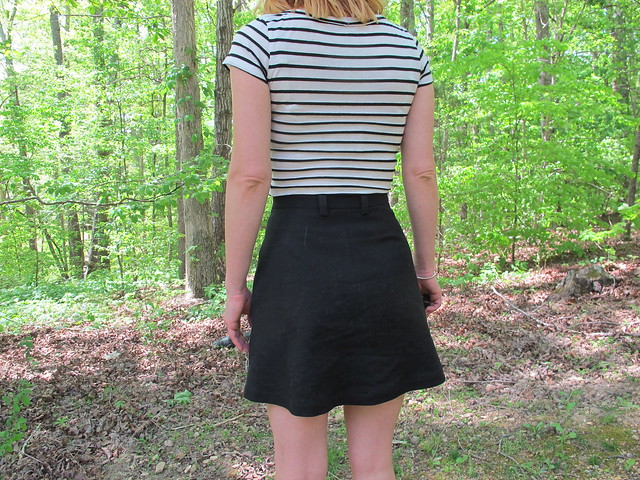
If you can see in the picture, I also used the same fabric to make a bound edge for the waistband facing. I really love the way that looks, and it’s so much easier than trying to fold up the seam allowance of the facing and get everything all even when you topstitch it down.
I guess that’s about all the Rosarí chat I have in me today! How about those zippered pockets, tho? 😉


Lately I find I am even more interested in seeing what the inside of garments look like, as I am working on making mine look better. So this skirt is fabulous! I will have to try binding that waist seam–what a great idea!
I think making the inside look good is almost as fun as making the outside look good. Plus it’s like a little surprise when you’re getting dressed 😀 haha!
I really want this pattern! I’m surprised it seems like no one carries it in the US. Why?! I have to order it from Spain?? Sigh.
Anyway, it looks great!
No idea! I got mine in a PDF format, so no shipping costs 😛 haha
SO cute!!! Love those zipper pockets 🙂
Thank you!
Super cute shape! Love the snaps on that skirt as well. May I suggest trying duct tape for the cat hair? Just press lightly on the fabric and whisk away repeatedly. Works well for me!
I’ve used duct tape before, but honestly, I hate how wasteful it is! I don’t like throwing anything away if I can help it haha. The lint remover I have now is one of those cloth ones that you have to clean, and it does a pretty decent job 🙂
I use a barely damp washcloth to swipe off cat hair. Works for me!
I laughed reading your description of the snap setter! I have the one by Dritz but I haven’t actually done snaps yet and I’m nervous as heck to do it because of course everything is DONE by the time you get to them so I just chicken out and do buttons BUT I love snaps so much. Beautiful skirt! I too admire your inside finishes. It just makes you feel so proud and smug when you are putting it on or taking it off!
Oh, those Dritz ones are real easy to pull out if you set them in wrong hahaha. The only thing you have to deal with is the hole is leaves behind, but that can be patched with interfacing and some zigzag stitches hahaha. Don’t be scared of it!
Super neat skirt ! I have to ask, are all your snaps the same color, because in the pictures it looks like they alternate between silver and gold. Which would be neat, but I couldn’t tell what color they were !
Haha yeah, they are all the same color – kind of a gunmetal grey. They just look different because of the light 🙂
I also love this kind of insides, do you have any suggestions on a good tutorial?
You mean for the binding on the waistband facing? It’s the same concept as doing a bound seam (here’s my tutorial for that), and then you sew the waistband as normal without folding the seam allowances to the inside.
Yes, those pockets are indeed beauts. I love your little skirt. It’s ok it’s the same skirt – the fabric makes it look different. Beautiful!
Thank you! I love a good pattern that looks different with changing fabric choices 😀
Cute skirt! I’m not normally a fan of exposed zips, but I like it here where it’s just a little bit of interest on a relatively plain black skirt. Seriously jealous of your snap setter! I have the one from Snap Source, which is great, but I do dream of the big cast iron one that is surely less fussy and faster. 😉
I wish I had the cast iron one too! I guess just having access to use it is good enough for now 😉
Hello, M’Dear – lovely job on your Rosari skirt! Would you mind showing us how you attach the bound edge for the waistline facing? This little touch eludes me . . . . Cheers, Jen
You bind the edge of the waistband facing the exact same way you’d bind the edge for a bound seam (I wrote a tutorial on how to do bound seams – it’s linked in the comments on this post). Then you finish the waistband as normal, except you don’t need to fold the seam allowance of the facing under since the edge is bound 🙂
Your skirt guts are amazing! They just make me smile. This skirt really highlights what I like about sewing, the details. Your details are perfect!
Thank you, Carolyn! I too love the details of sewing, I think it’s one of my favorite parts! 🙂
I love this! Do you have any more info about the pro snap setter? I would like to upgrade from my Dritz (whose idea was it to hit a piece of plastic with a hammer? ugh). I’d love to hear more about what the pros use, or how close I can get at home.
I wish I could give you more info, but honestly I have no idea haha. Elizabeth bought the snap setter, and I just use it cos it’s there 🙂 I’m not even sure where she bought it from or the brand, just that it’s huge and heavy!
Super neat skirt
Thank you!
Skirt is great , perfect proportion for you , great post , very funny describing the snaps application ! I have an cast iron press for eyelets which is worse as it cuts a hole ! You can get the dies for all snaps , they are pricey but worth it if you do a lot . Great use of the fun print – more please
Thank you!! You’ll see at least one more of these skirts soon 😀
Looking forward to it 🙂
I have been looking at this pattern for ages and now I think it’s time to buy. You have inspired me once again to just go for it.
Woohoo!! :DDD
Snazzy! Love the zippers and lining. I’ve actually taken to putting up a baby gate to the sewing room to keep the dogs out due to fur. Course, that won’t work with a cat since they will just up-and-over…unless yours is like my mom’s and weighs 19 pounds. That cat hasn’t been off the ground in years. 😉
LOVE! Nice job girl! I especially like the bound edge on the facing and would like to start doing that on all my skirts and pants. I’m sure it’s easy but can you outline the steps?
You are so awesome!!!! I love your skirt so bad, cat fur & all 😛 Wish I could learn to sew like you–someday!!! ❤ ❤ ❤
Nice job on your skirt, I love how you added the contrasting lining. I love it when garments have pretty guts 😉
I’ve been meaning to make about a million of these since I finished my first one (which I haven’t got around to blogging yet either!) so I don’t blame you for making multiple. Those zips are gorgeous! Bet you get loads of wear out of this one
Reblogged this on By the Mighty Mumford and commented:
VERY NICELY DONE…IS THE LINING REVERSIBLE? LOVE THE SCENERY!